
Setup Gmail
This guide describes how to connect Gmail with Confluence Server/Data Center.
Google requires users to authenticate using OAuth2. Unfortunately, in order to use OAuth2 with mailto.wiki and Gmail, you will need to register your own OAuth2 client in the Google Developer Console. This guide will walk you through the process, which should take approximately 15 minutes.
To follow this guide, you will need administrative rights. If you are not a Confluence Administrator, you will need to ask a Confluence admin in your organization to perform the steps on your behalf.
Step 1 – Go to the configuration page
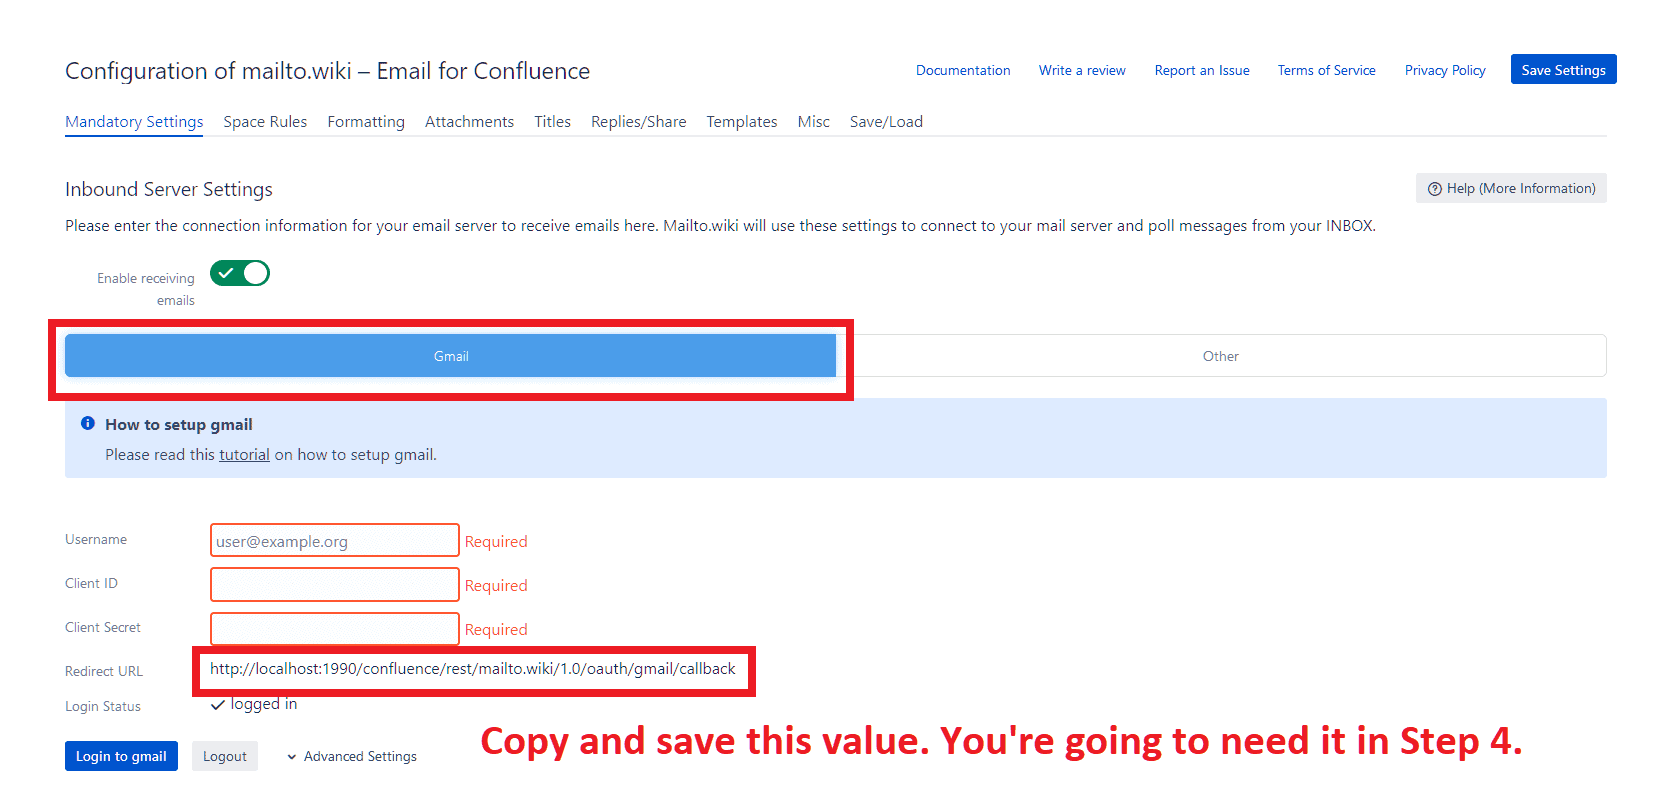
If you are not already on the configuration page of mailto.wiki, please navigate to the configuration page (refer to the Getting Started section for instructions).
On the Inbound Server Settings or Outbound Server Settings section, click on Gmail. Copy and save the “Redirect URL”. You will need this value later in Step 4 when you create your OAuth2 client.
Step 2 – Create a new project in the Google Cloud console
Since Gmail only supports authentication with OAuth2, you need to register your own OAuth2 client to use mailto.wiki with Gmail.
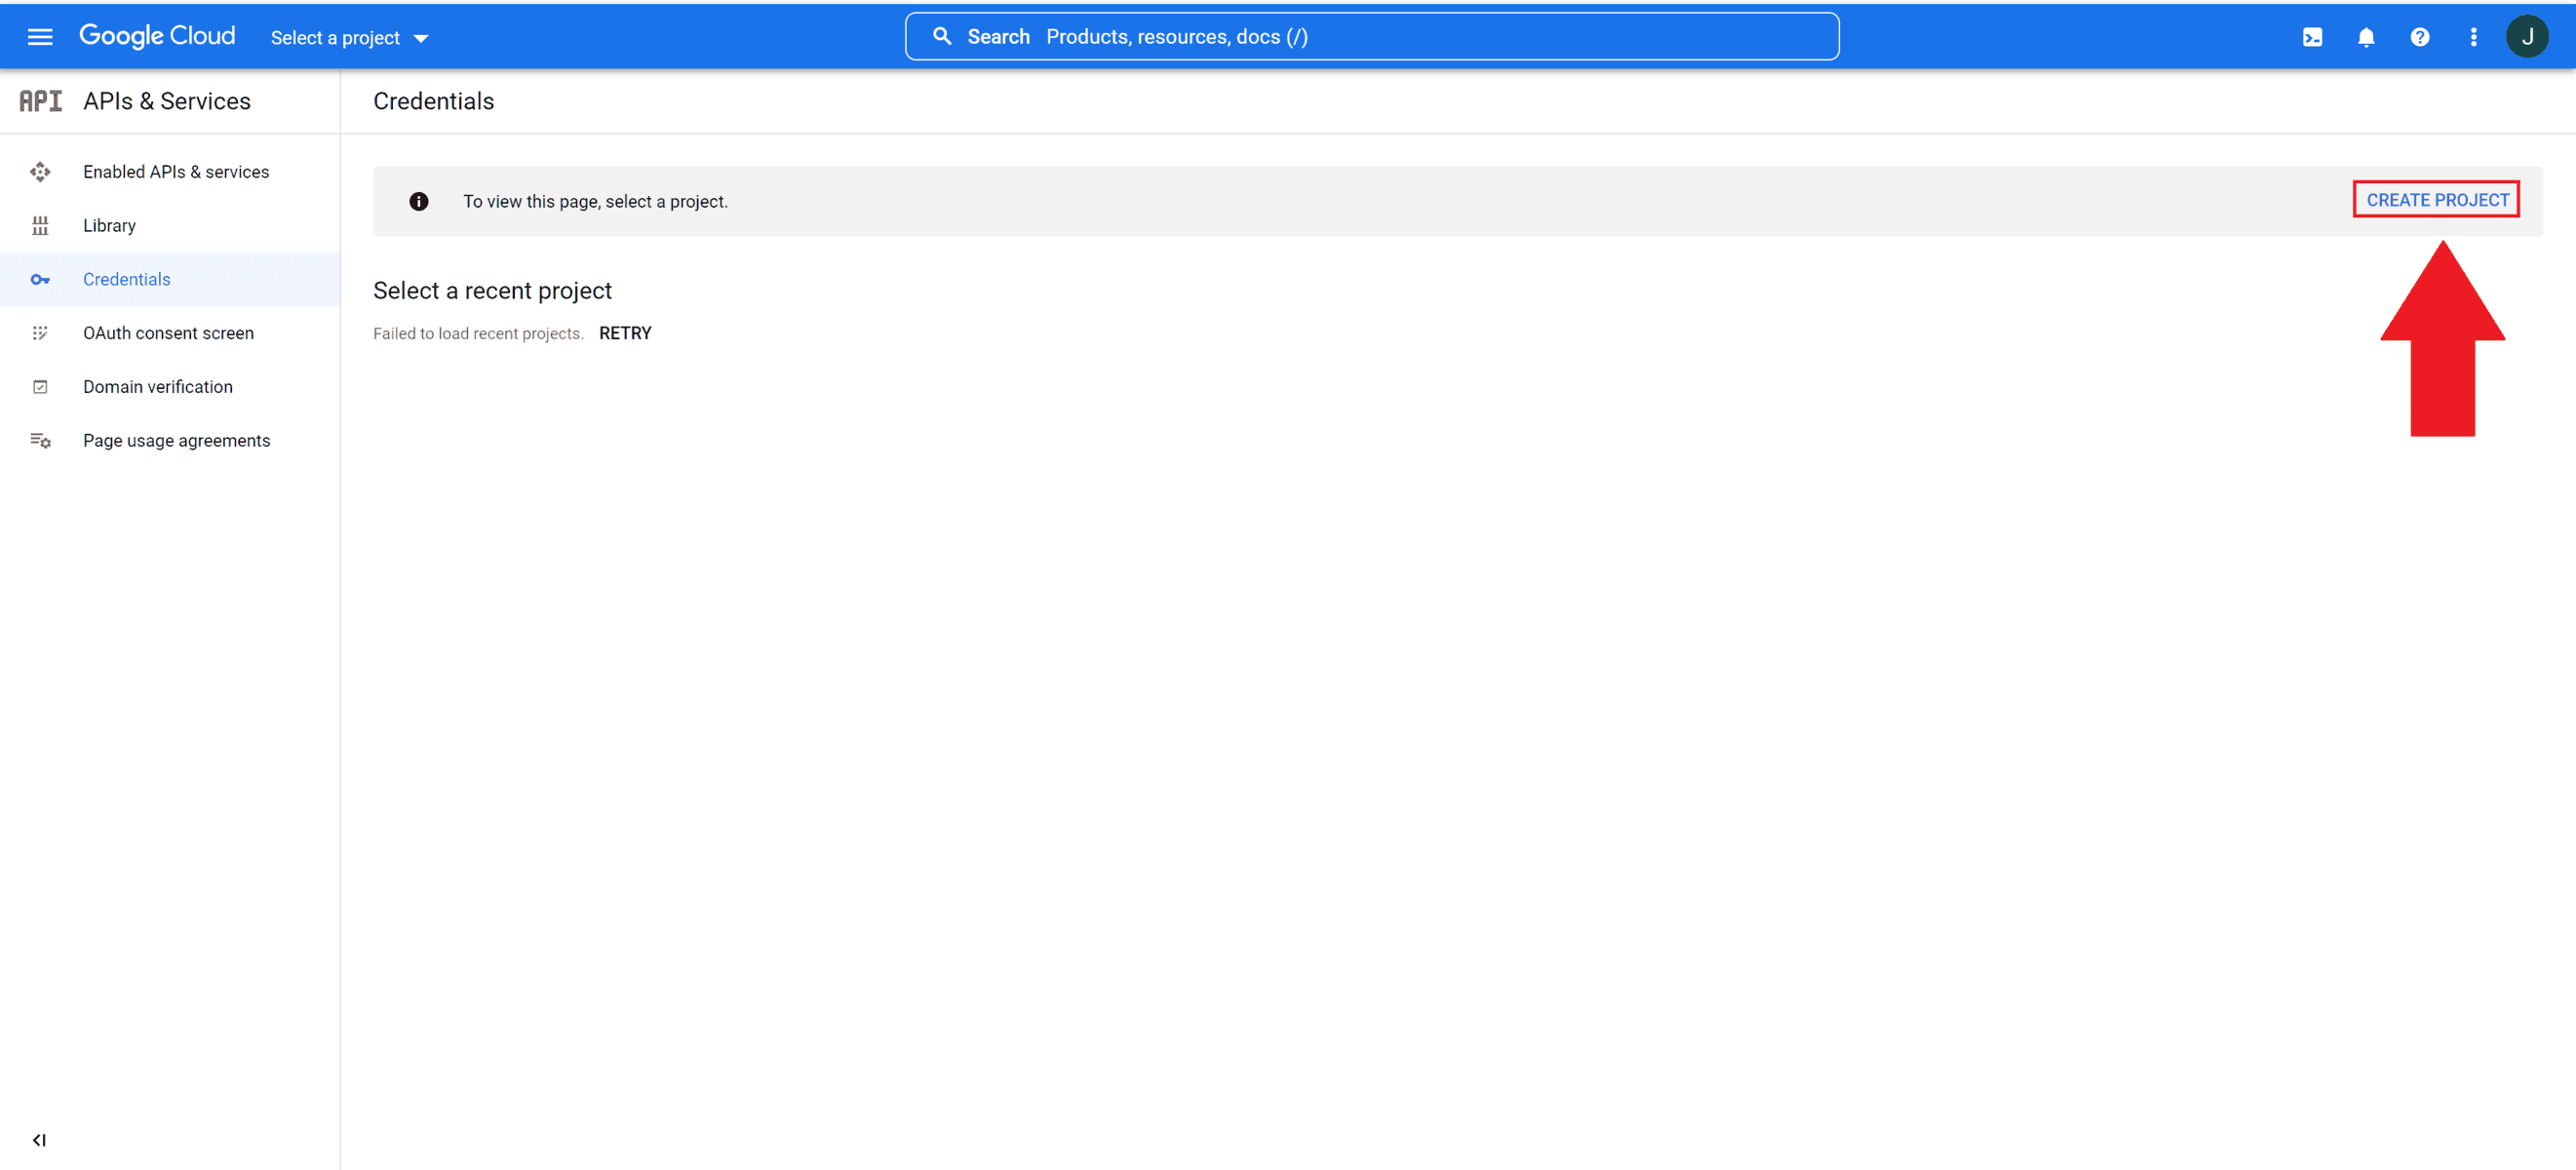
Begin by navigating to the Google API Console Credentials page. You will need to log in using a Google account. You can use the same account that you intend to use with mailto.wiki, but it is not mandatory. Only trusted users should have access to this Google account.
Once logged in, you will be directed to the Credentials screen. If you haven’t used the Google API Console before, this screen will be empty. Click on the “CREATE PROJECT” button to initiate the creation of a new project:
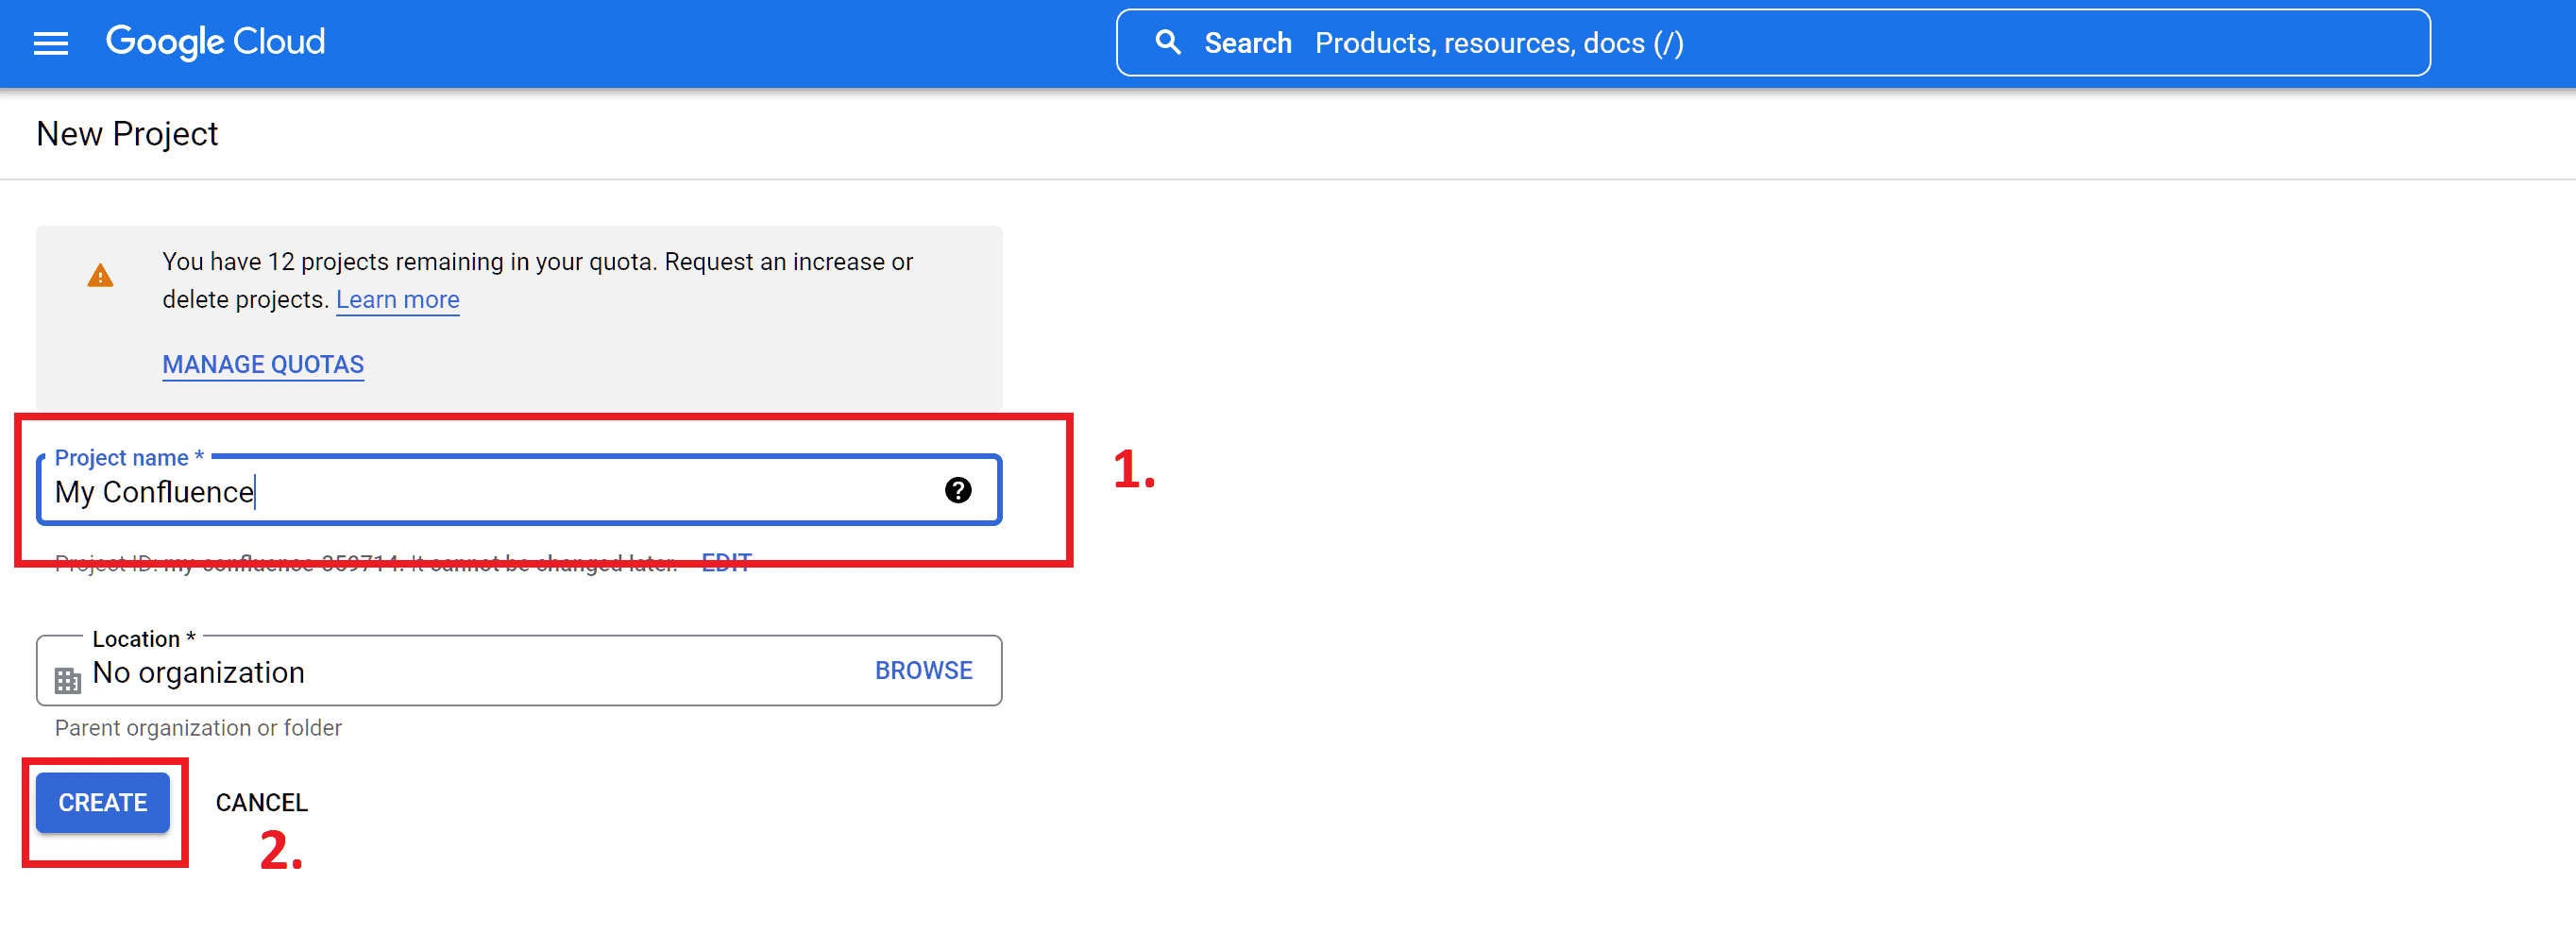
Give your project a meaningful name and then click on the “CREATE” button:
After your project has been created, you will be redirected back to the Credentials screen.
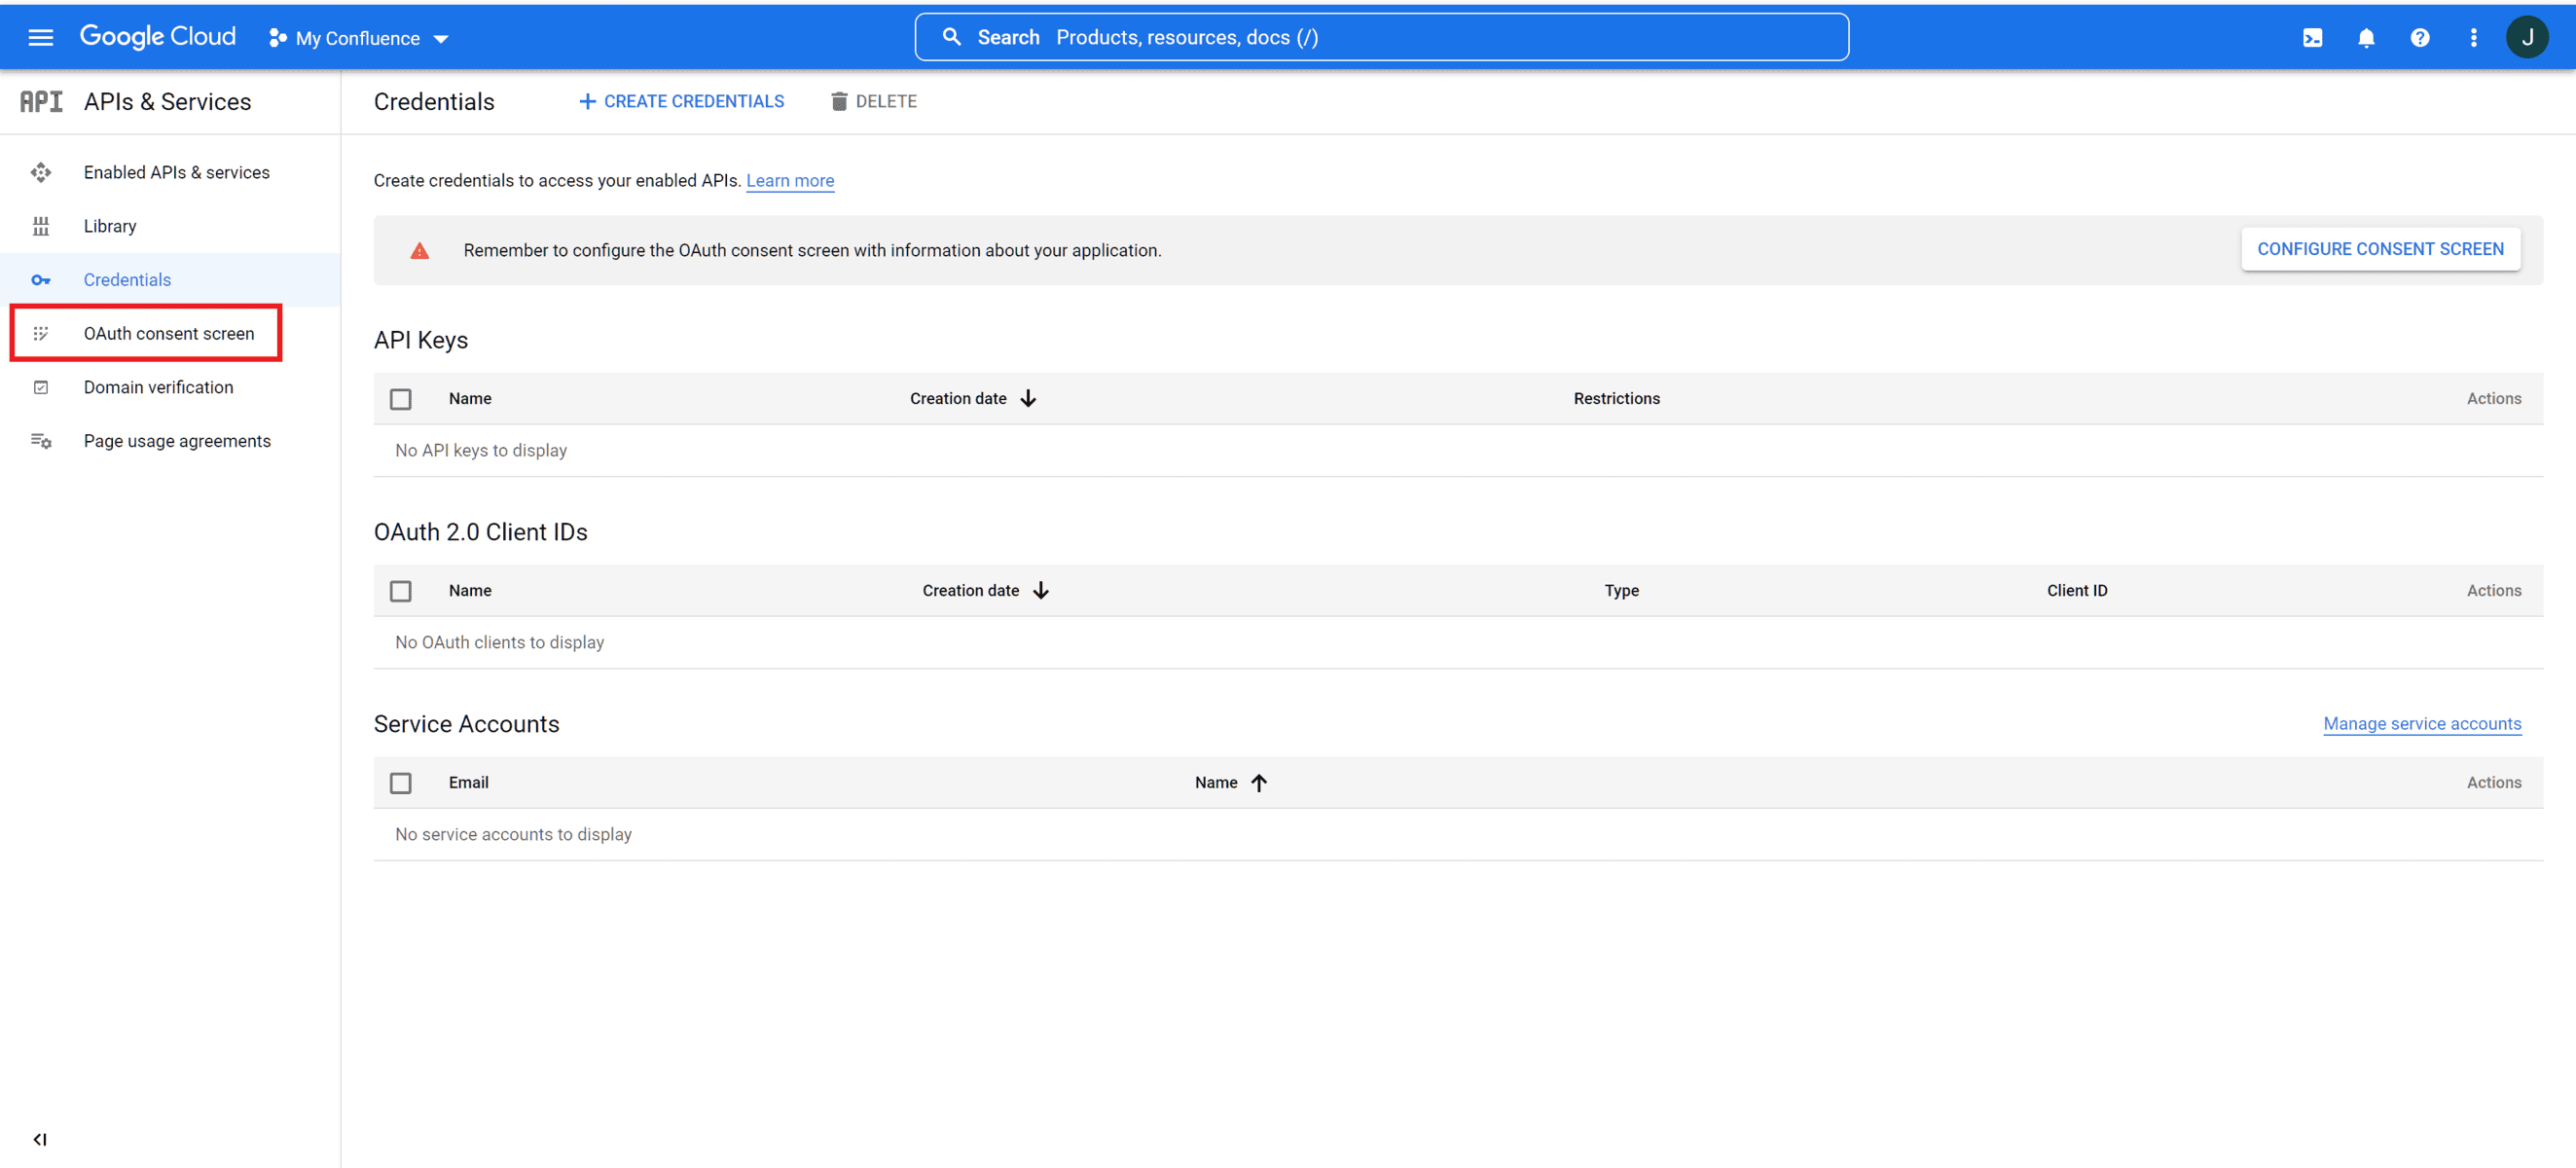
Step 3 – Configure the consent screen
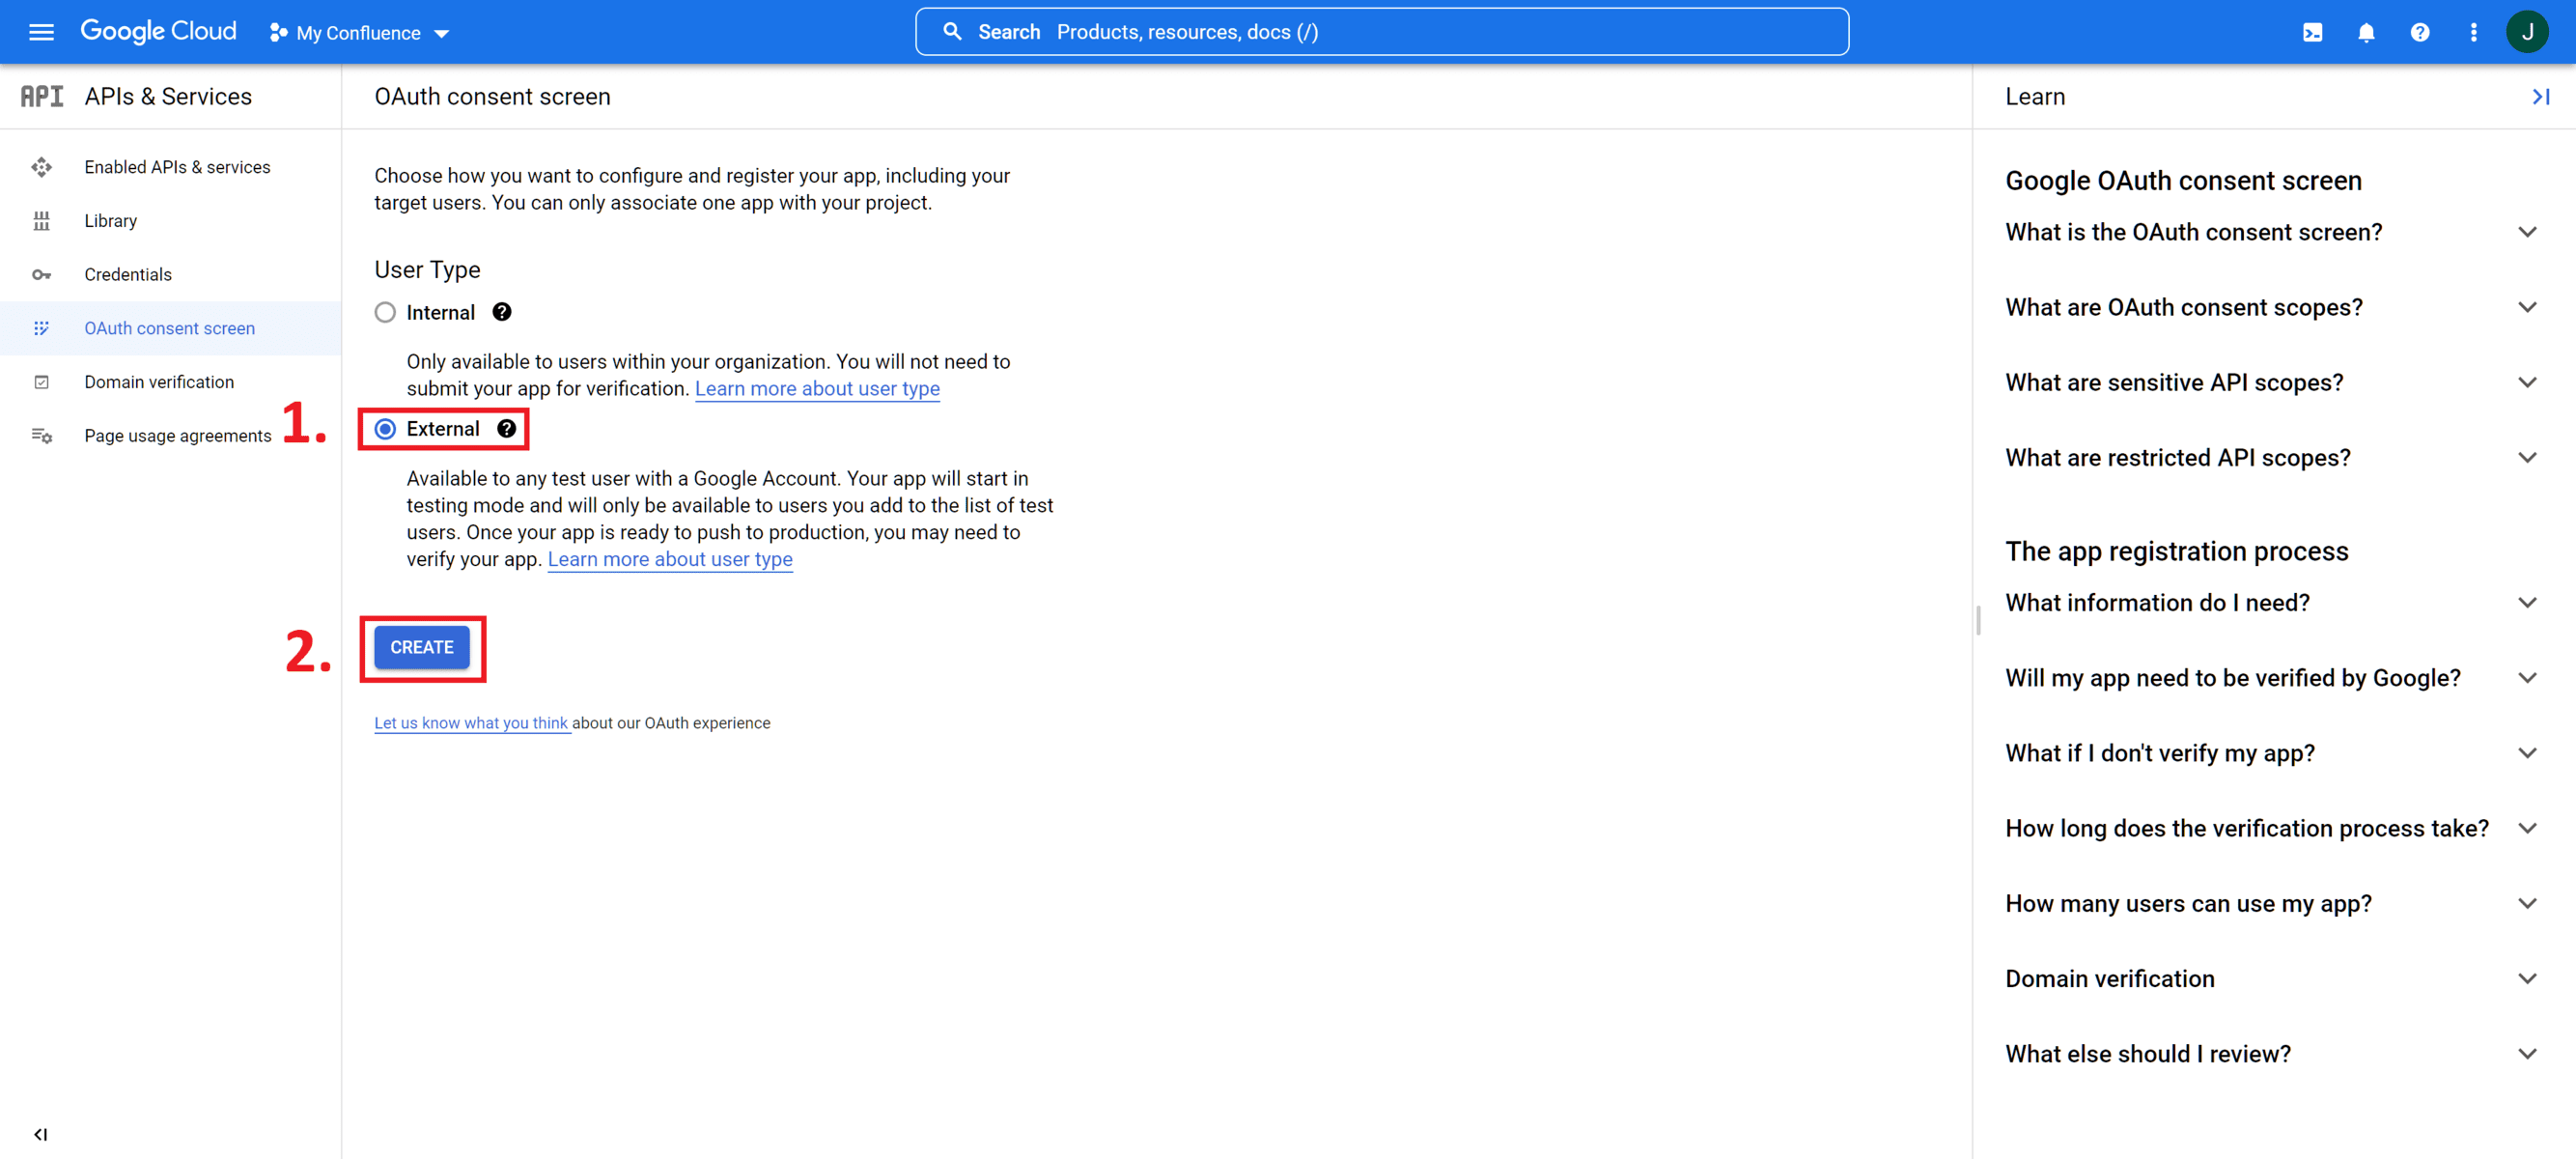
The next step is to configure the consent screen. To do this, select “OAuth consent screen” from the left menu:
In the configuration dialog for the OAuth consent screen, select “External” and then click on the “Create” button:
On the next screen fill out all required fields and then click on the “SAVE AND CONTINUE” button:

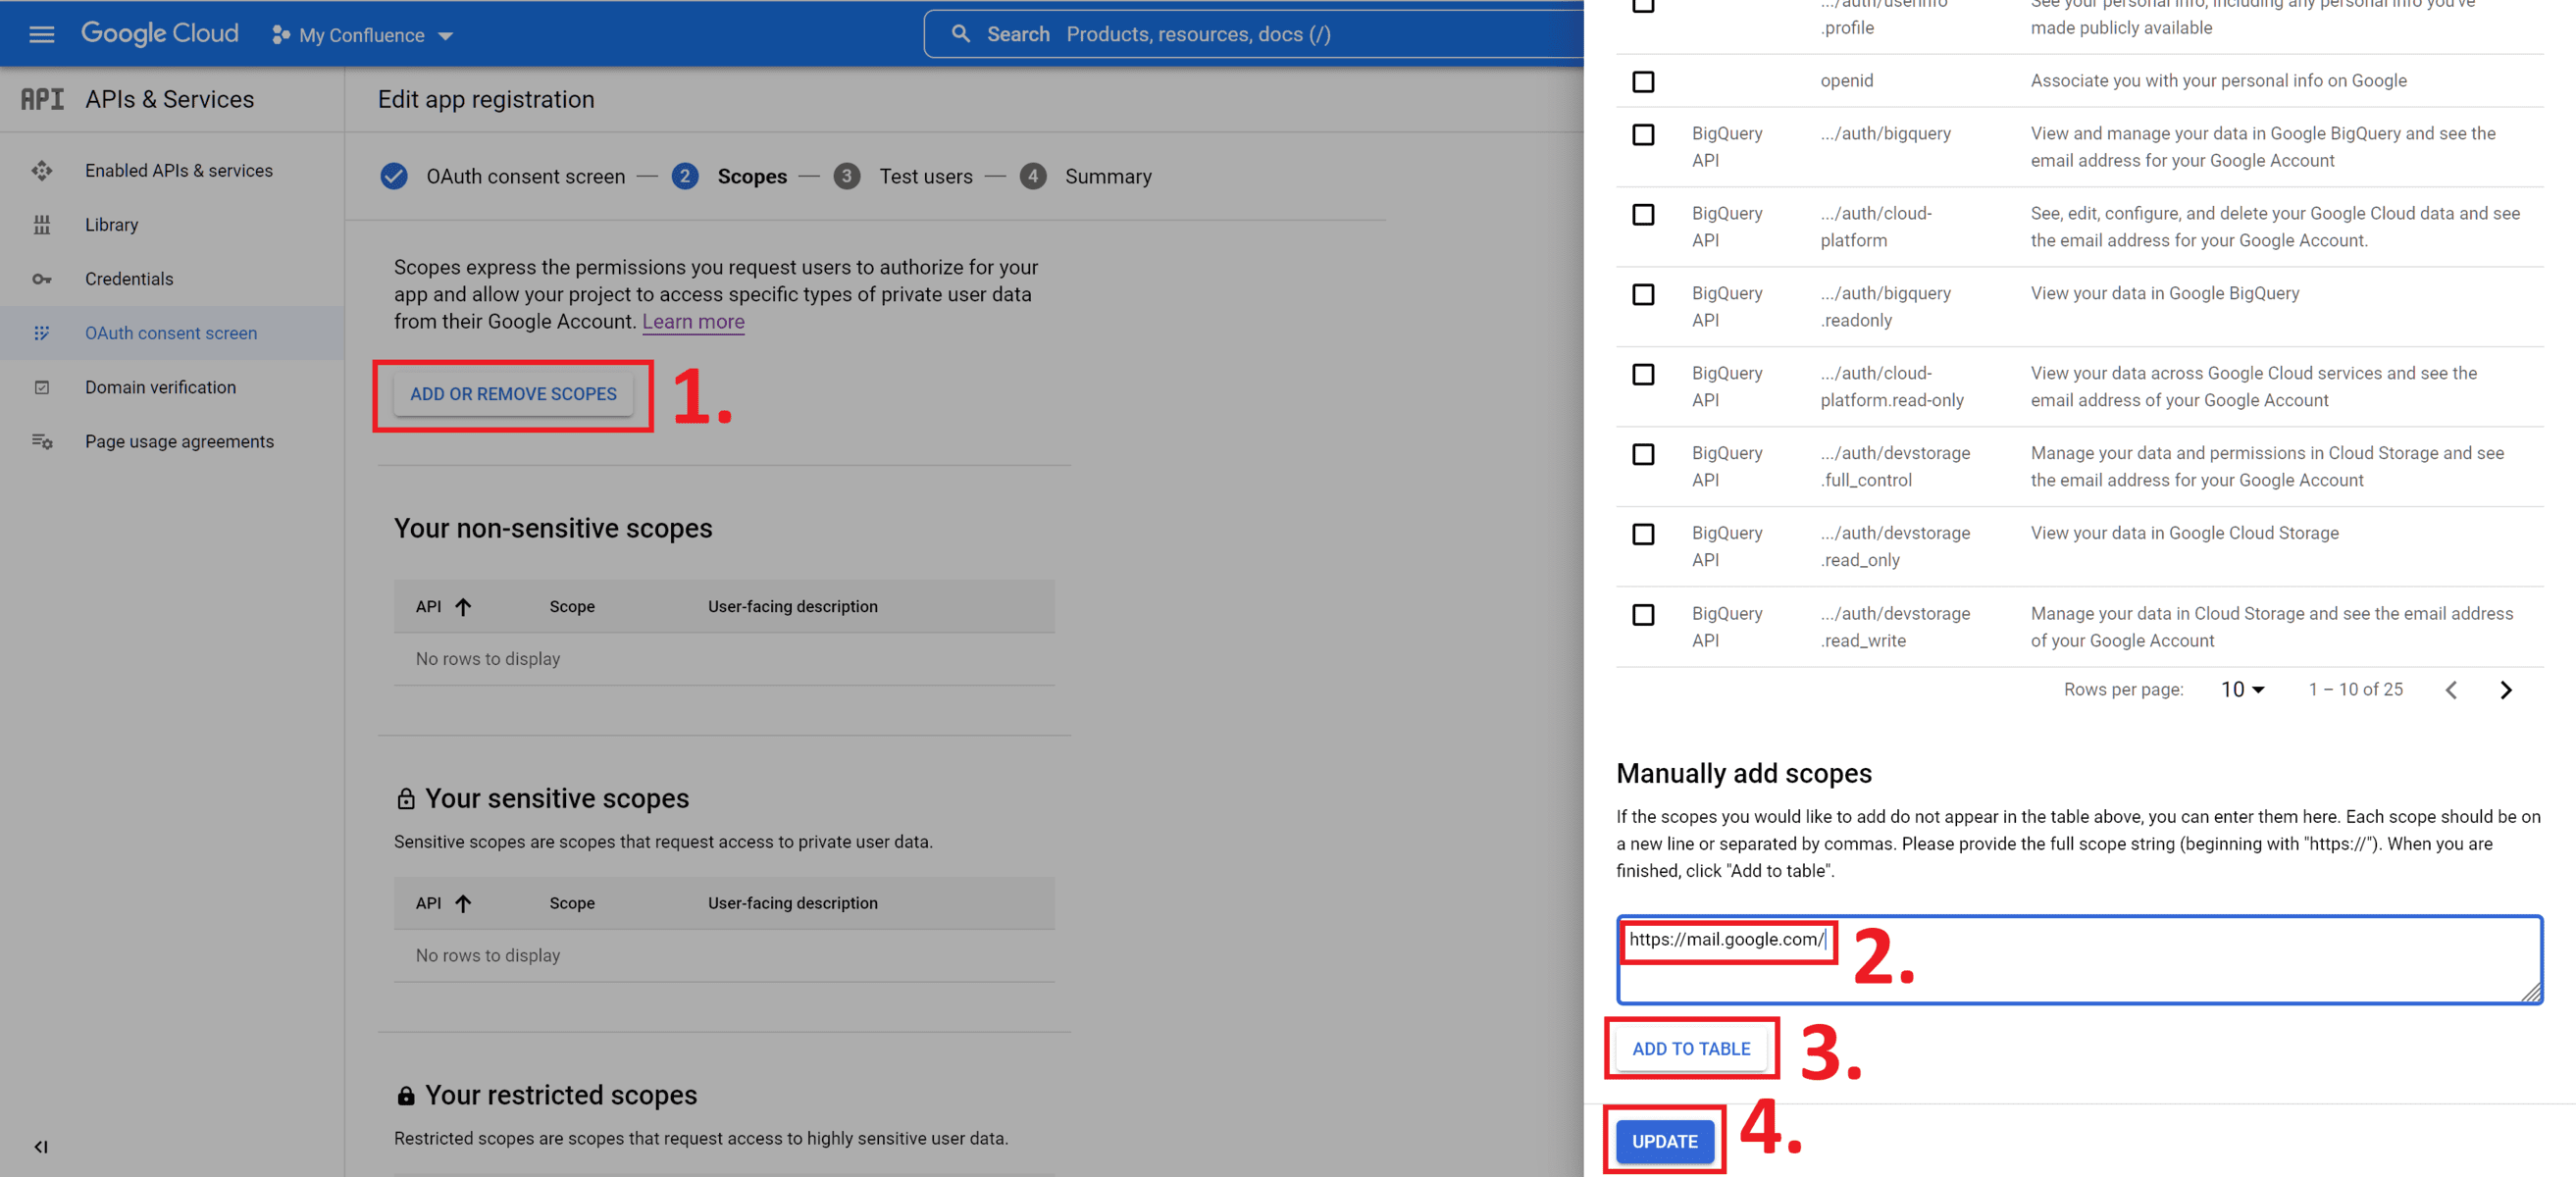
On the Scopes screen, click on “ADD OR REMOVE SCOPES”. A dialog will open. Scroll down to “Manually add scopes” and enter the text “https://mail.google.com/”. Then click on the “ADD TO TABLE” button. Finally, click on the “UPDATE” button to save the changes:
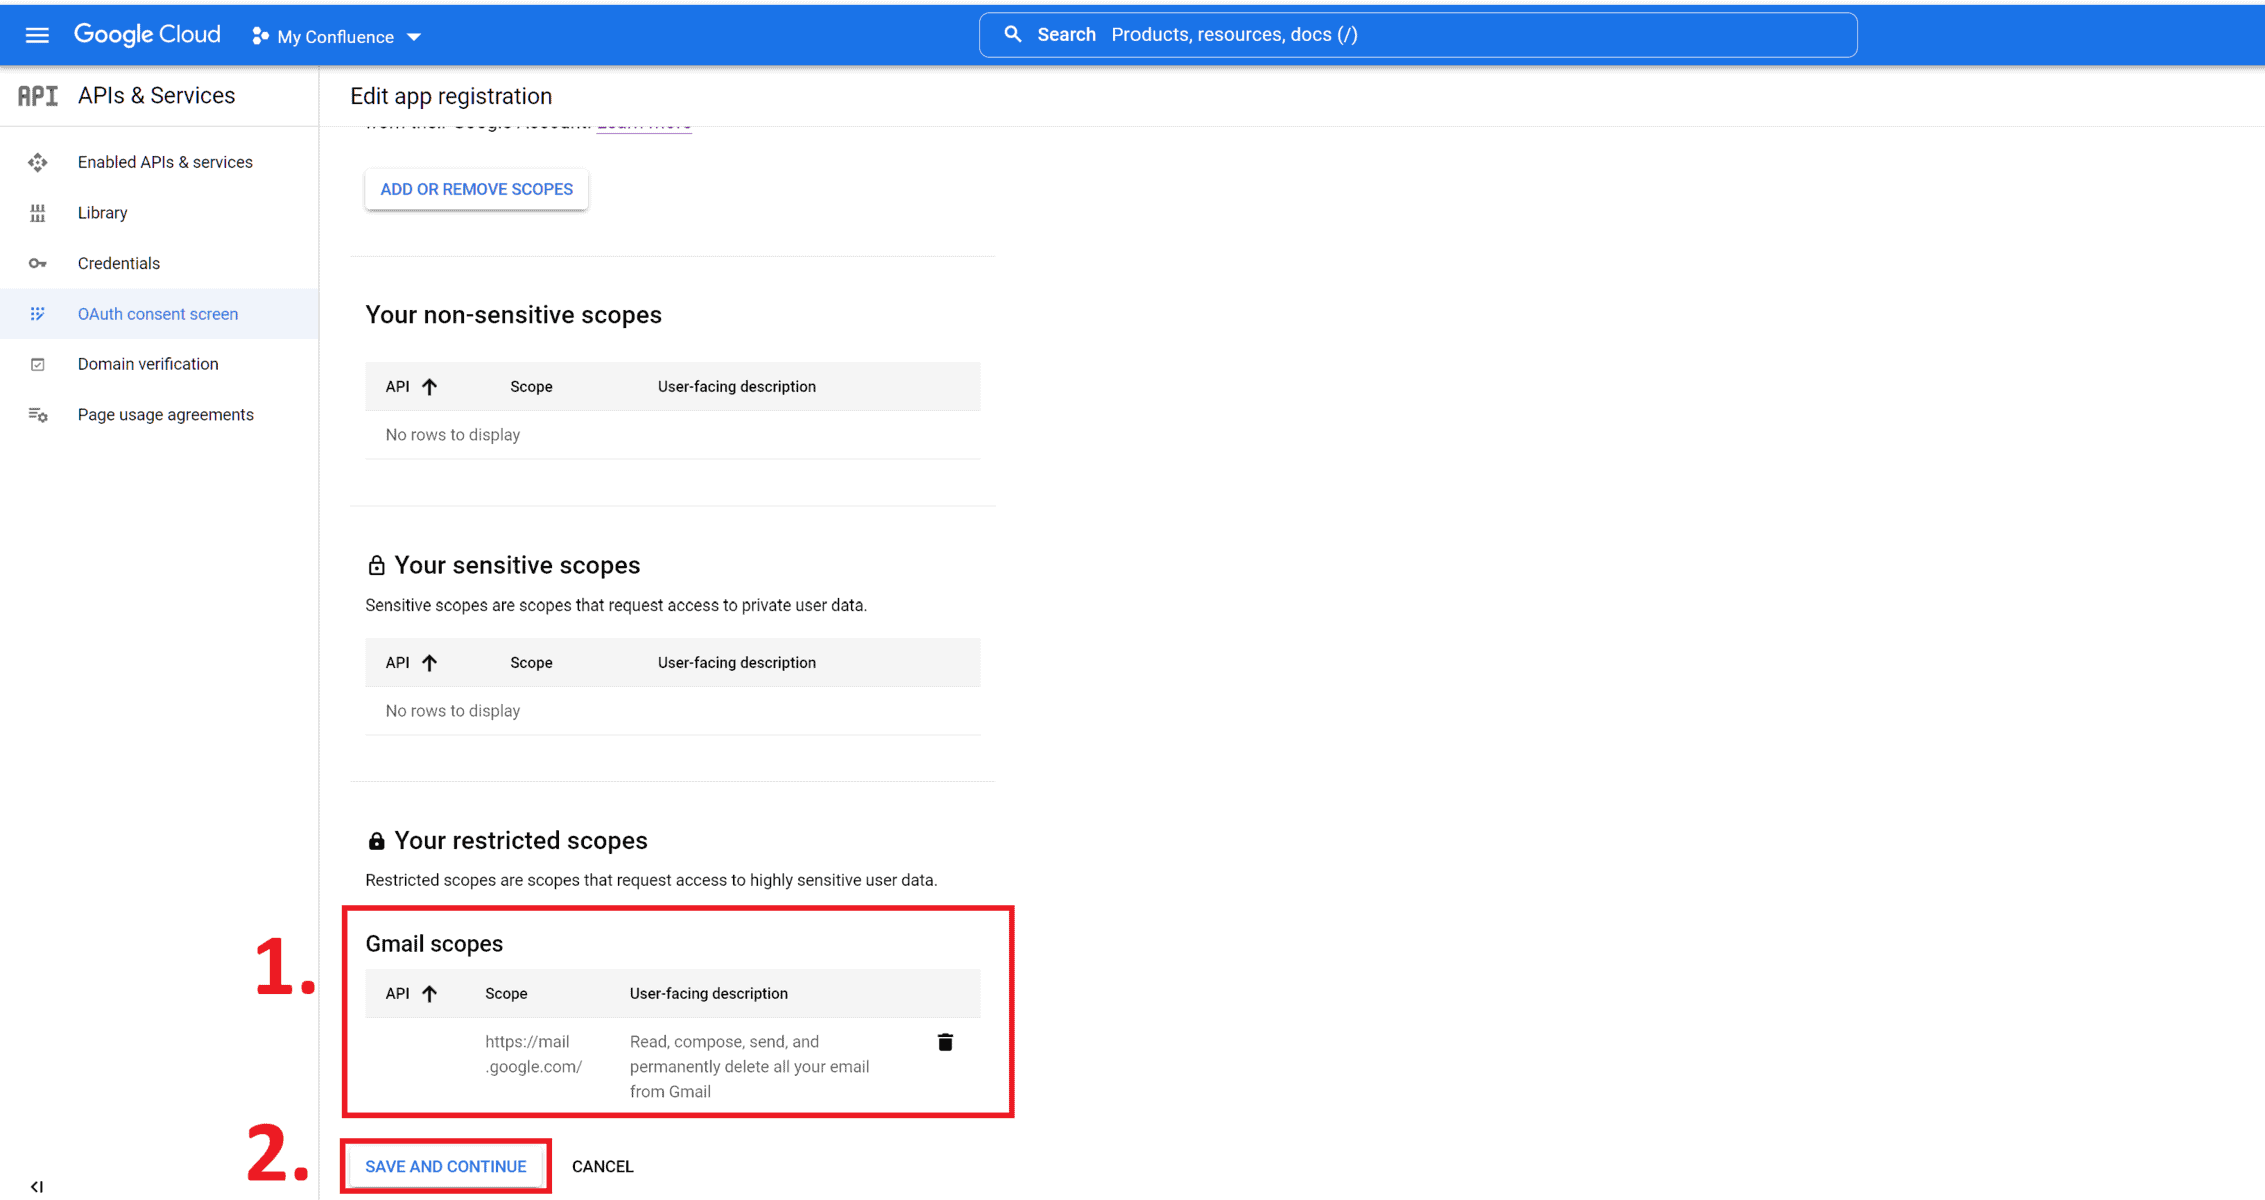
You should now see Gmail listed in the “Your restricted scopes” section. Proceed to the next screen by clicking on the “SAVE AND CONTINUE” button:
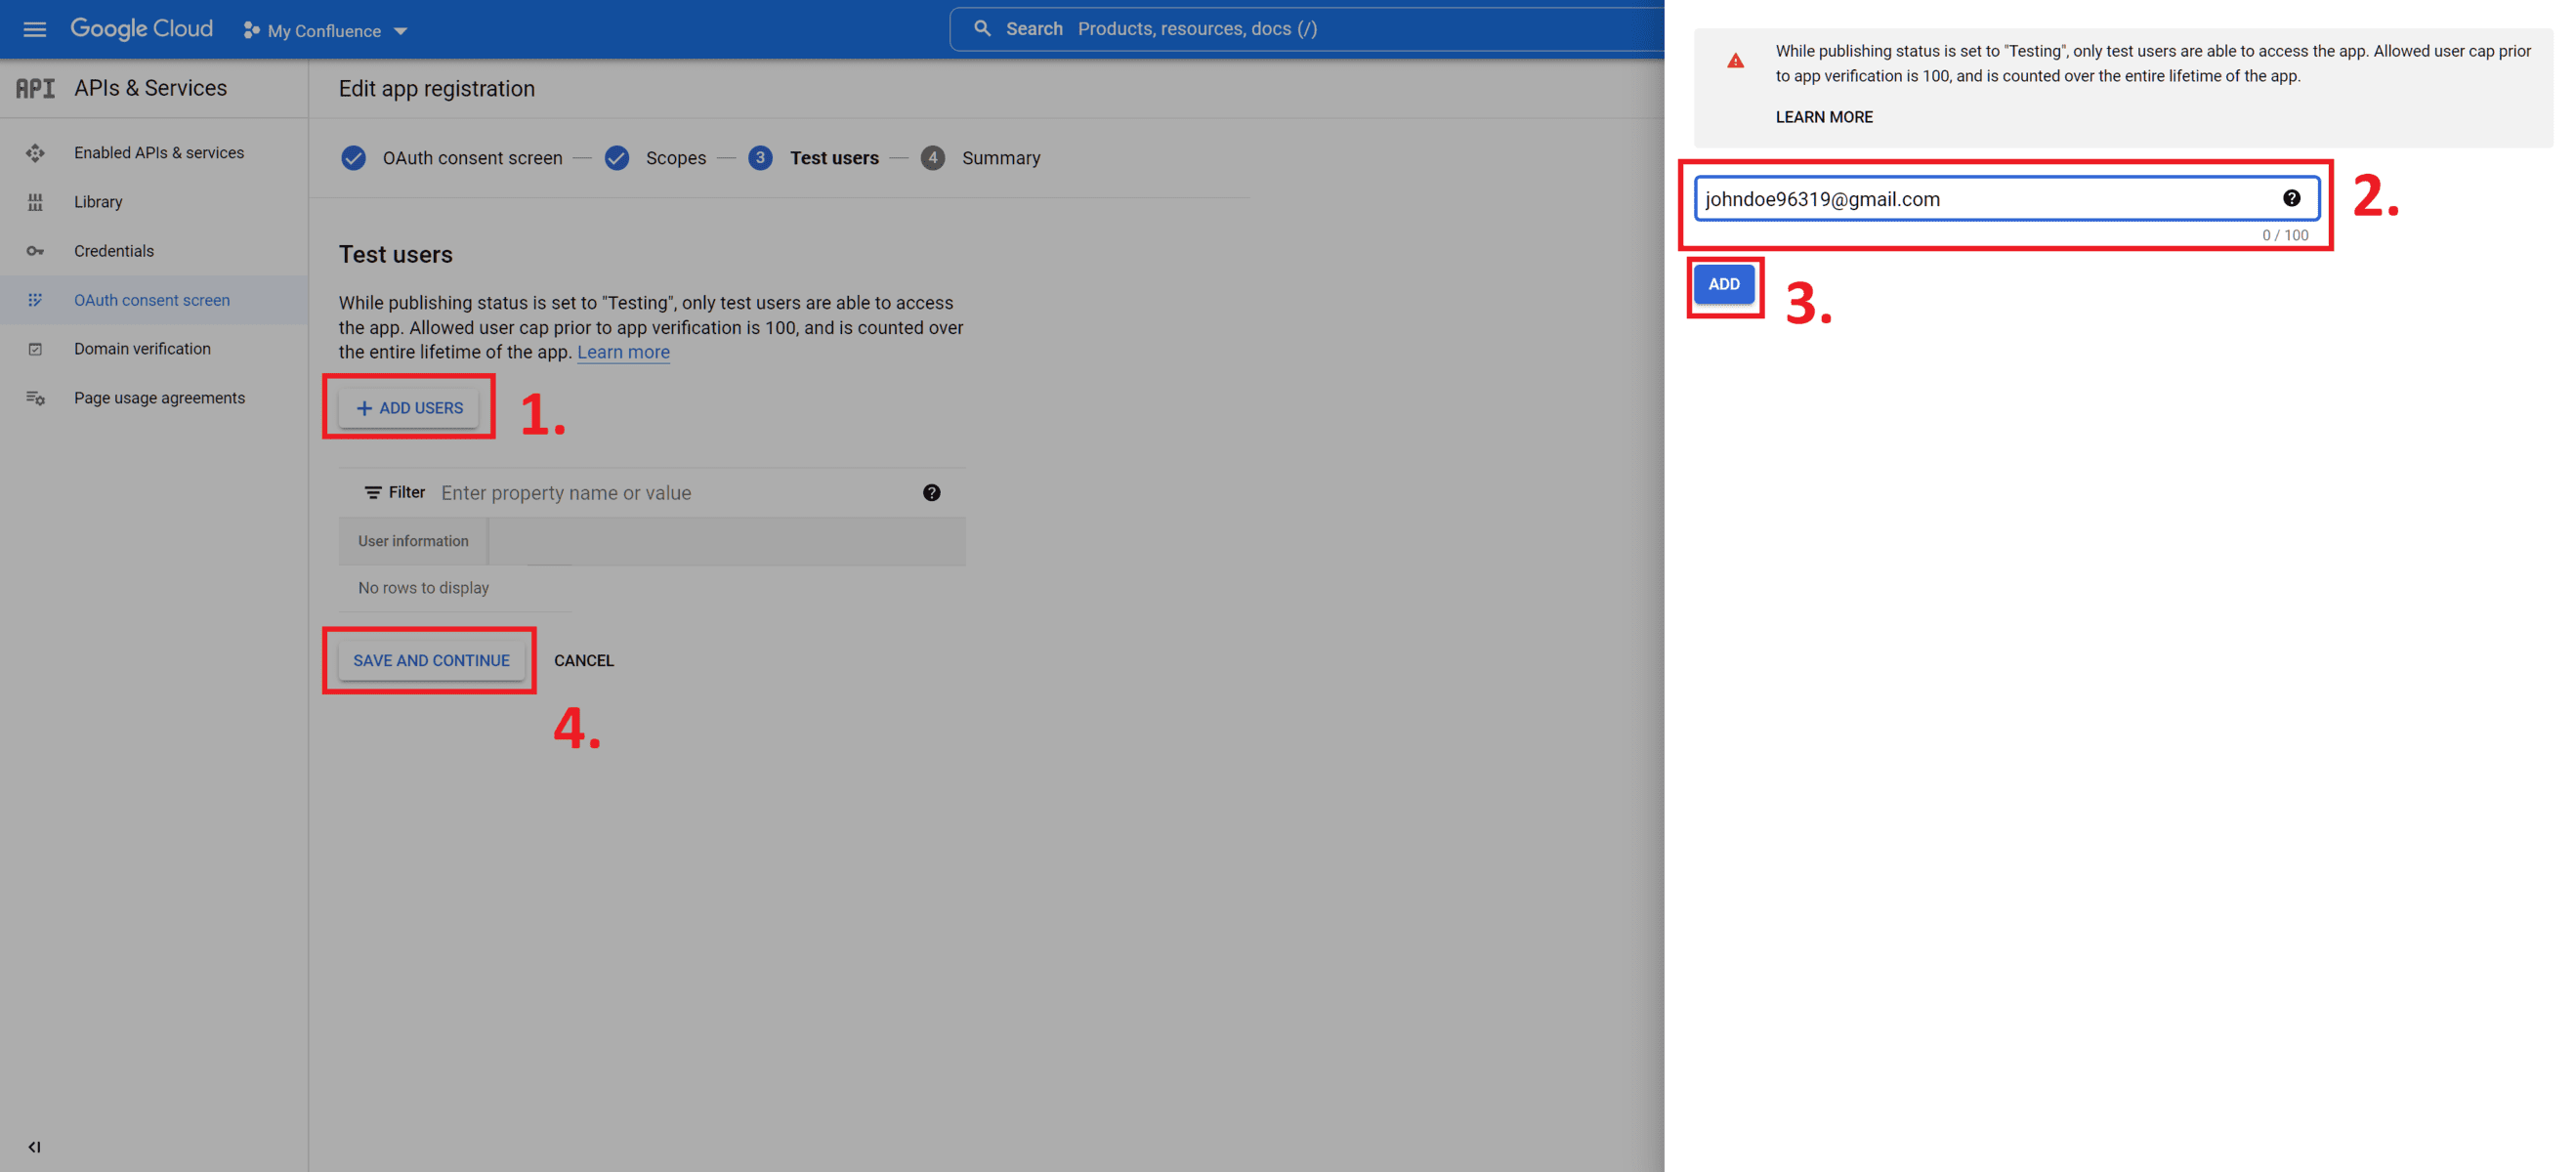
On the Test users screen, you need to add the Gmail address that you want to use with Confluence. To do this, click on the “ADD USERS” button. A dialog will open where you can enter the email address of the Gmail account. Confirm by clicking on “ADD”, and then proceed to the next screen by clicking on “SAVE AND CONTINUE”:
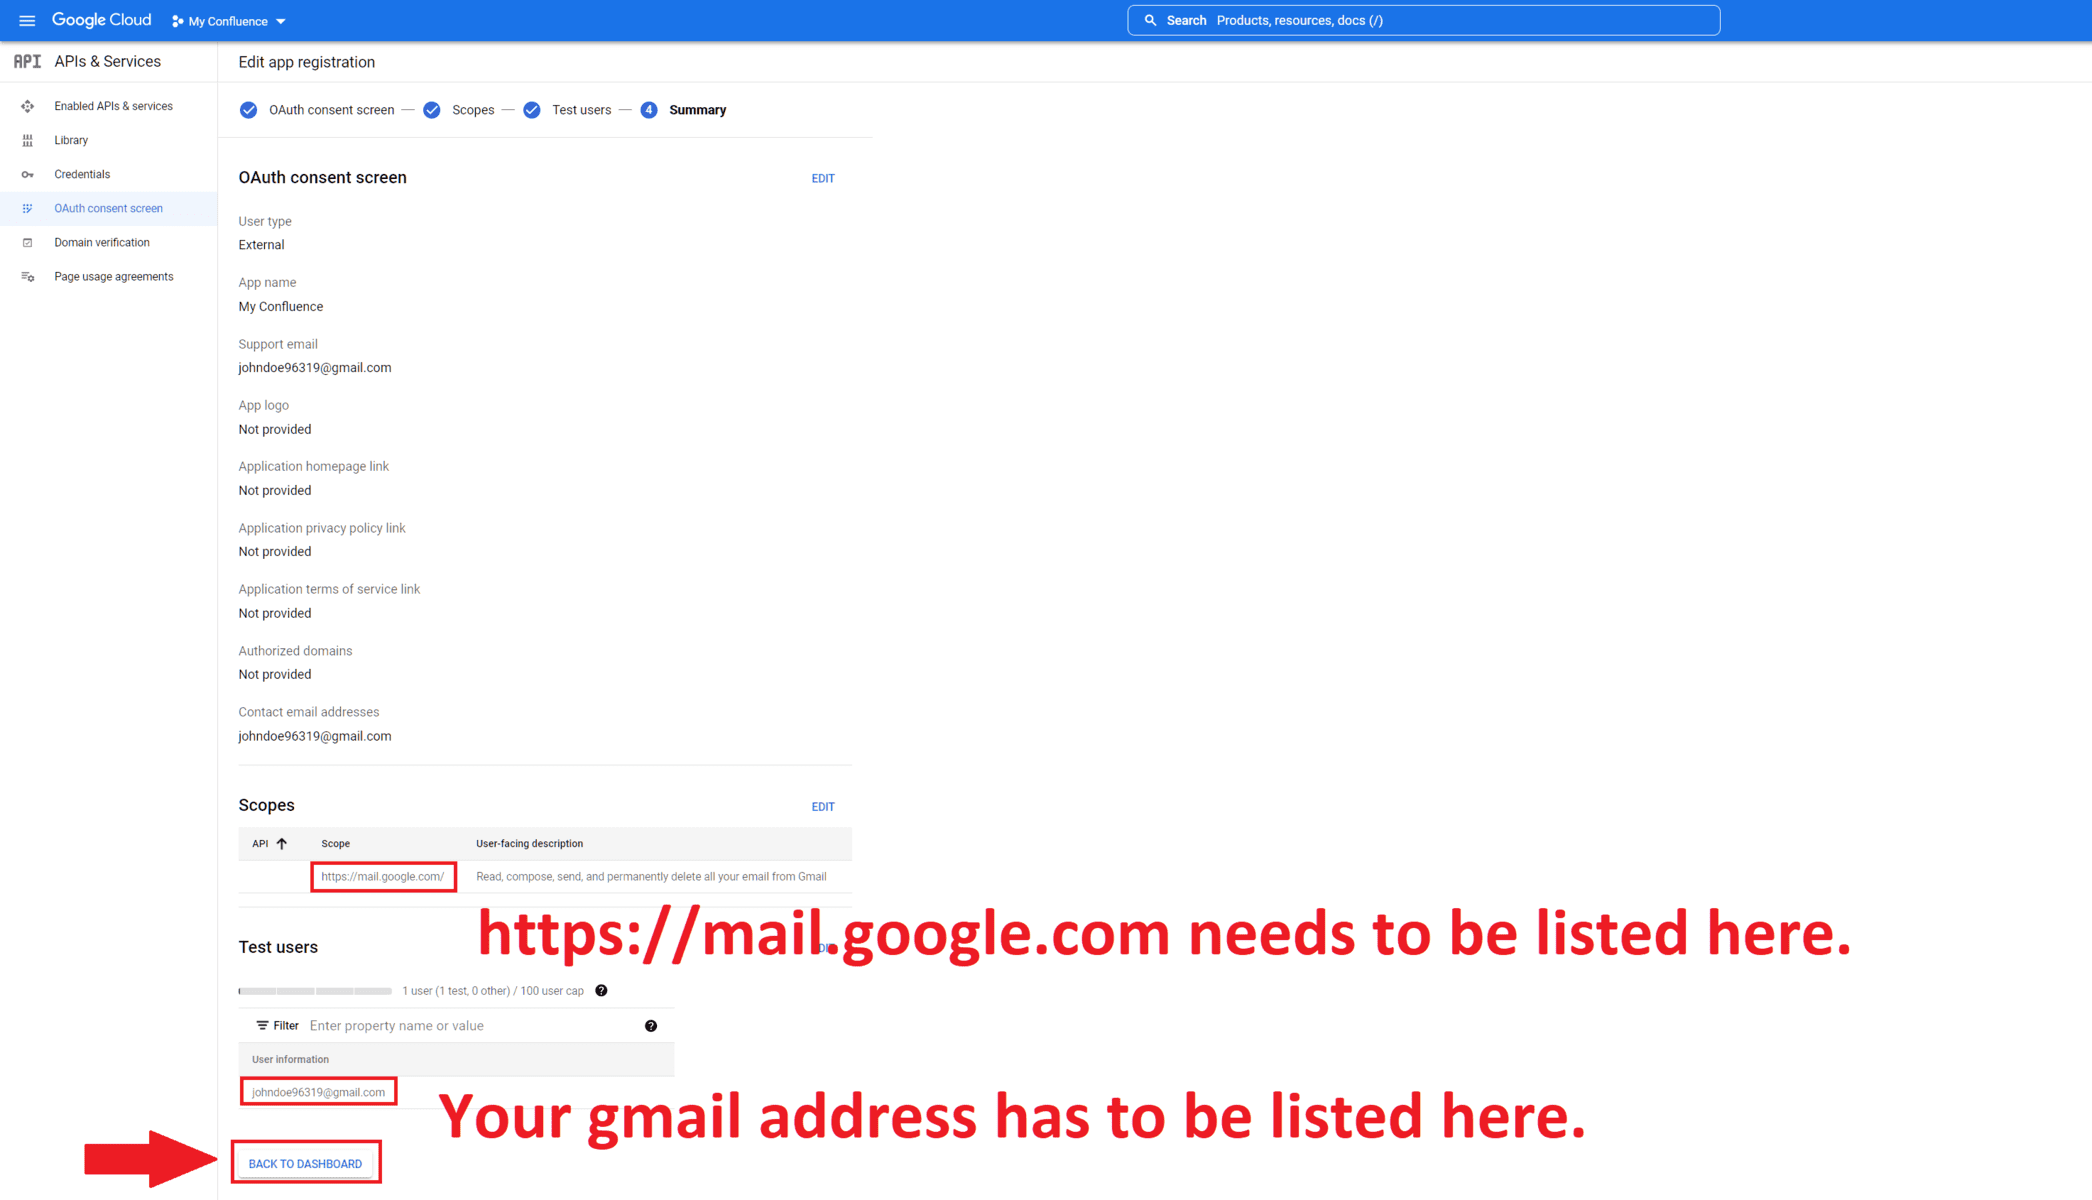
Your consent screen is now configured. On the summary page, double-check that “https://mail.google.com/” is listed in the scopes section. Also, ensure that the Gmail account you want to connect with Confluence is listed in the test users section. Then click on the “BACK TO DASHBOARD” button:
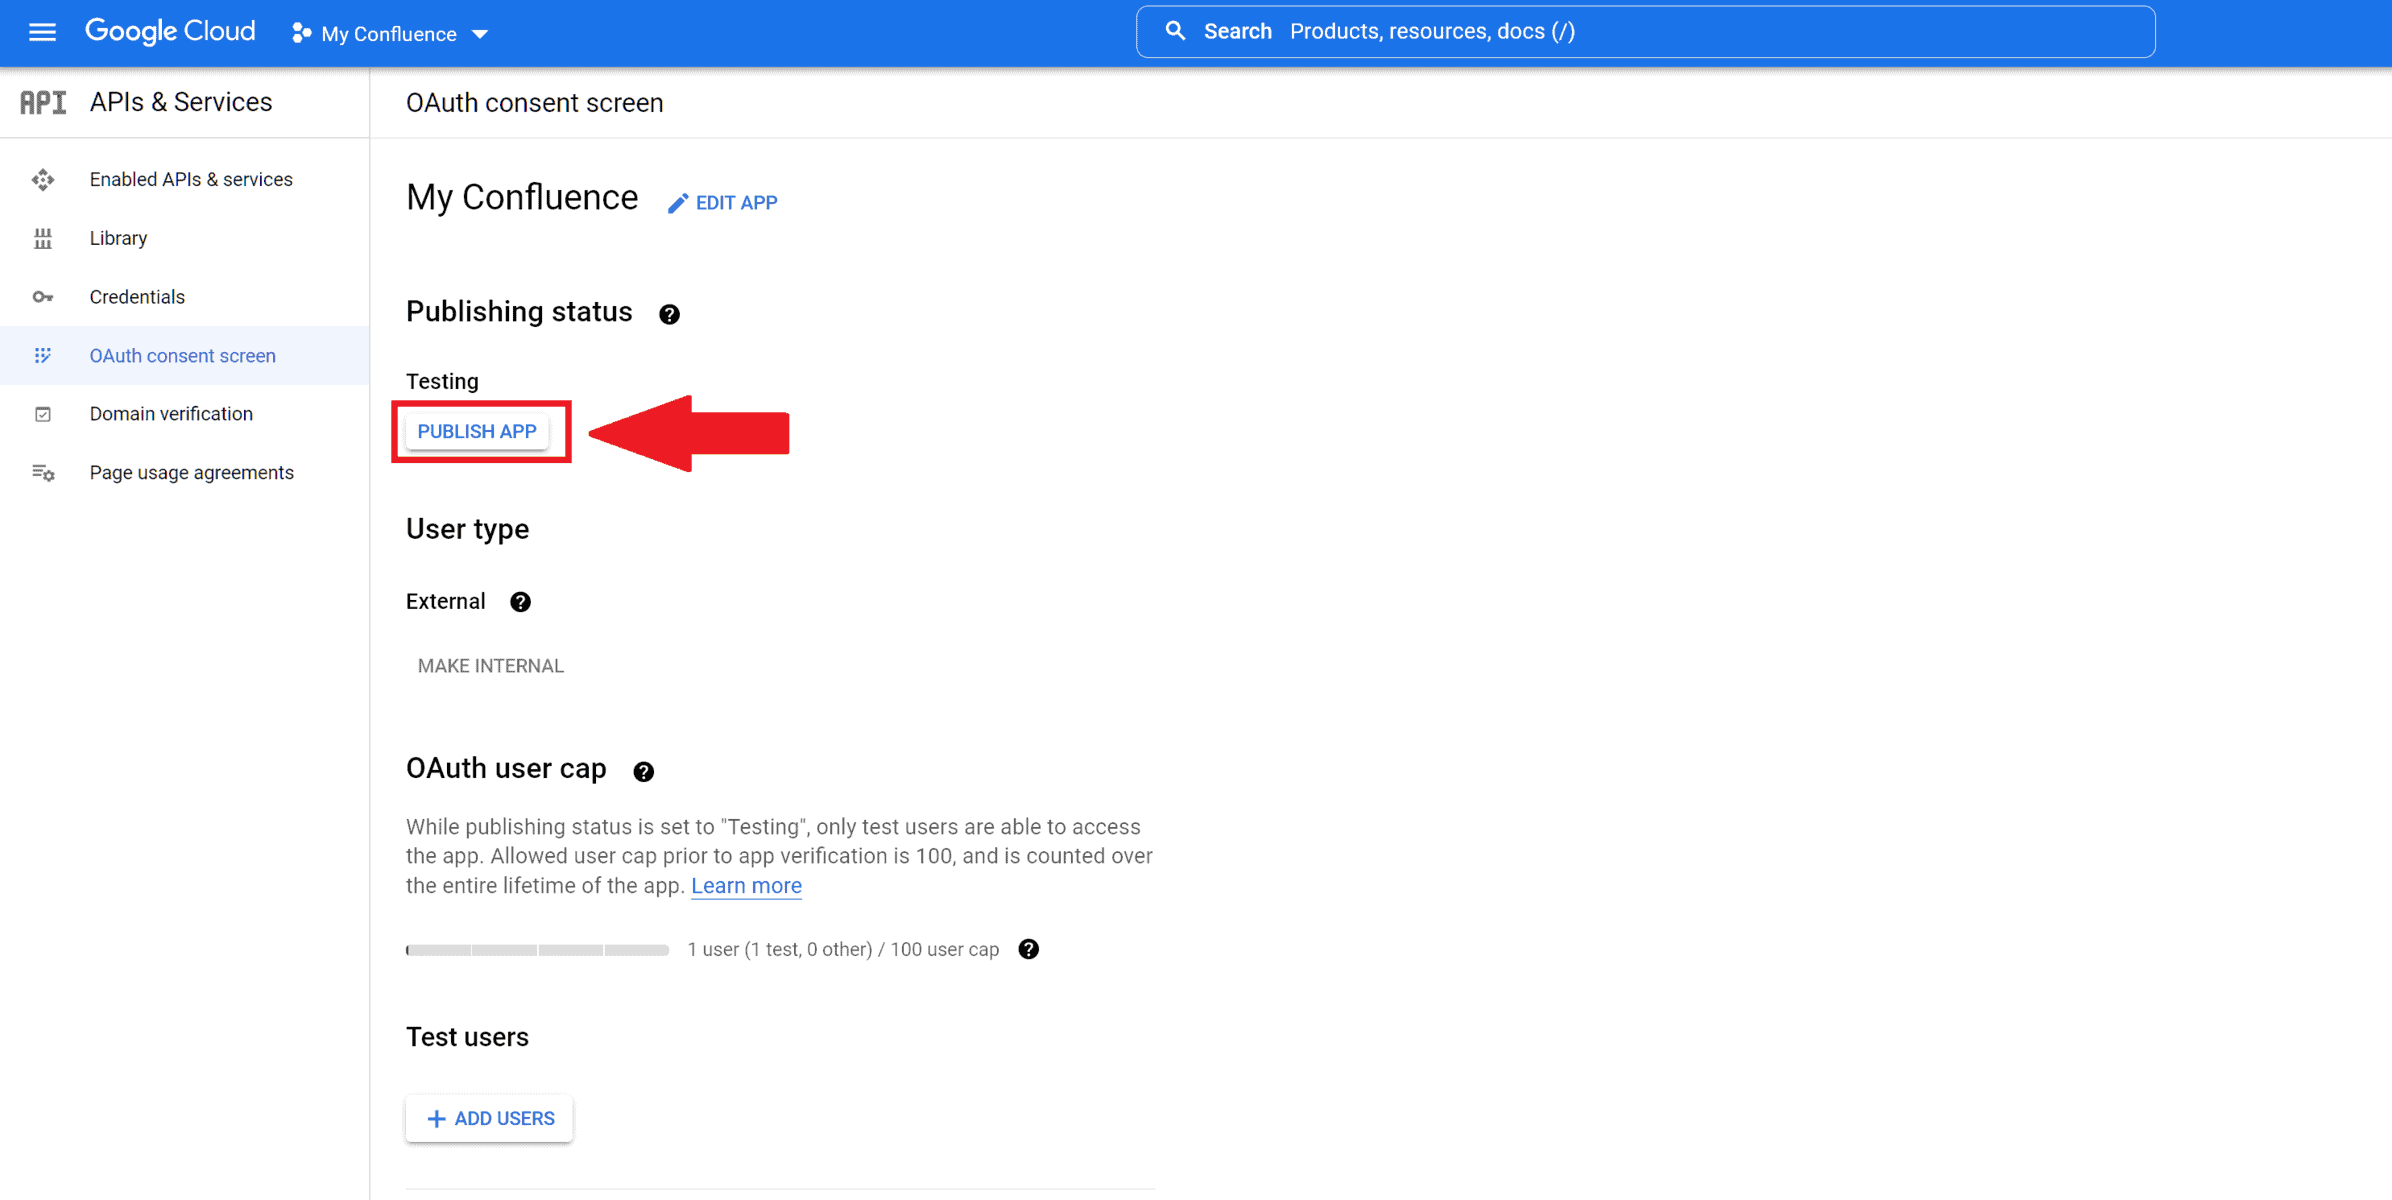
Next, you need to submit your consent screen for publishing. This is necessary because in testing mode, you will be logged out after 7 days. However, you only need to submit the app and do not have to go through the entire verification process. To do so, click on the “PUBLISH APP” button:
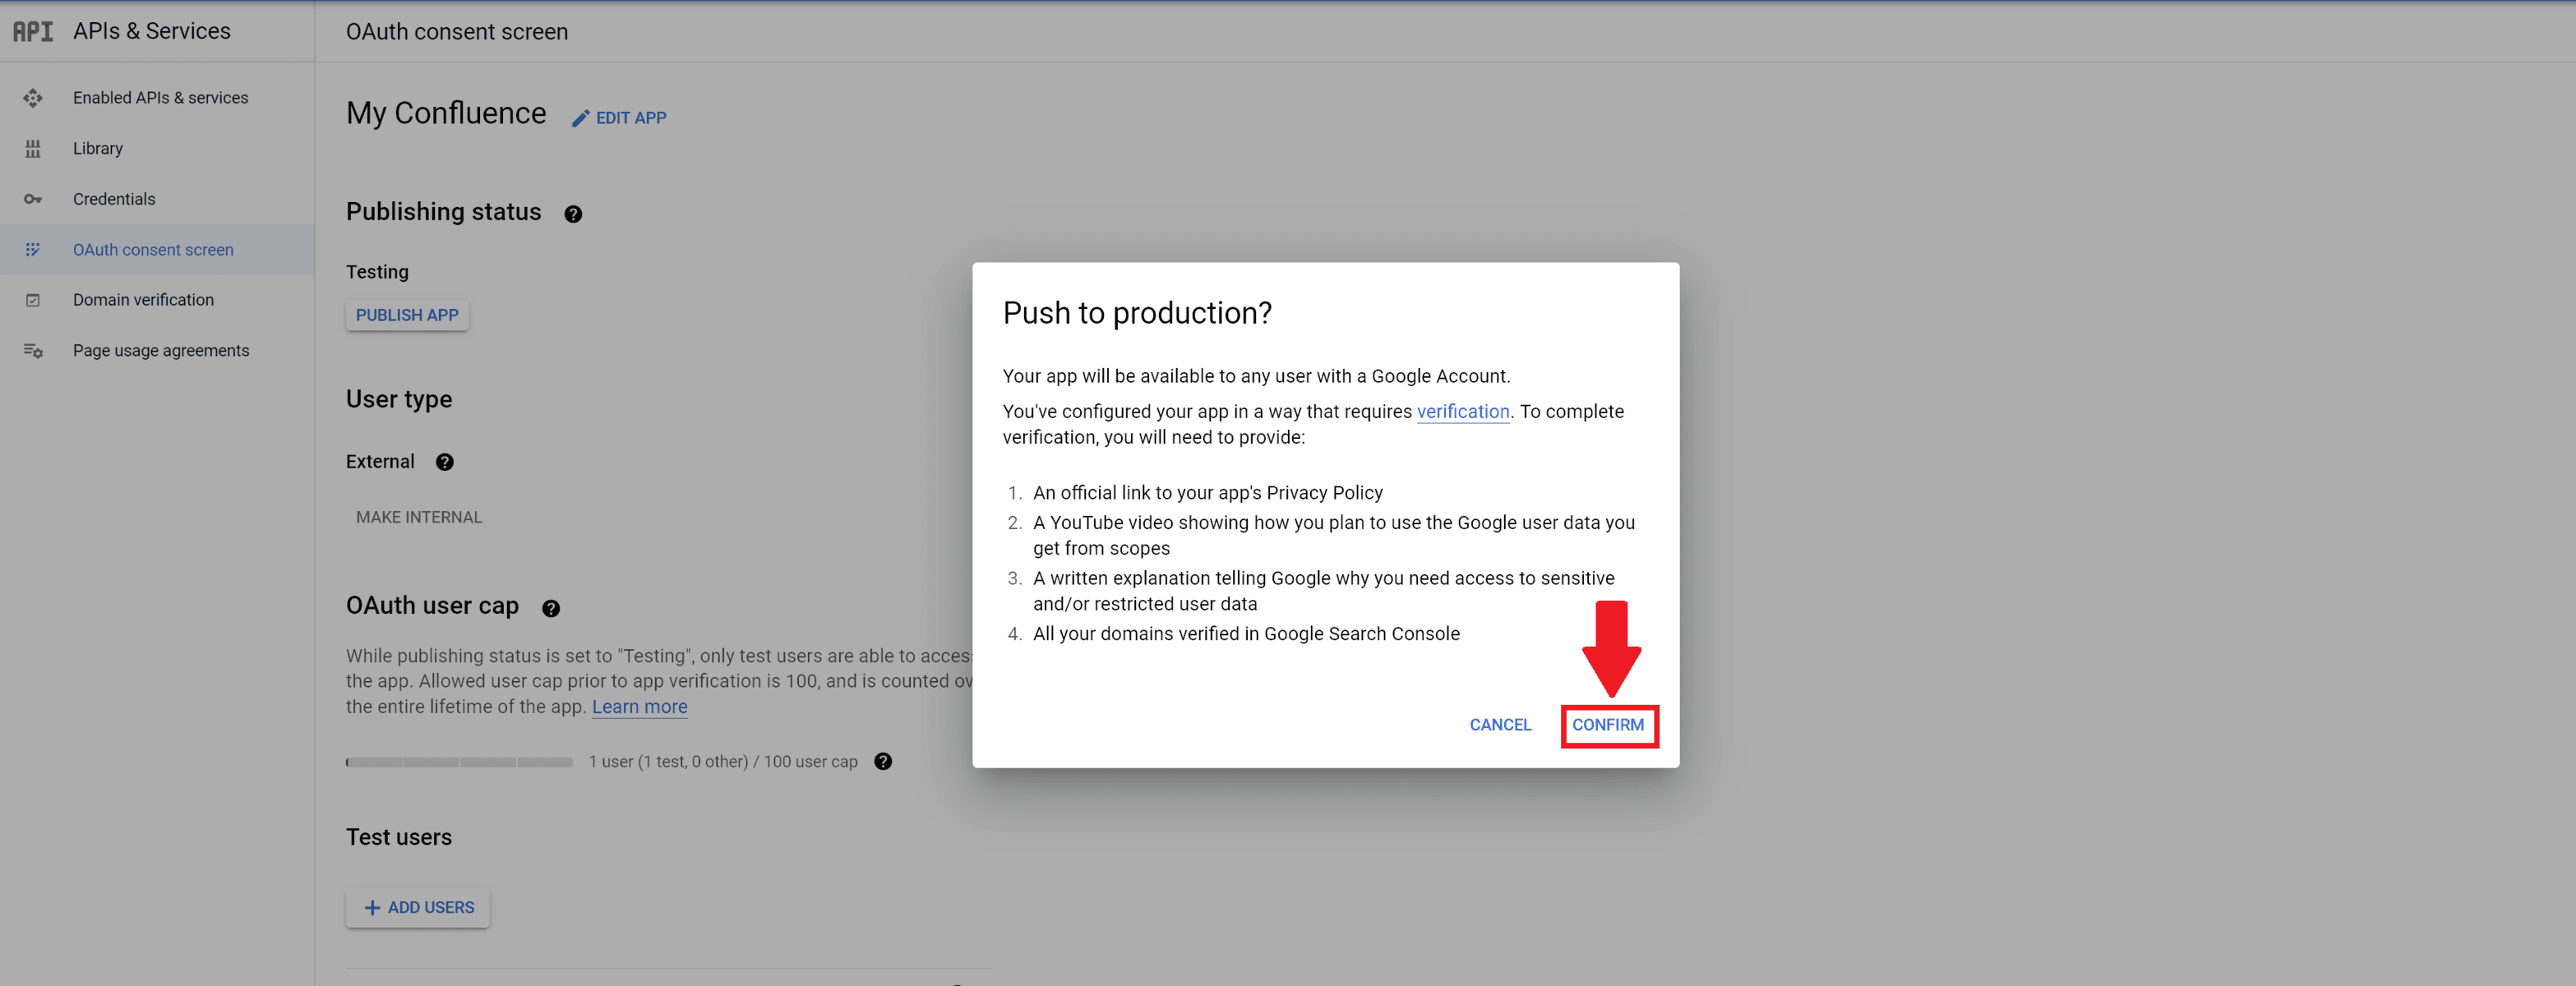
Google will display a message asking if you’re ready to push to production. This dialog may contain a list of items required for verification. Since you are not proceeding with the verification process, you can ignore all of this. Simply click on “CONFIRM”:
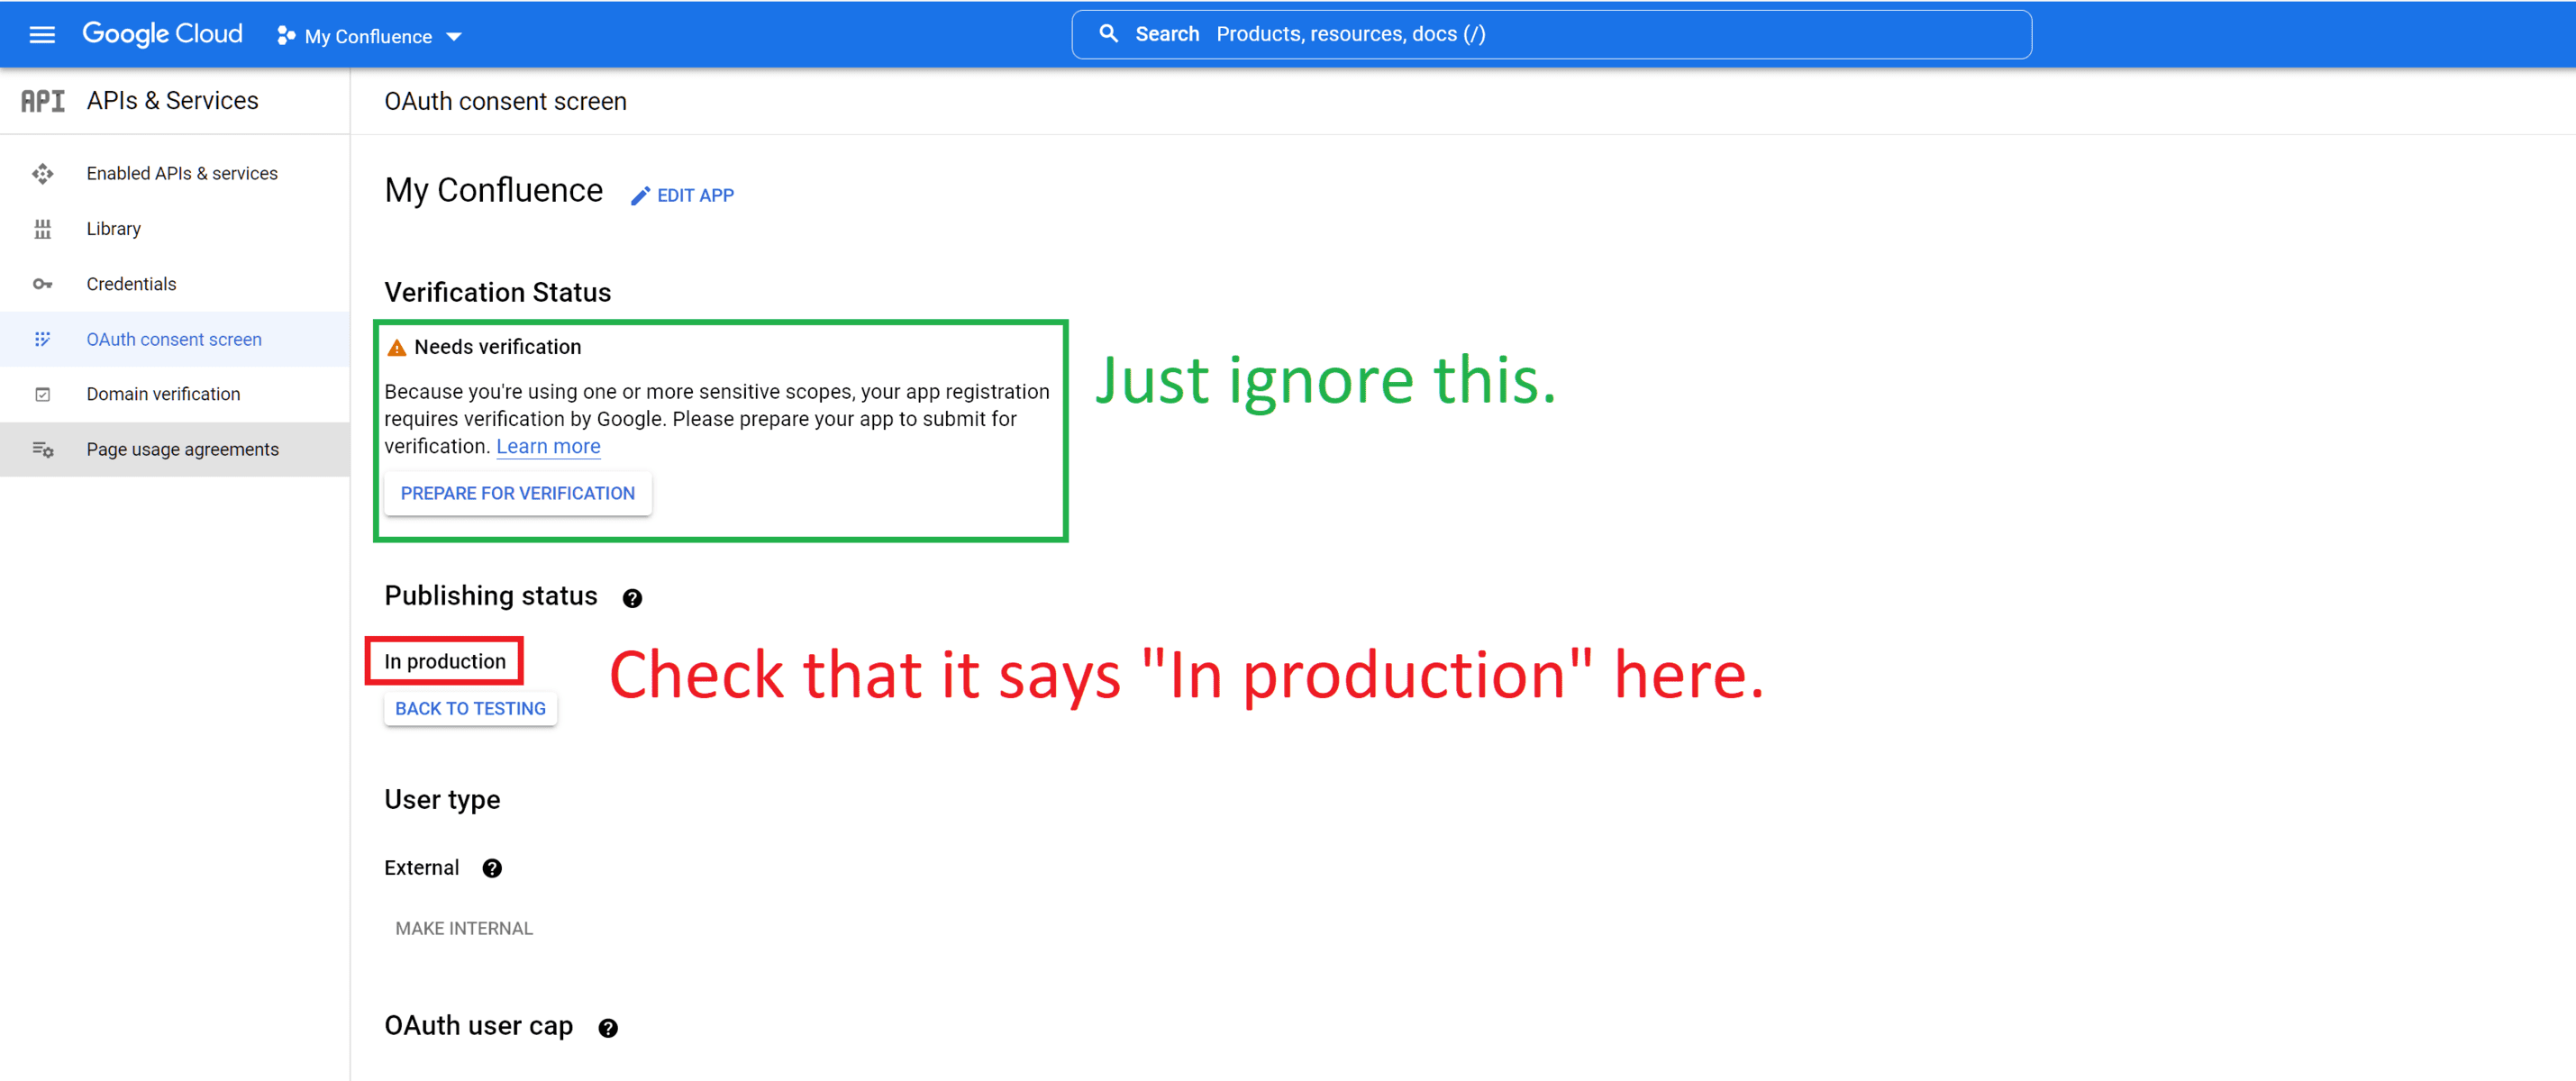
After confirming, the app will be in a production state, even though the verification process has not been completed. Do not proceed with the verification process and leave things as they are. You have now completed the consent screen setup and can proceed with creating the OAuth client.
Step 4 – Create the OAuth client
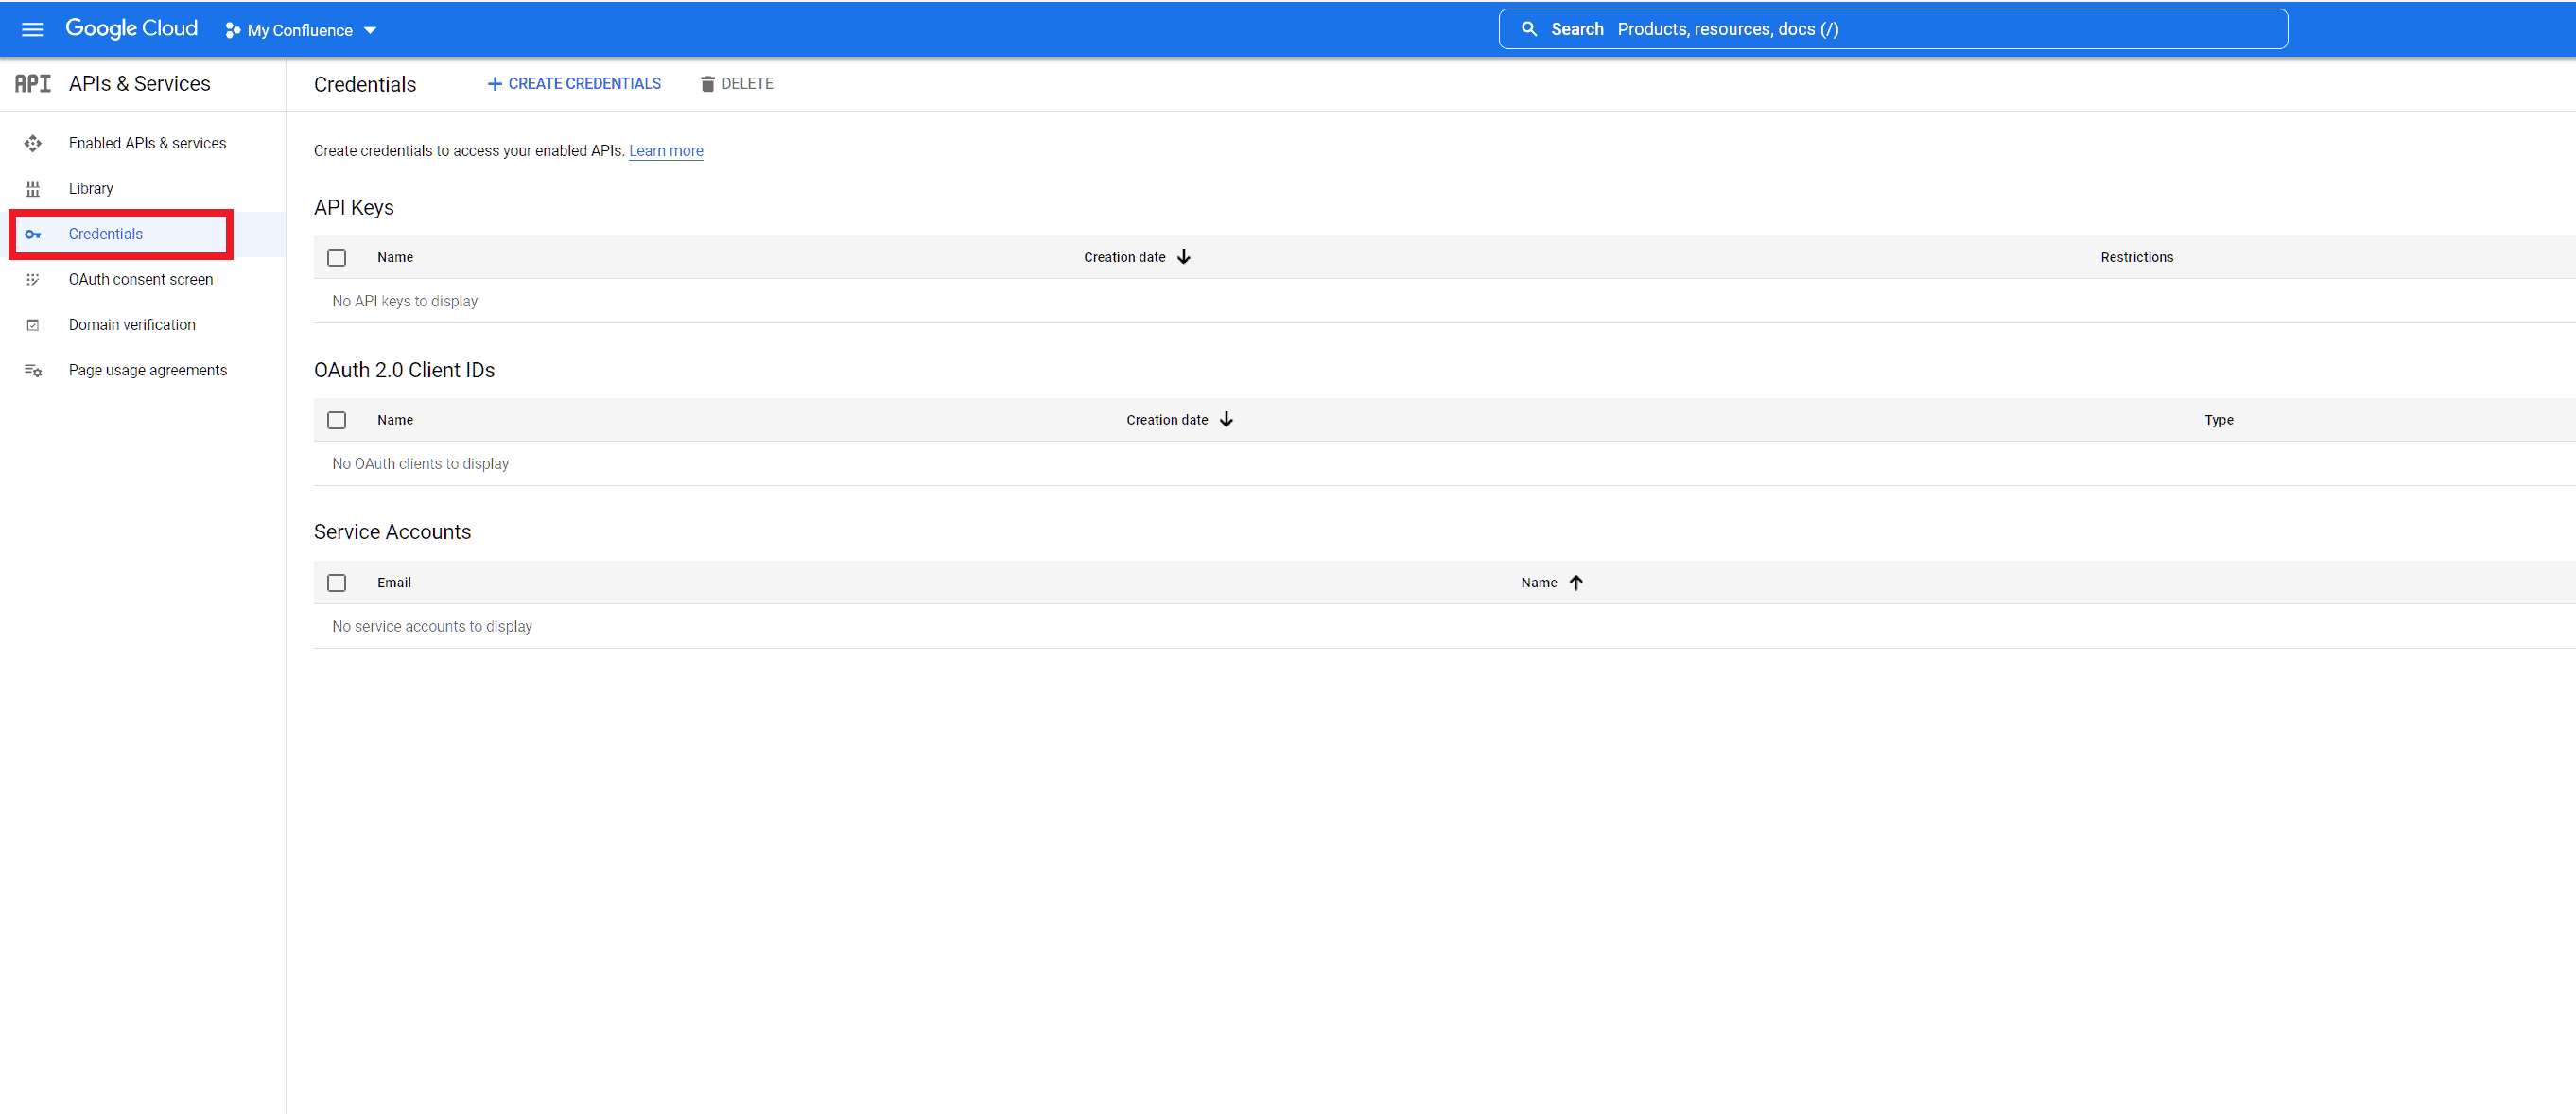
To create the OAuth client, go back to the Credentials page by clicking on “Credentials” in the left menu:
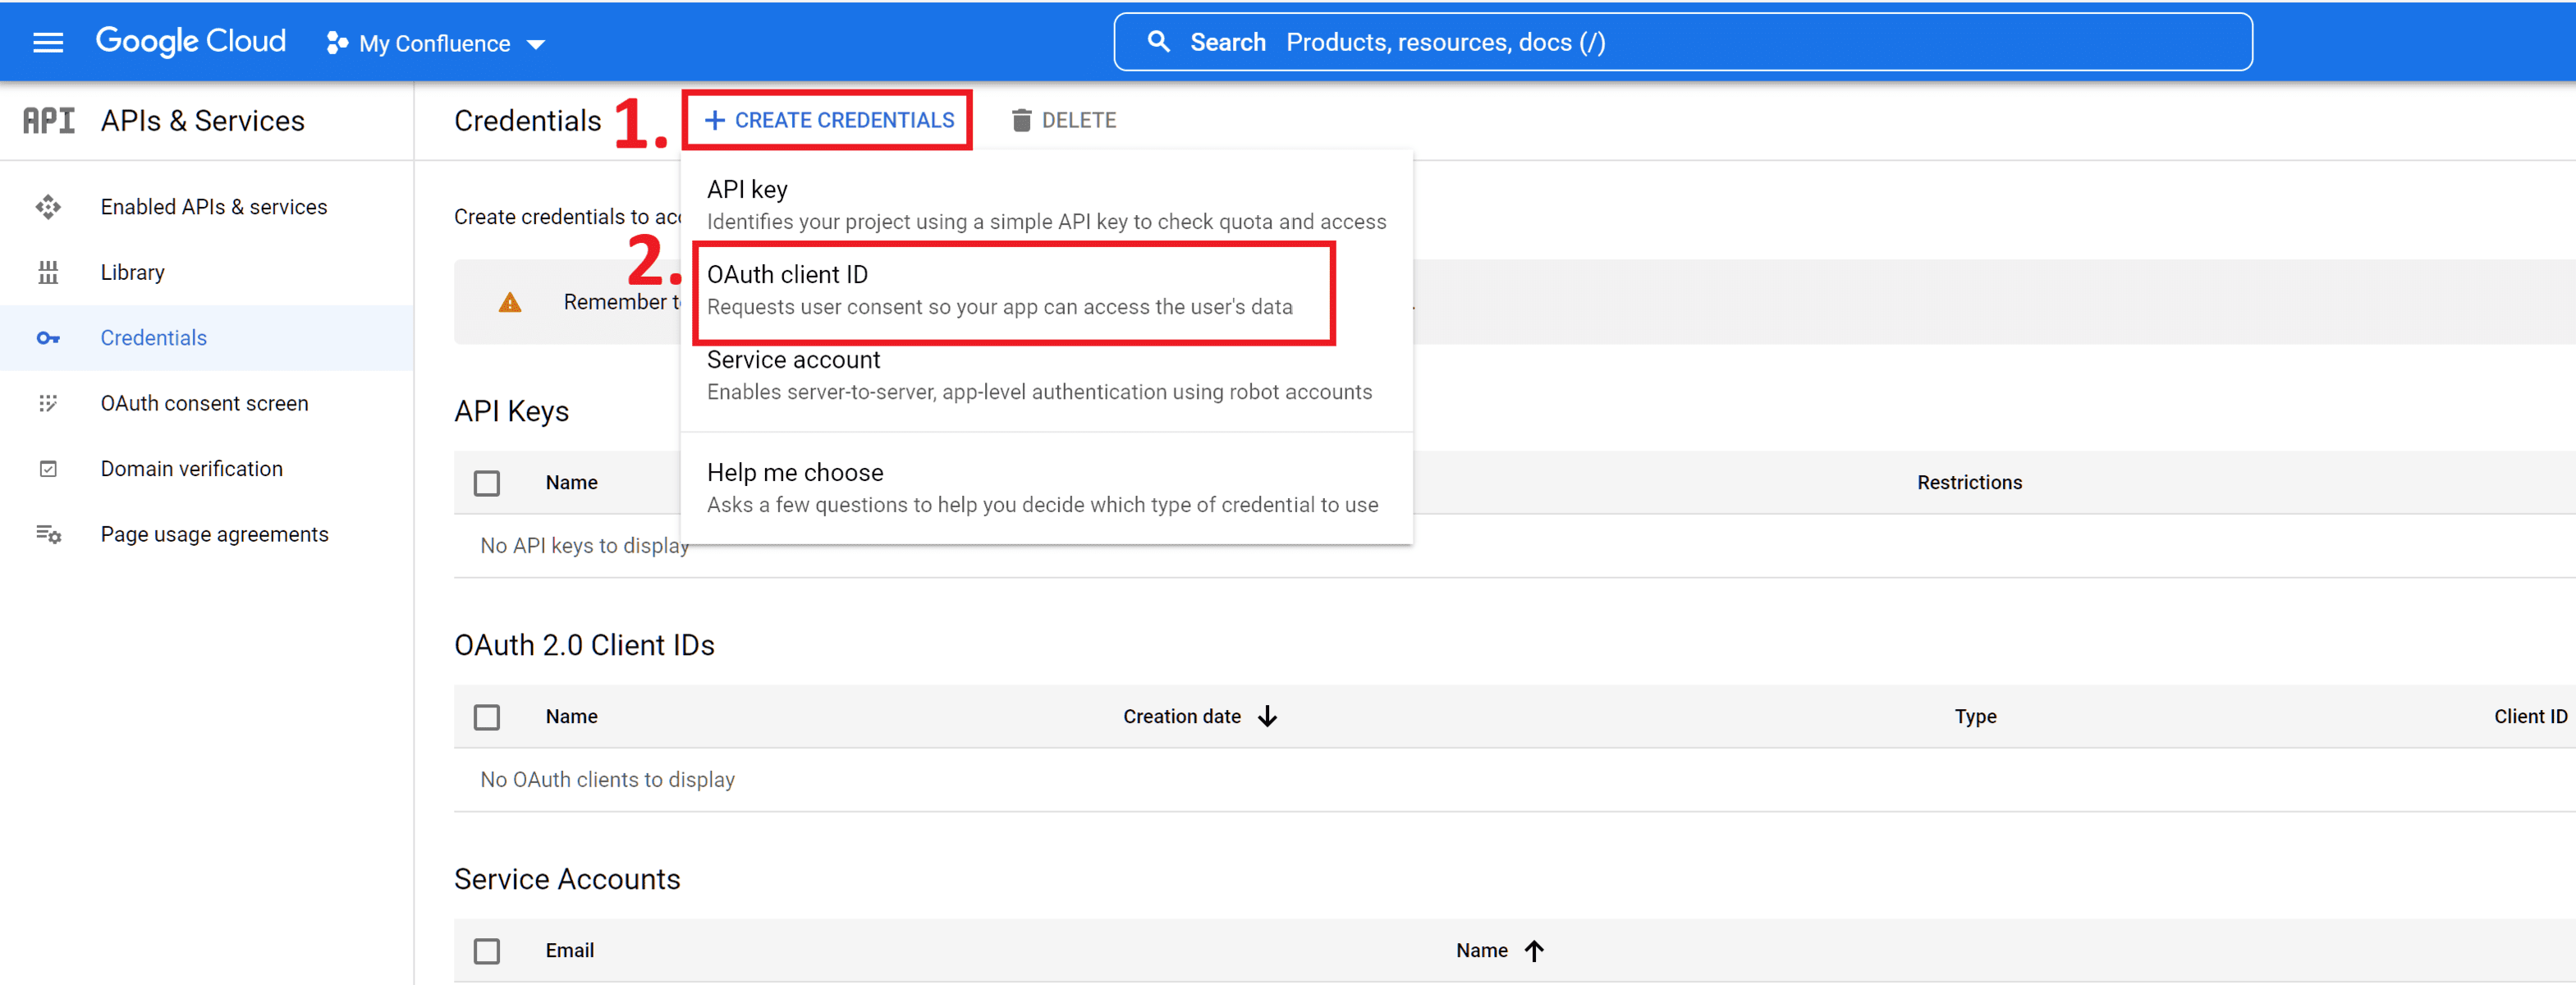
To create a new OAuth2 client, click on the “Create Credentials” button and then select “OAuth client ID” from the dropdown menu.
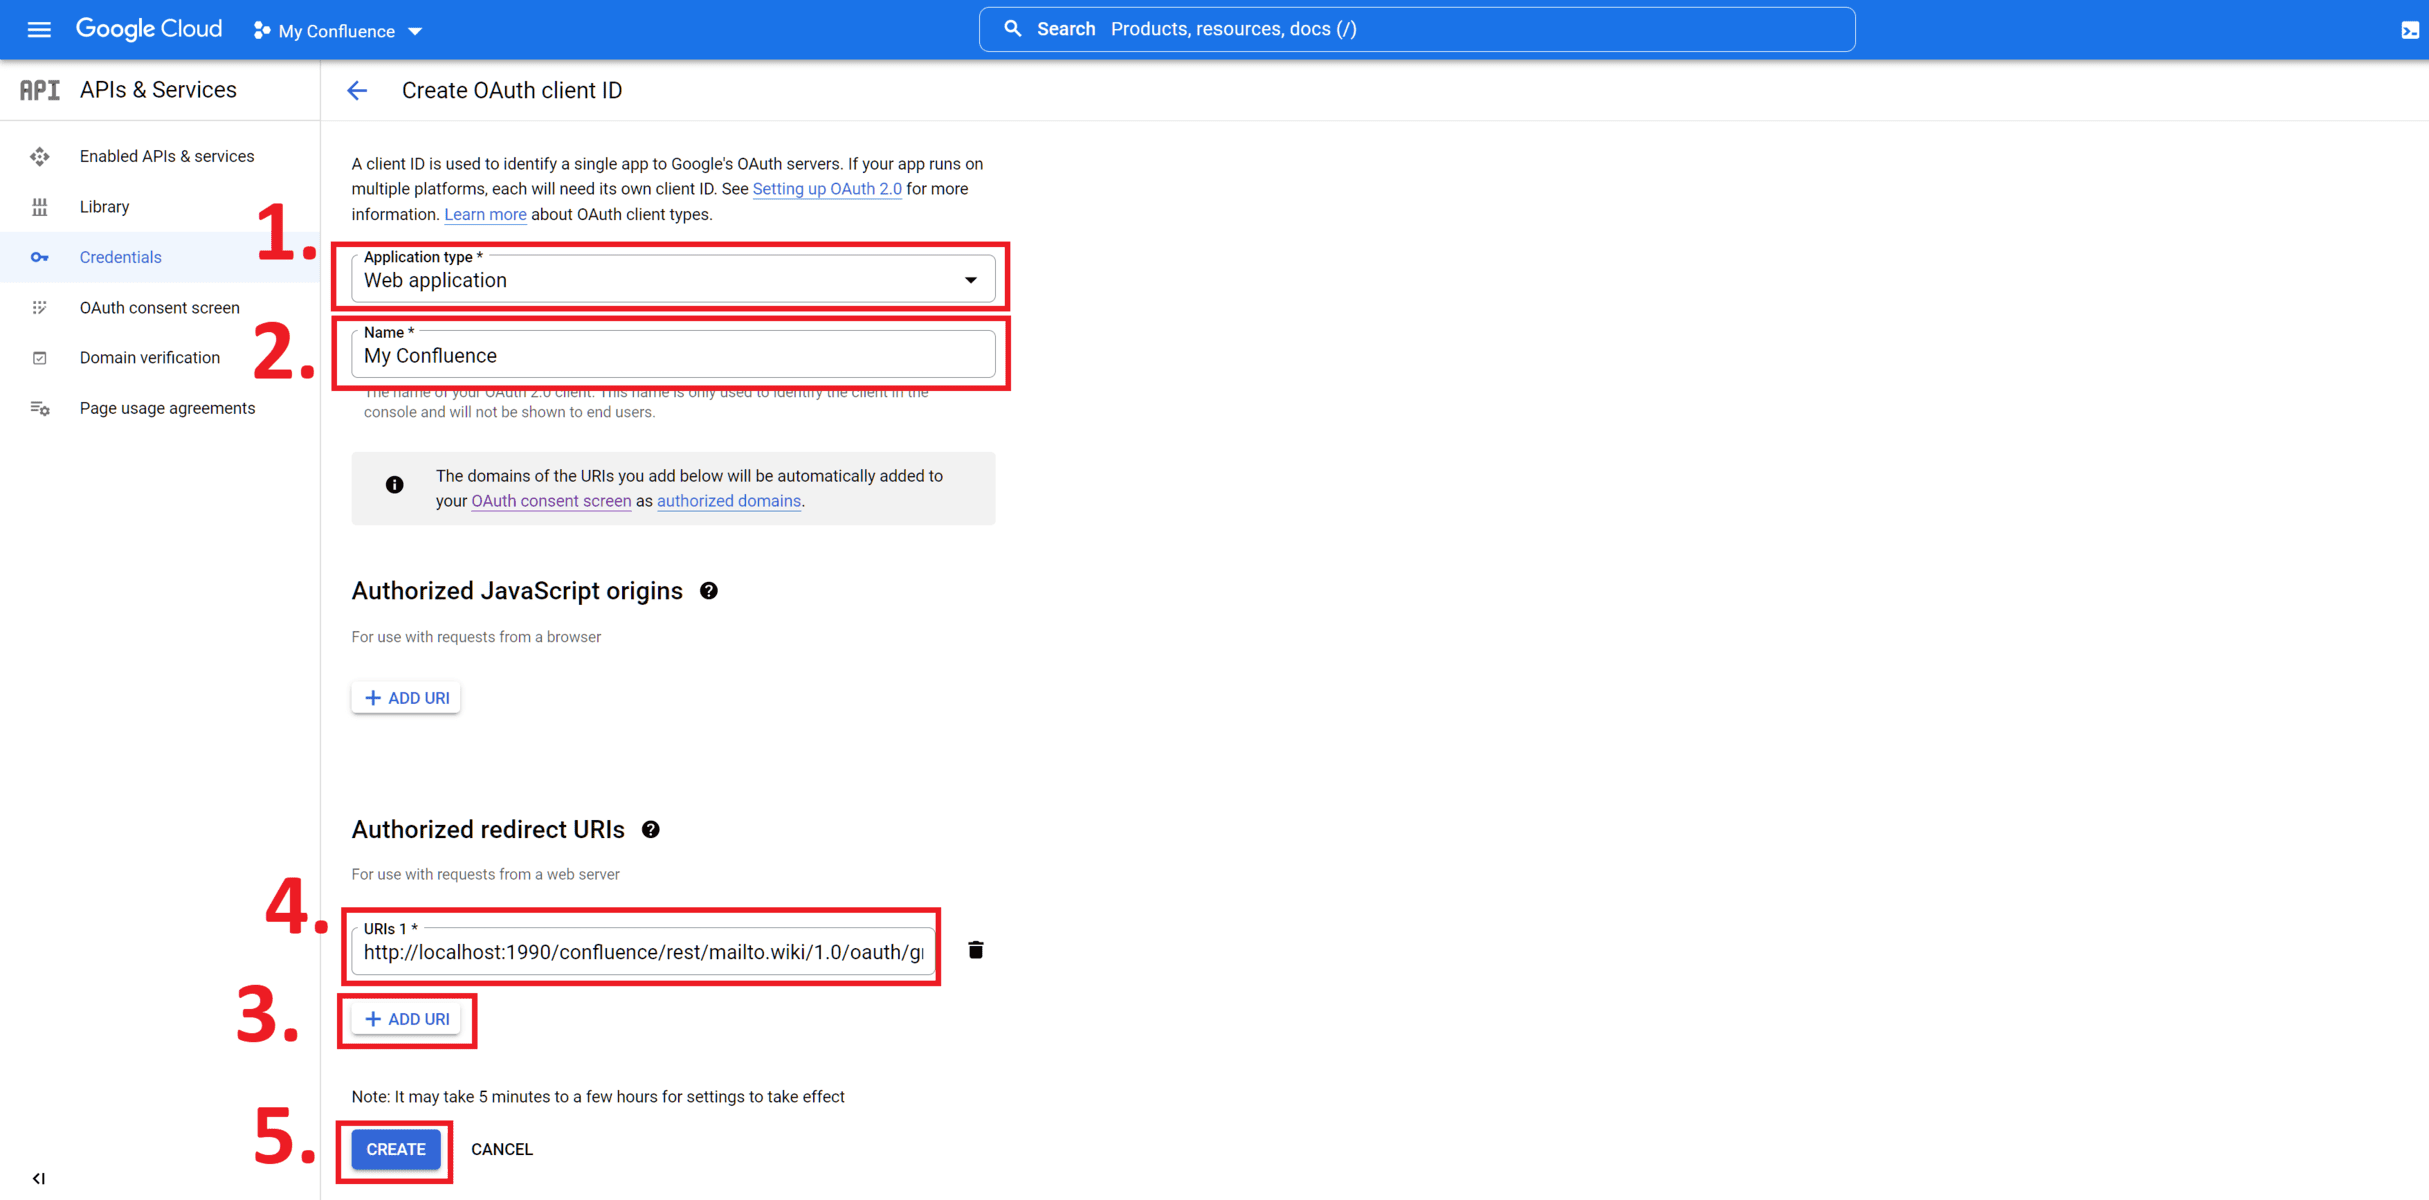
A dialog will open to create an OAuth client. From the “Application type” dropdown, select “Web application”. This will reveal additional fields. Next, provide a name for your OAuth client. Finally, add the redirect URL by clicking on “ADD URI” and enter the redirect URL as displayed on the mailto.wiki configuration page (refer to Step 1):
You have successfully created the OAuth2 client. A dialog should appear displaying your client ID and client secret. Copy and securely store these values for the next step.

Step 6 – Connect Confluence with Gmail
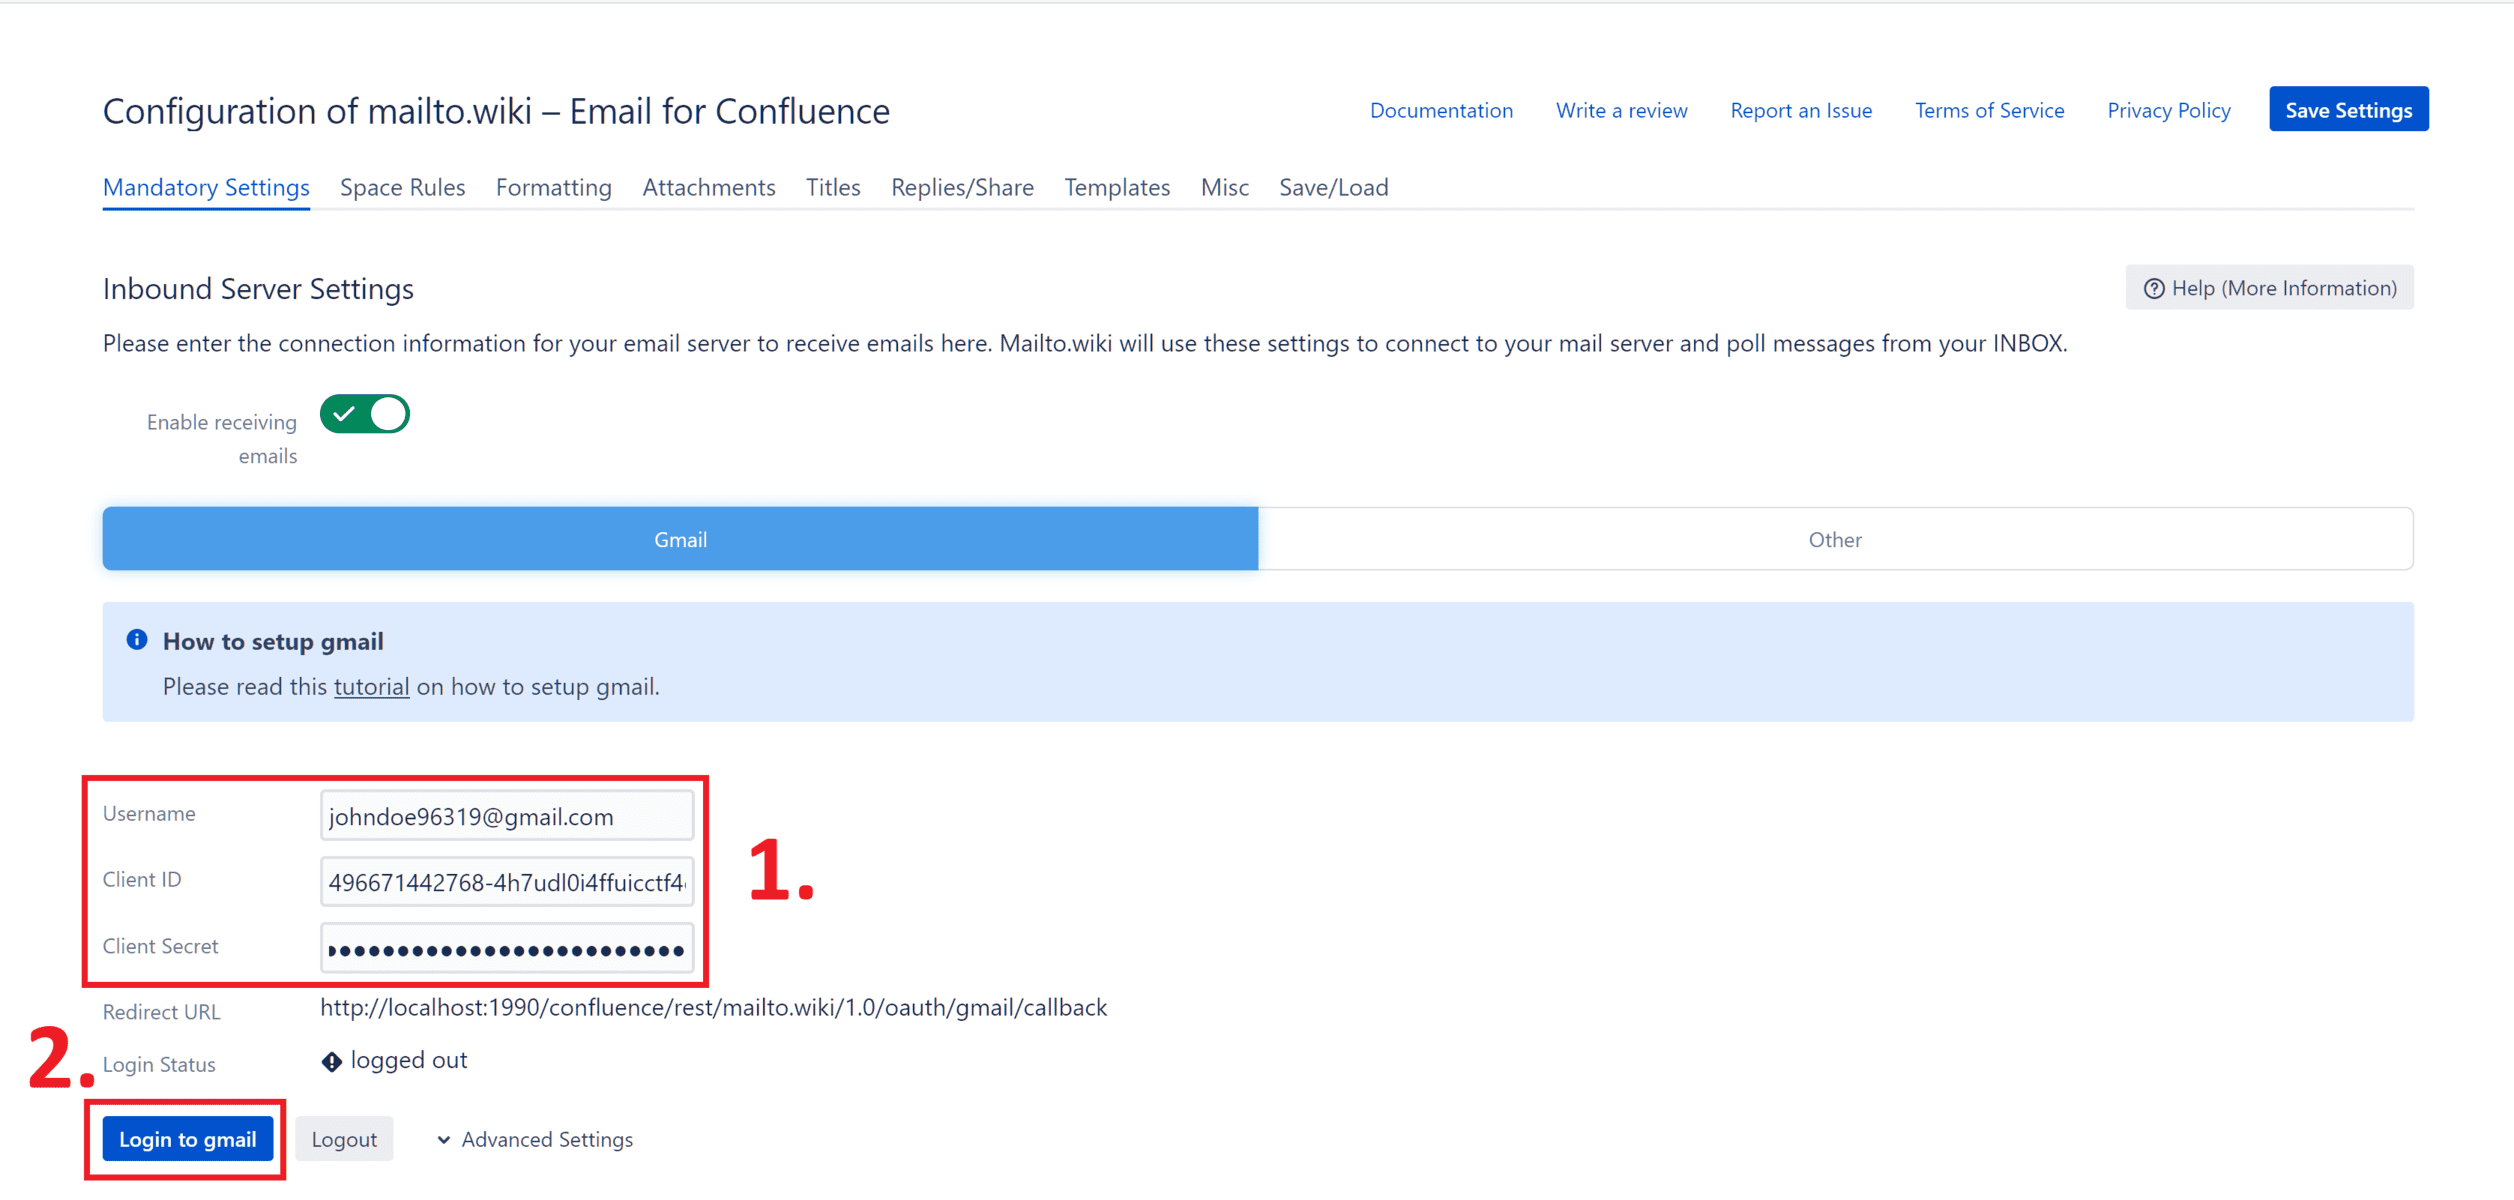
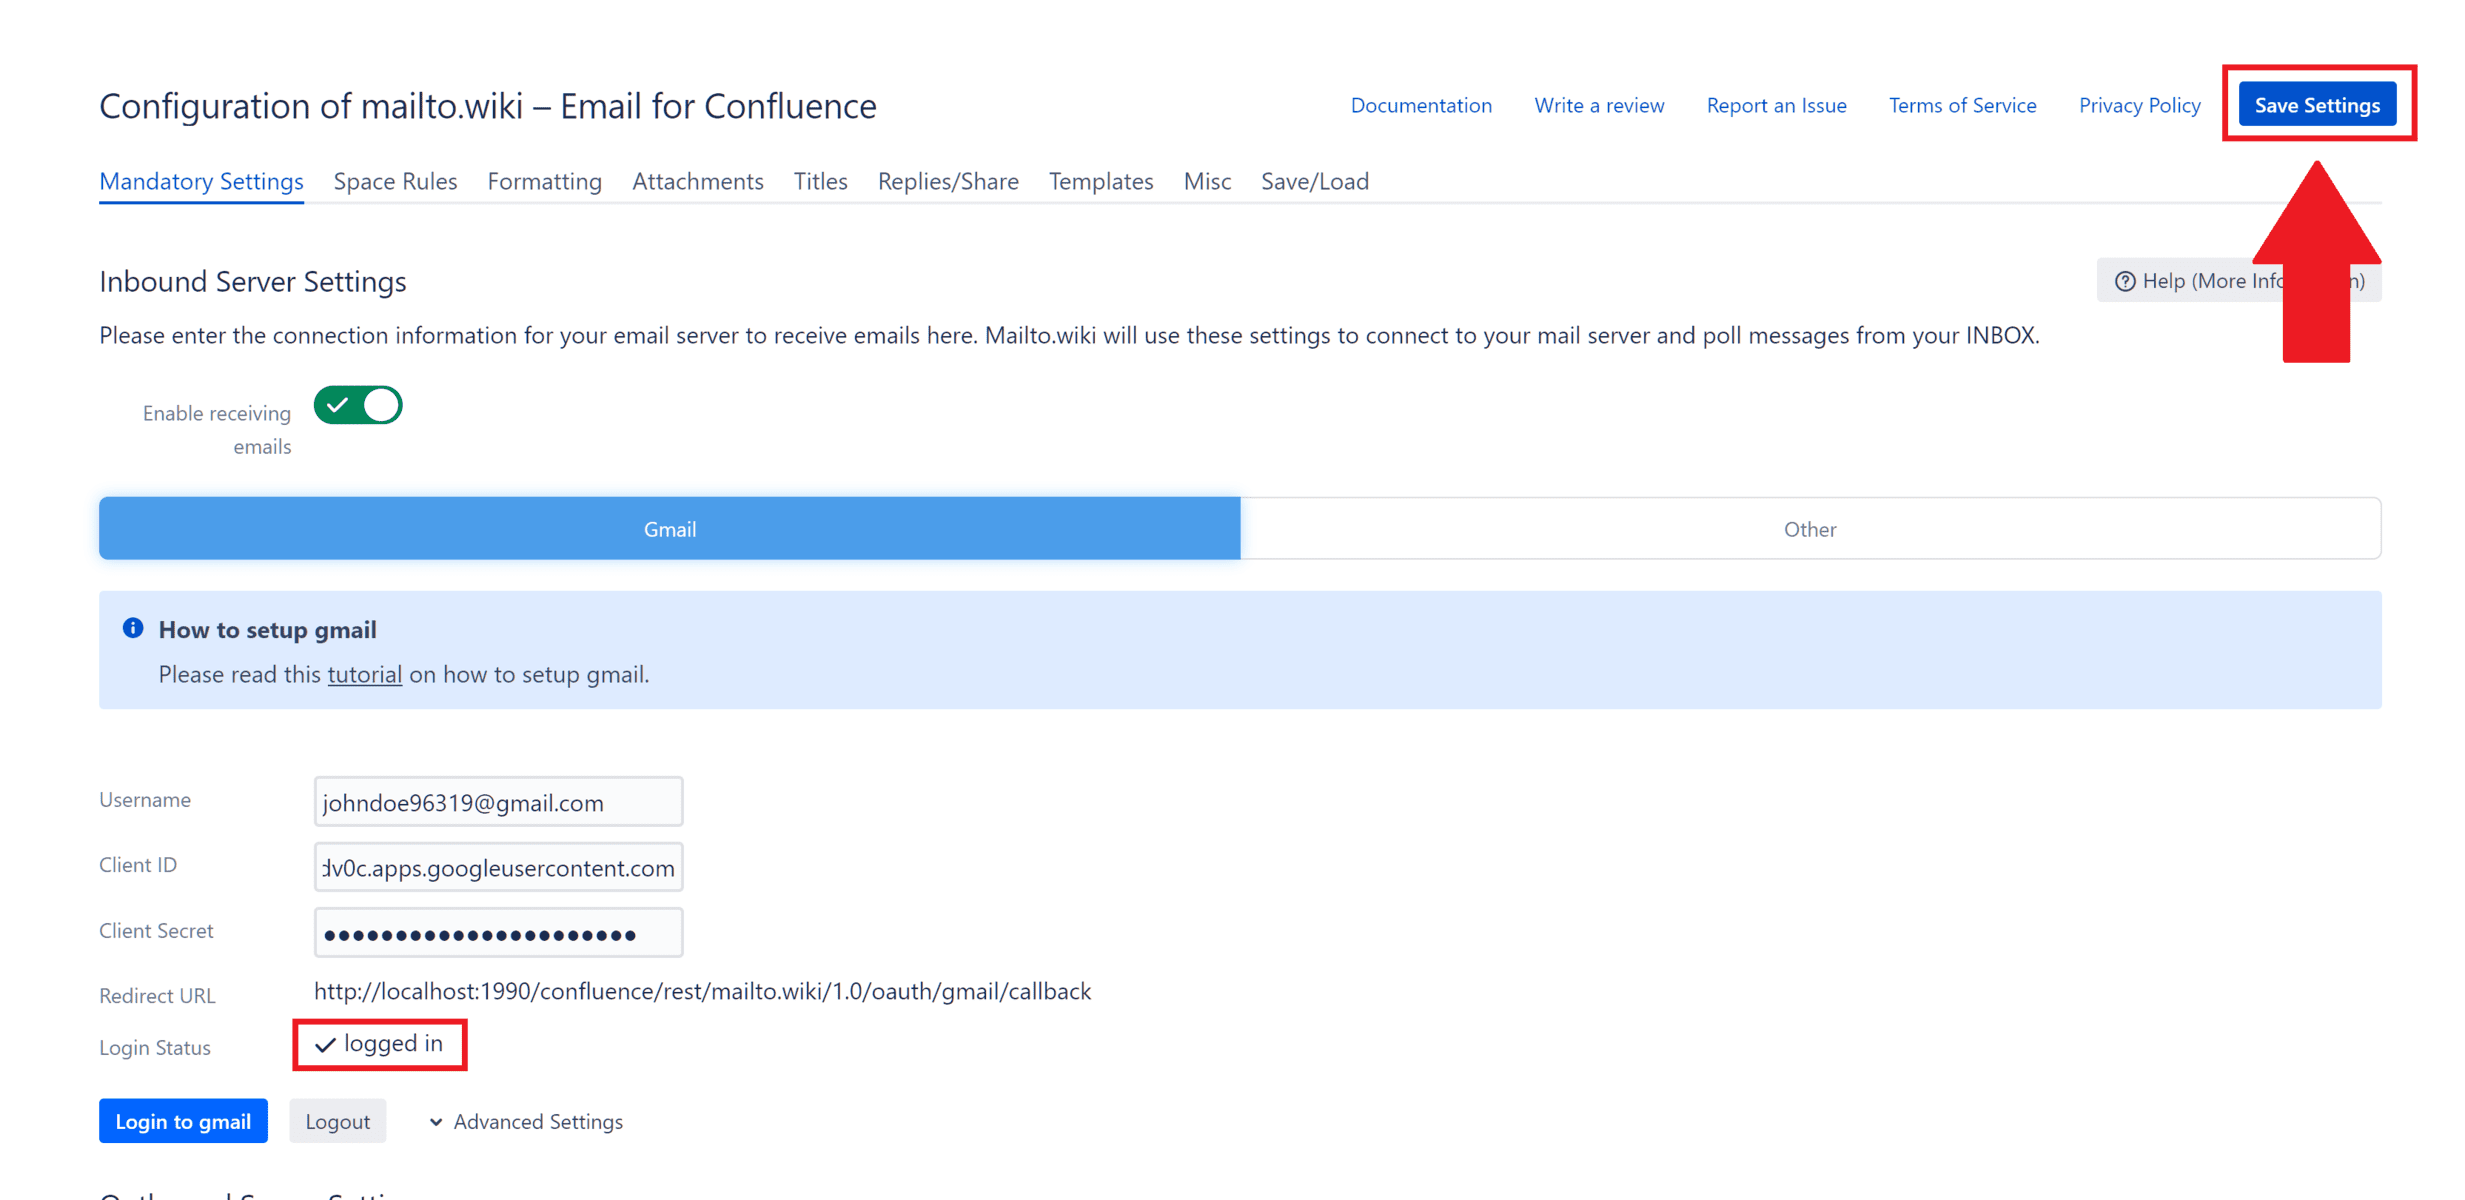
Now, go back to the configuration page of mailto.wiki (Step 1) and enter the Gmail address you want to use with mailto.wiki into the Username field. Additionally, enter the client ID and client secret that you obtained in the previous step. Finally, click on the “Login to Gmail” button:
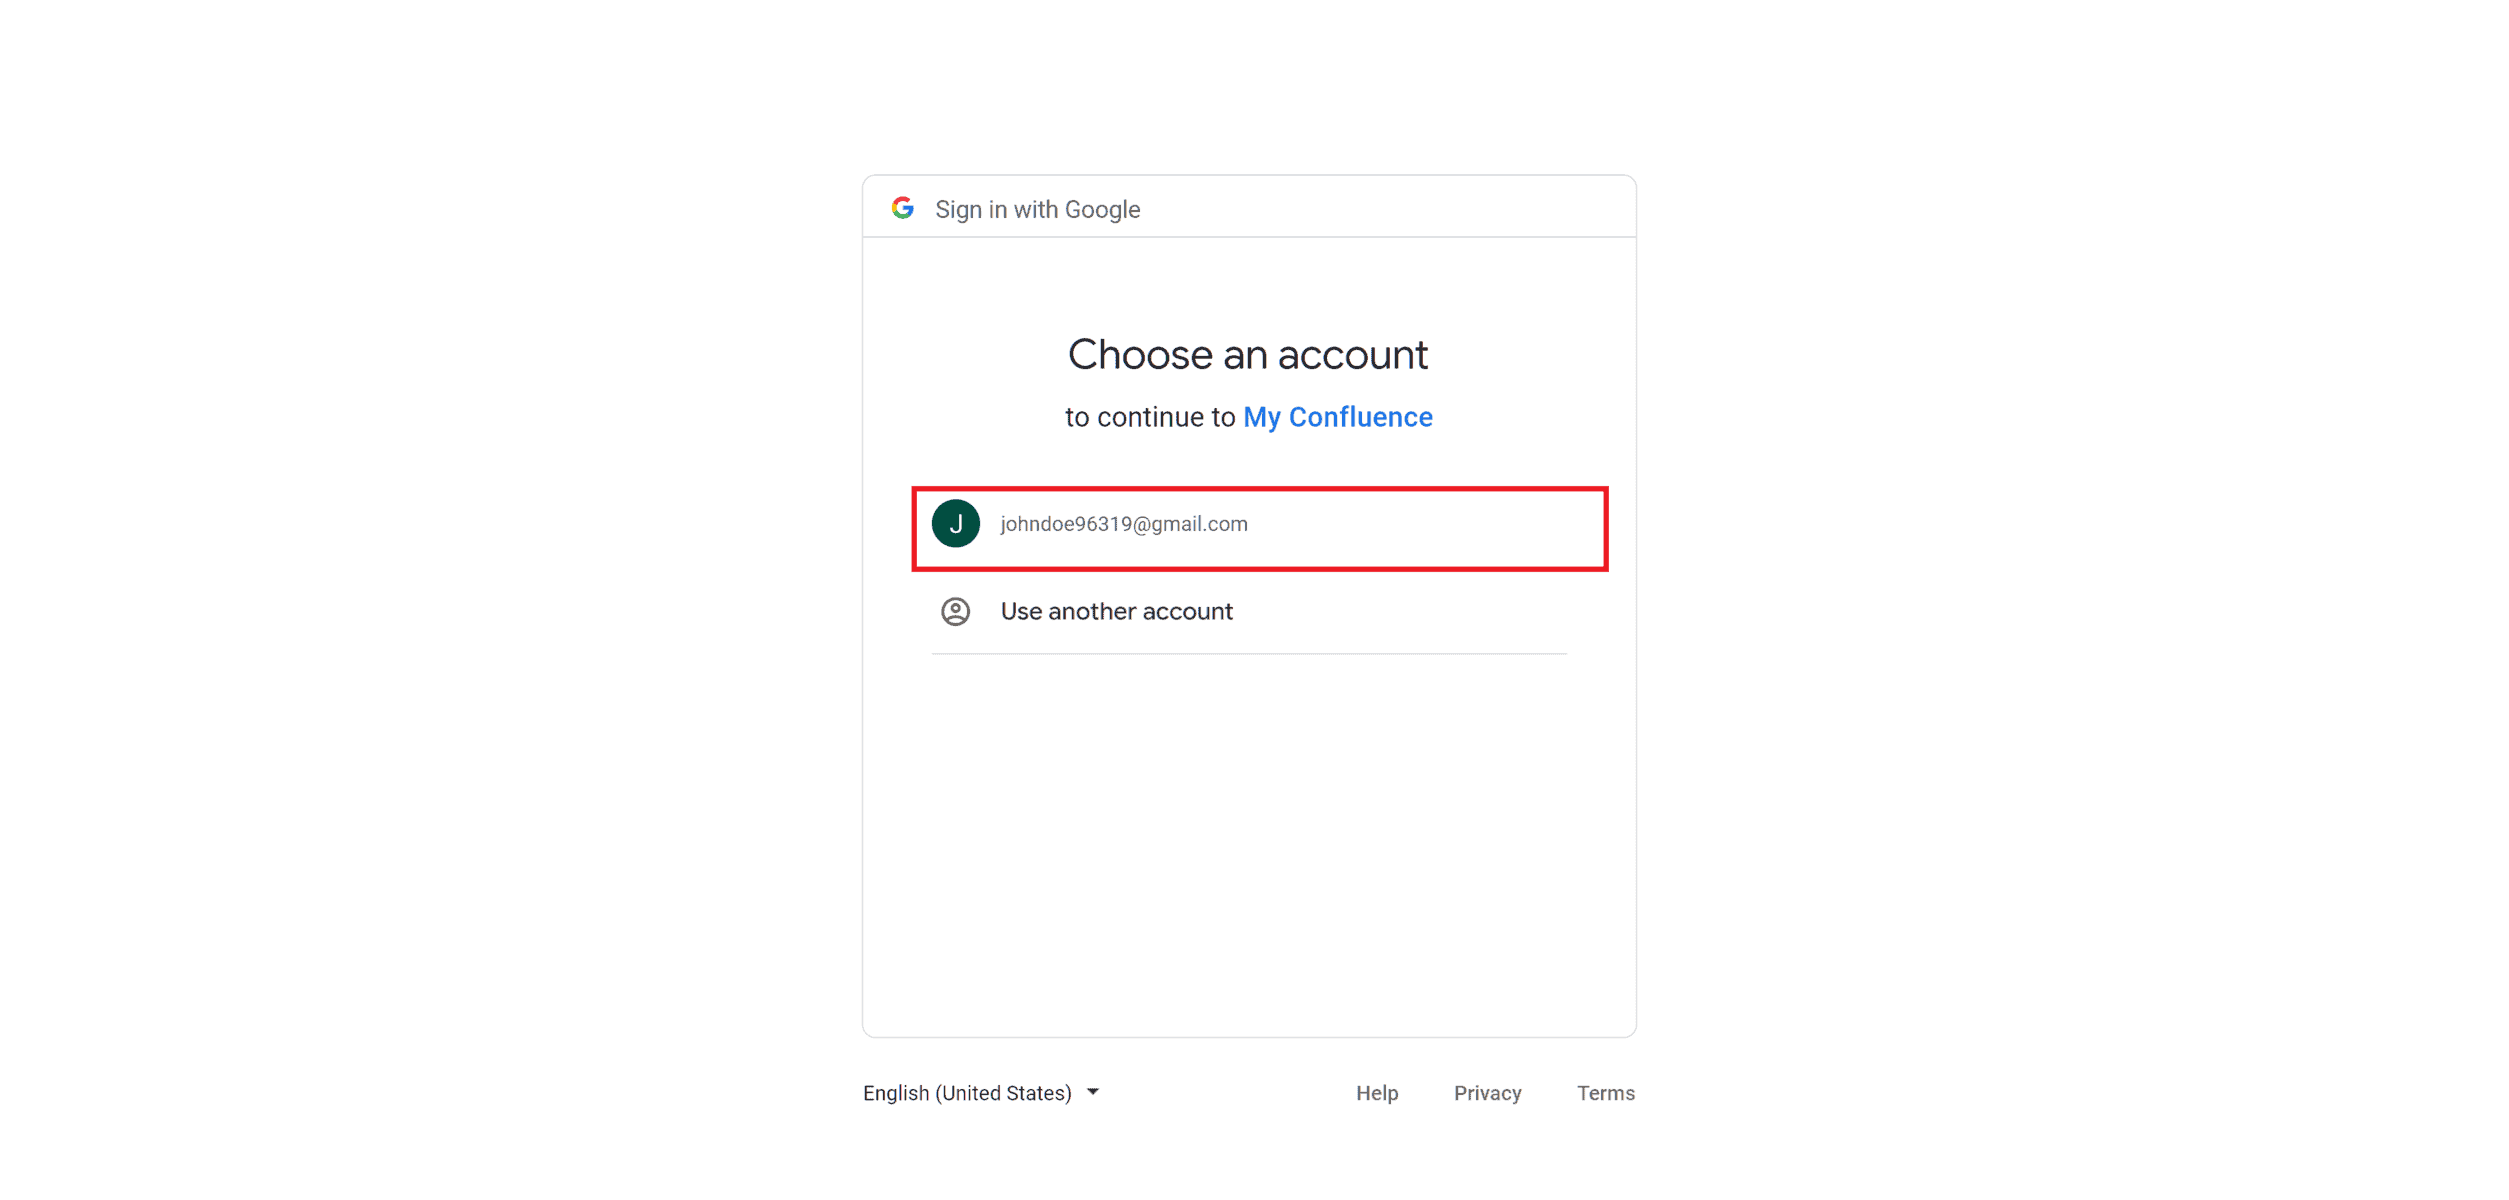
This will open a new tab or window in your browser displaying the “Sign in with Google” dialog. If everything goes well, you should be able to choose the account you want to connect with Confluence. If you encounter any issues and are unable to resolve them on your own, please take a screenshot of the error message and reach out for assistance at support@mailto.wiki.
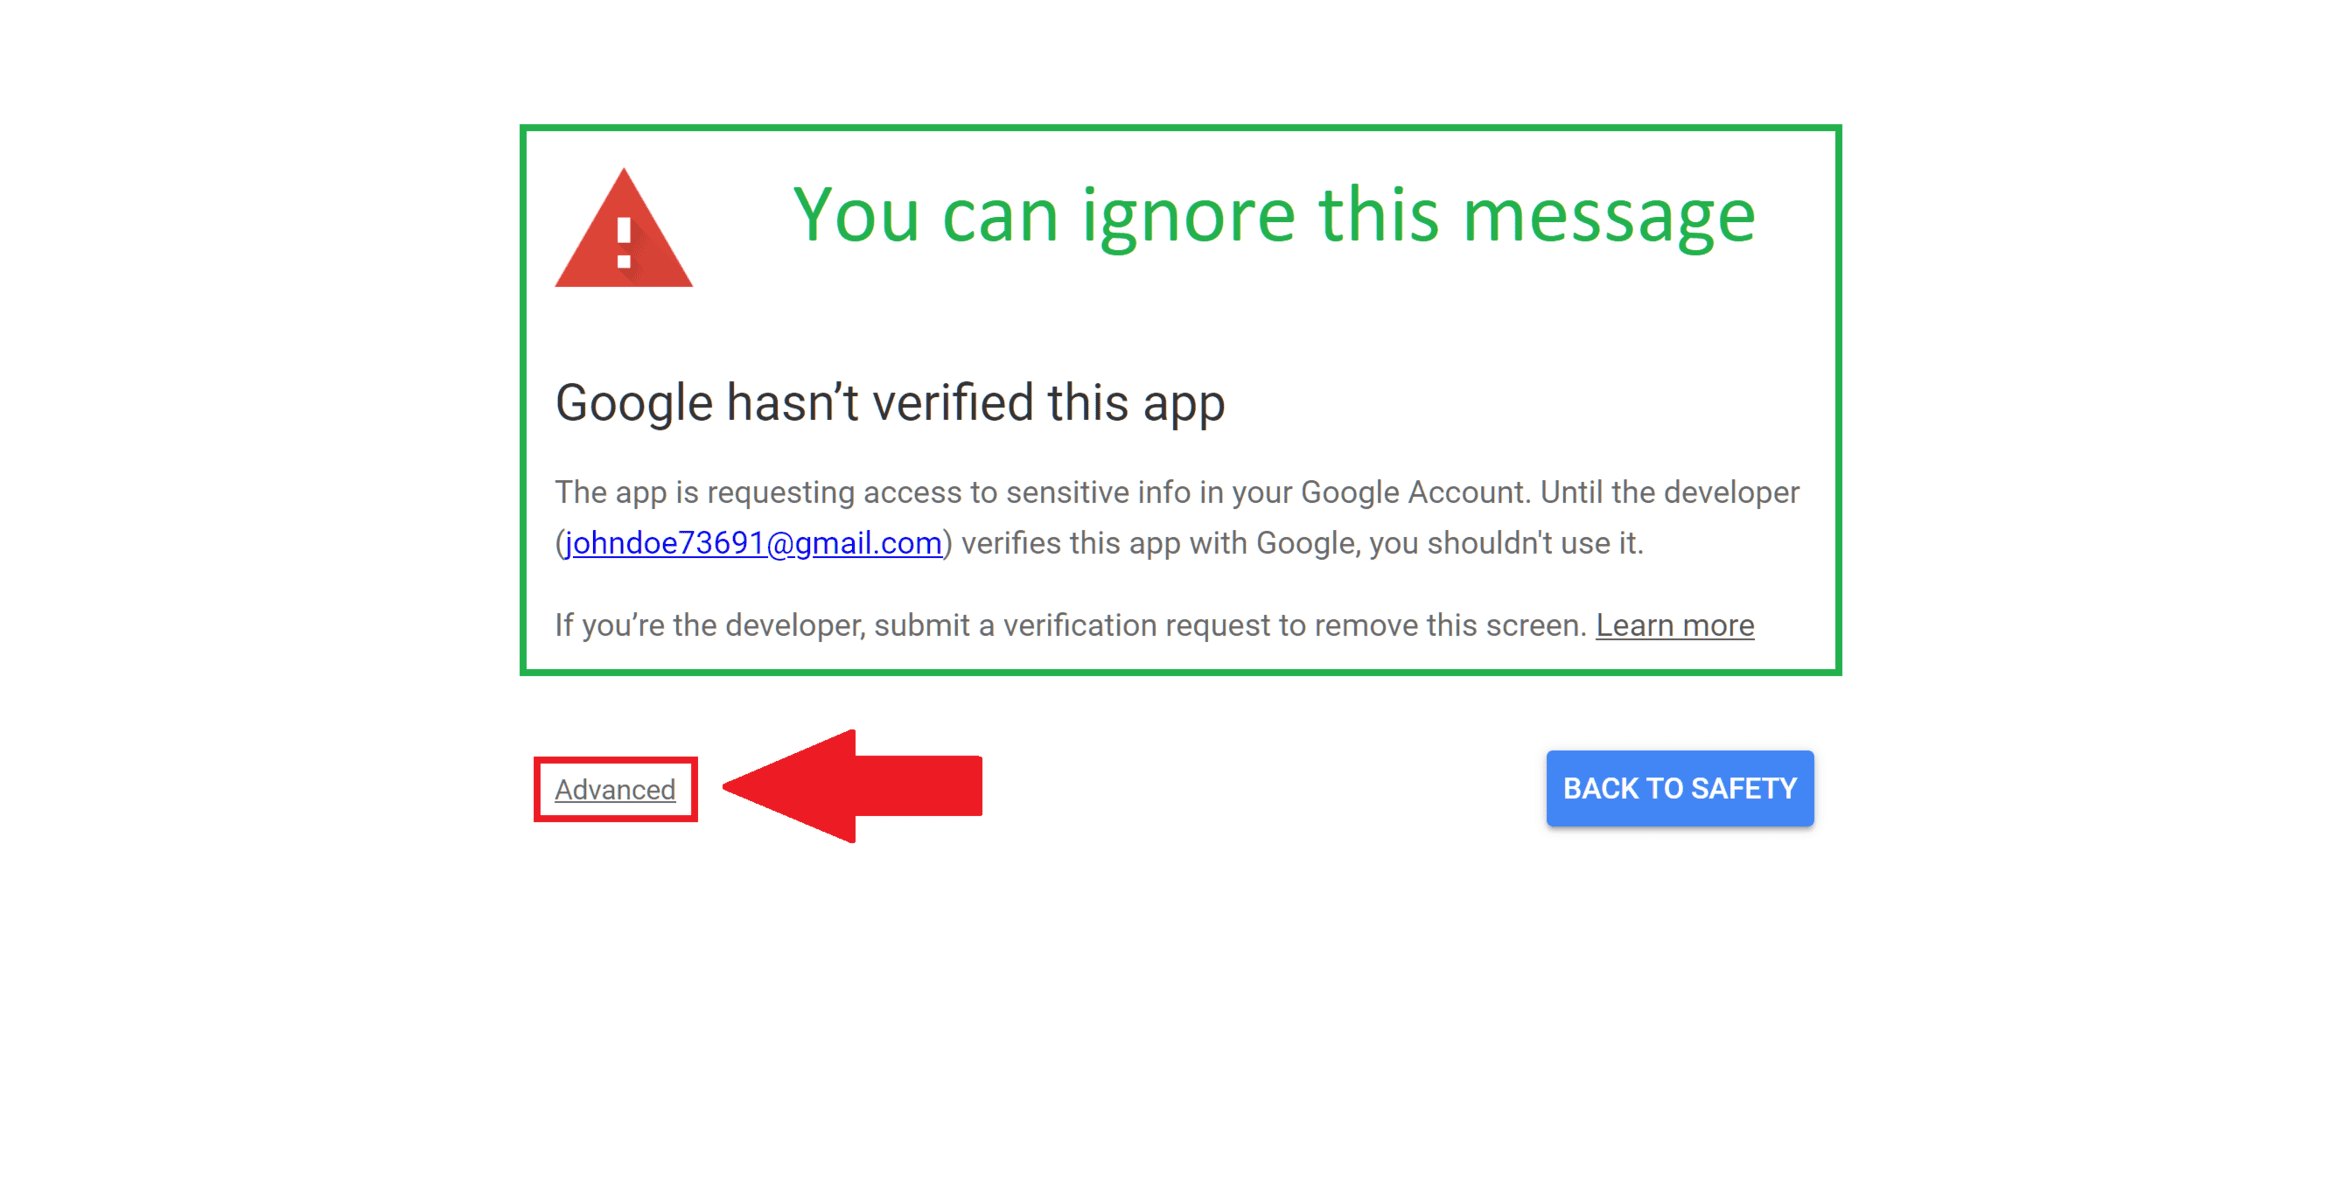
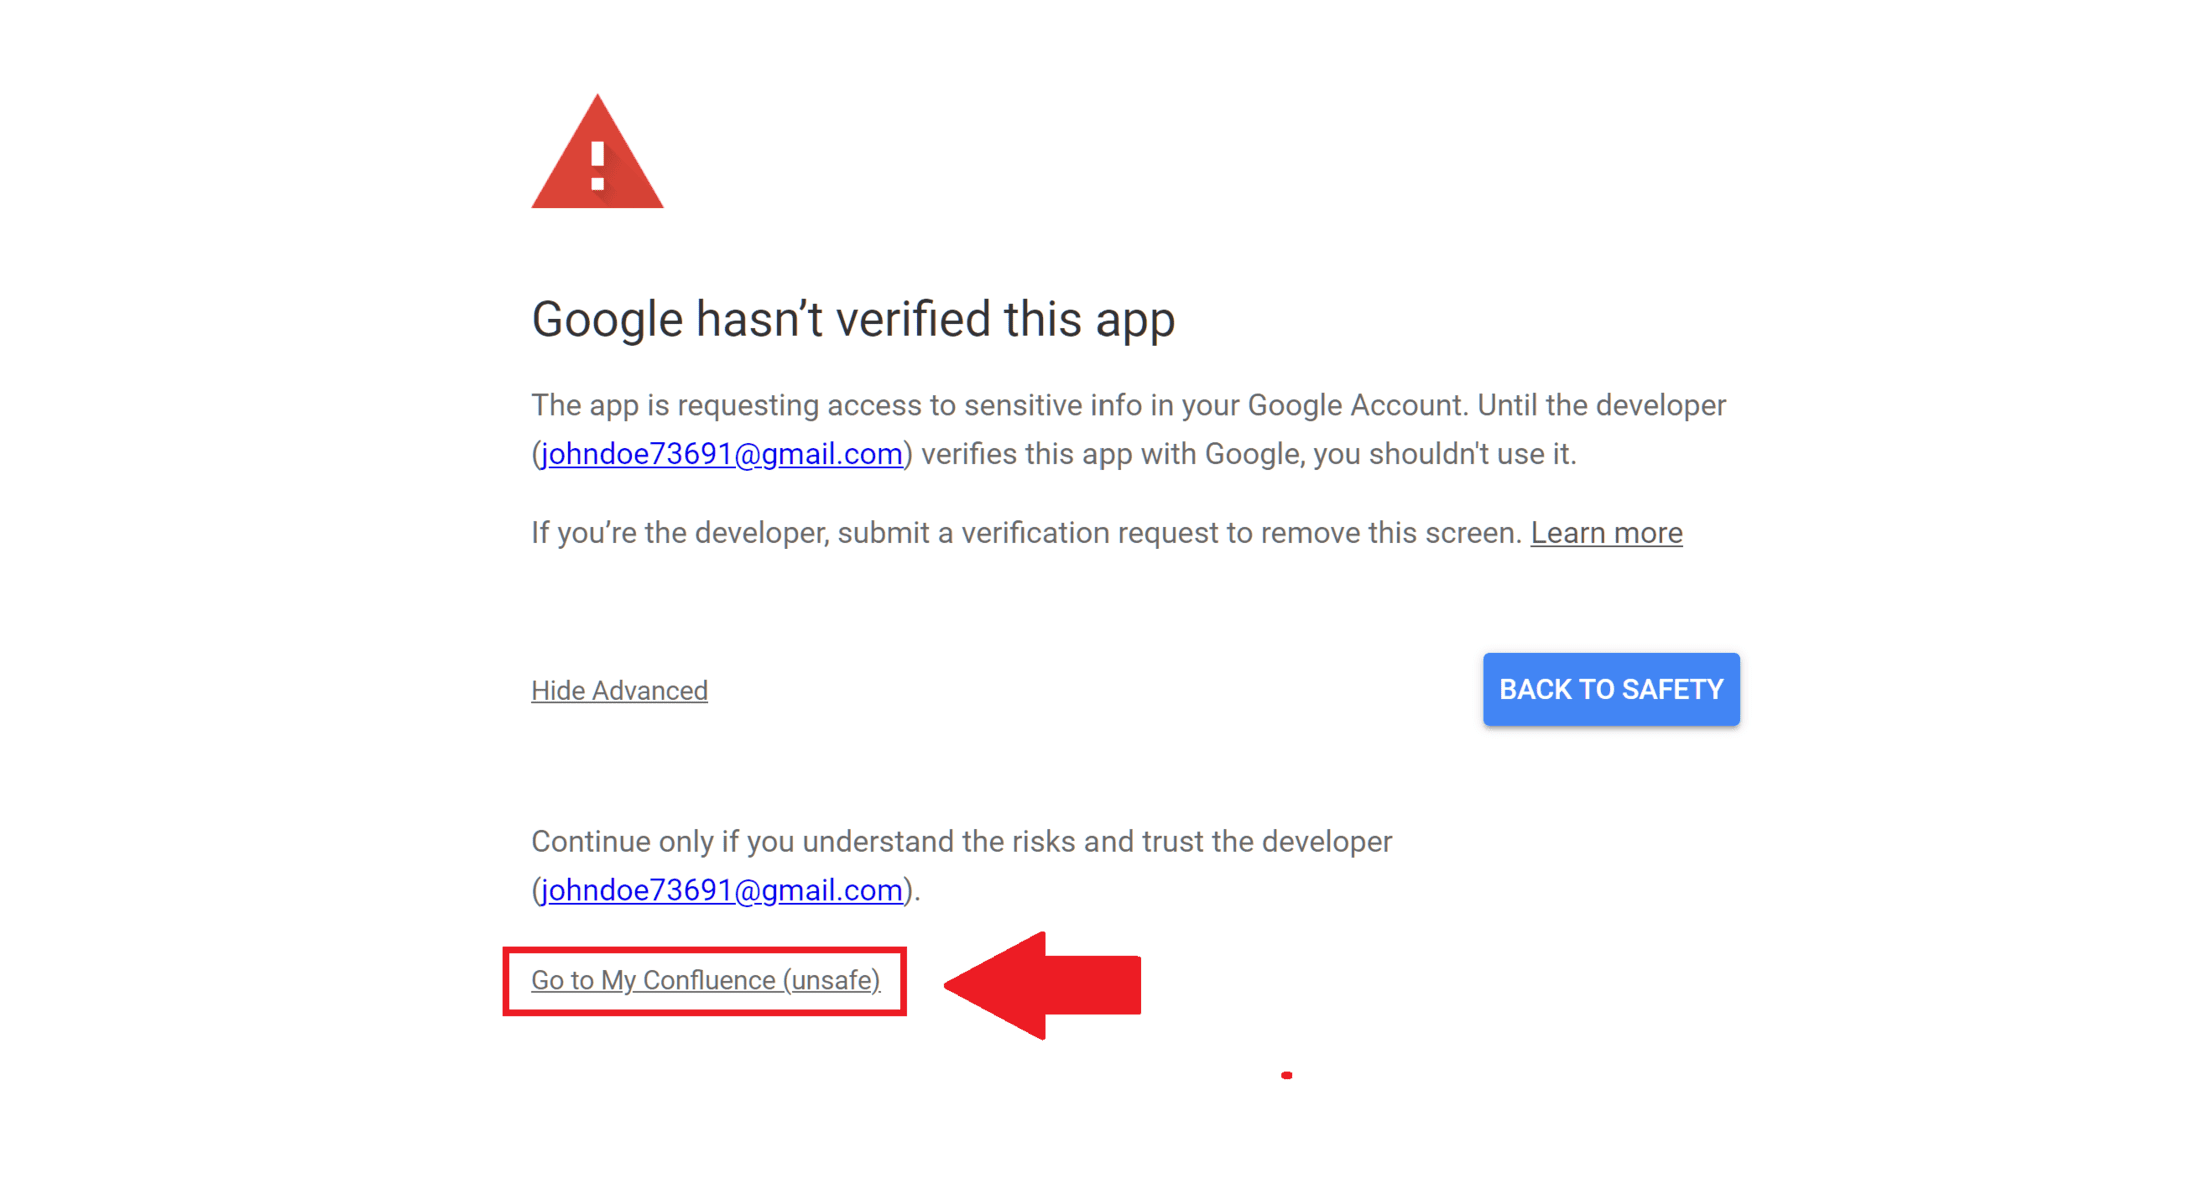
Since we did not complete the verification process in Step 3, Google will prominently display a warning stating that “Google hasn’t verified this app.” This is expected and not a cause for concern. Proceeding with the connection has no security implications. When the warning appears, click on “Advanced” and then click on “Go to your project name (unsafe).”
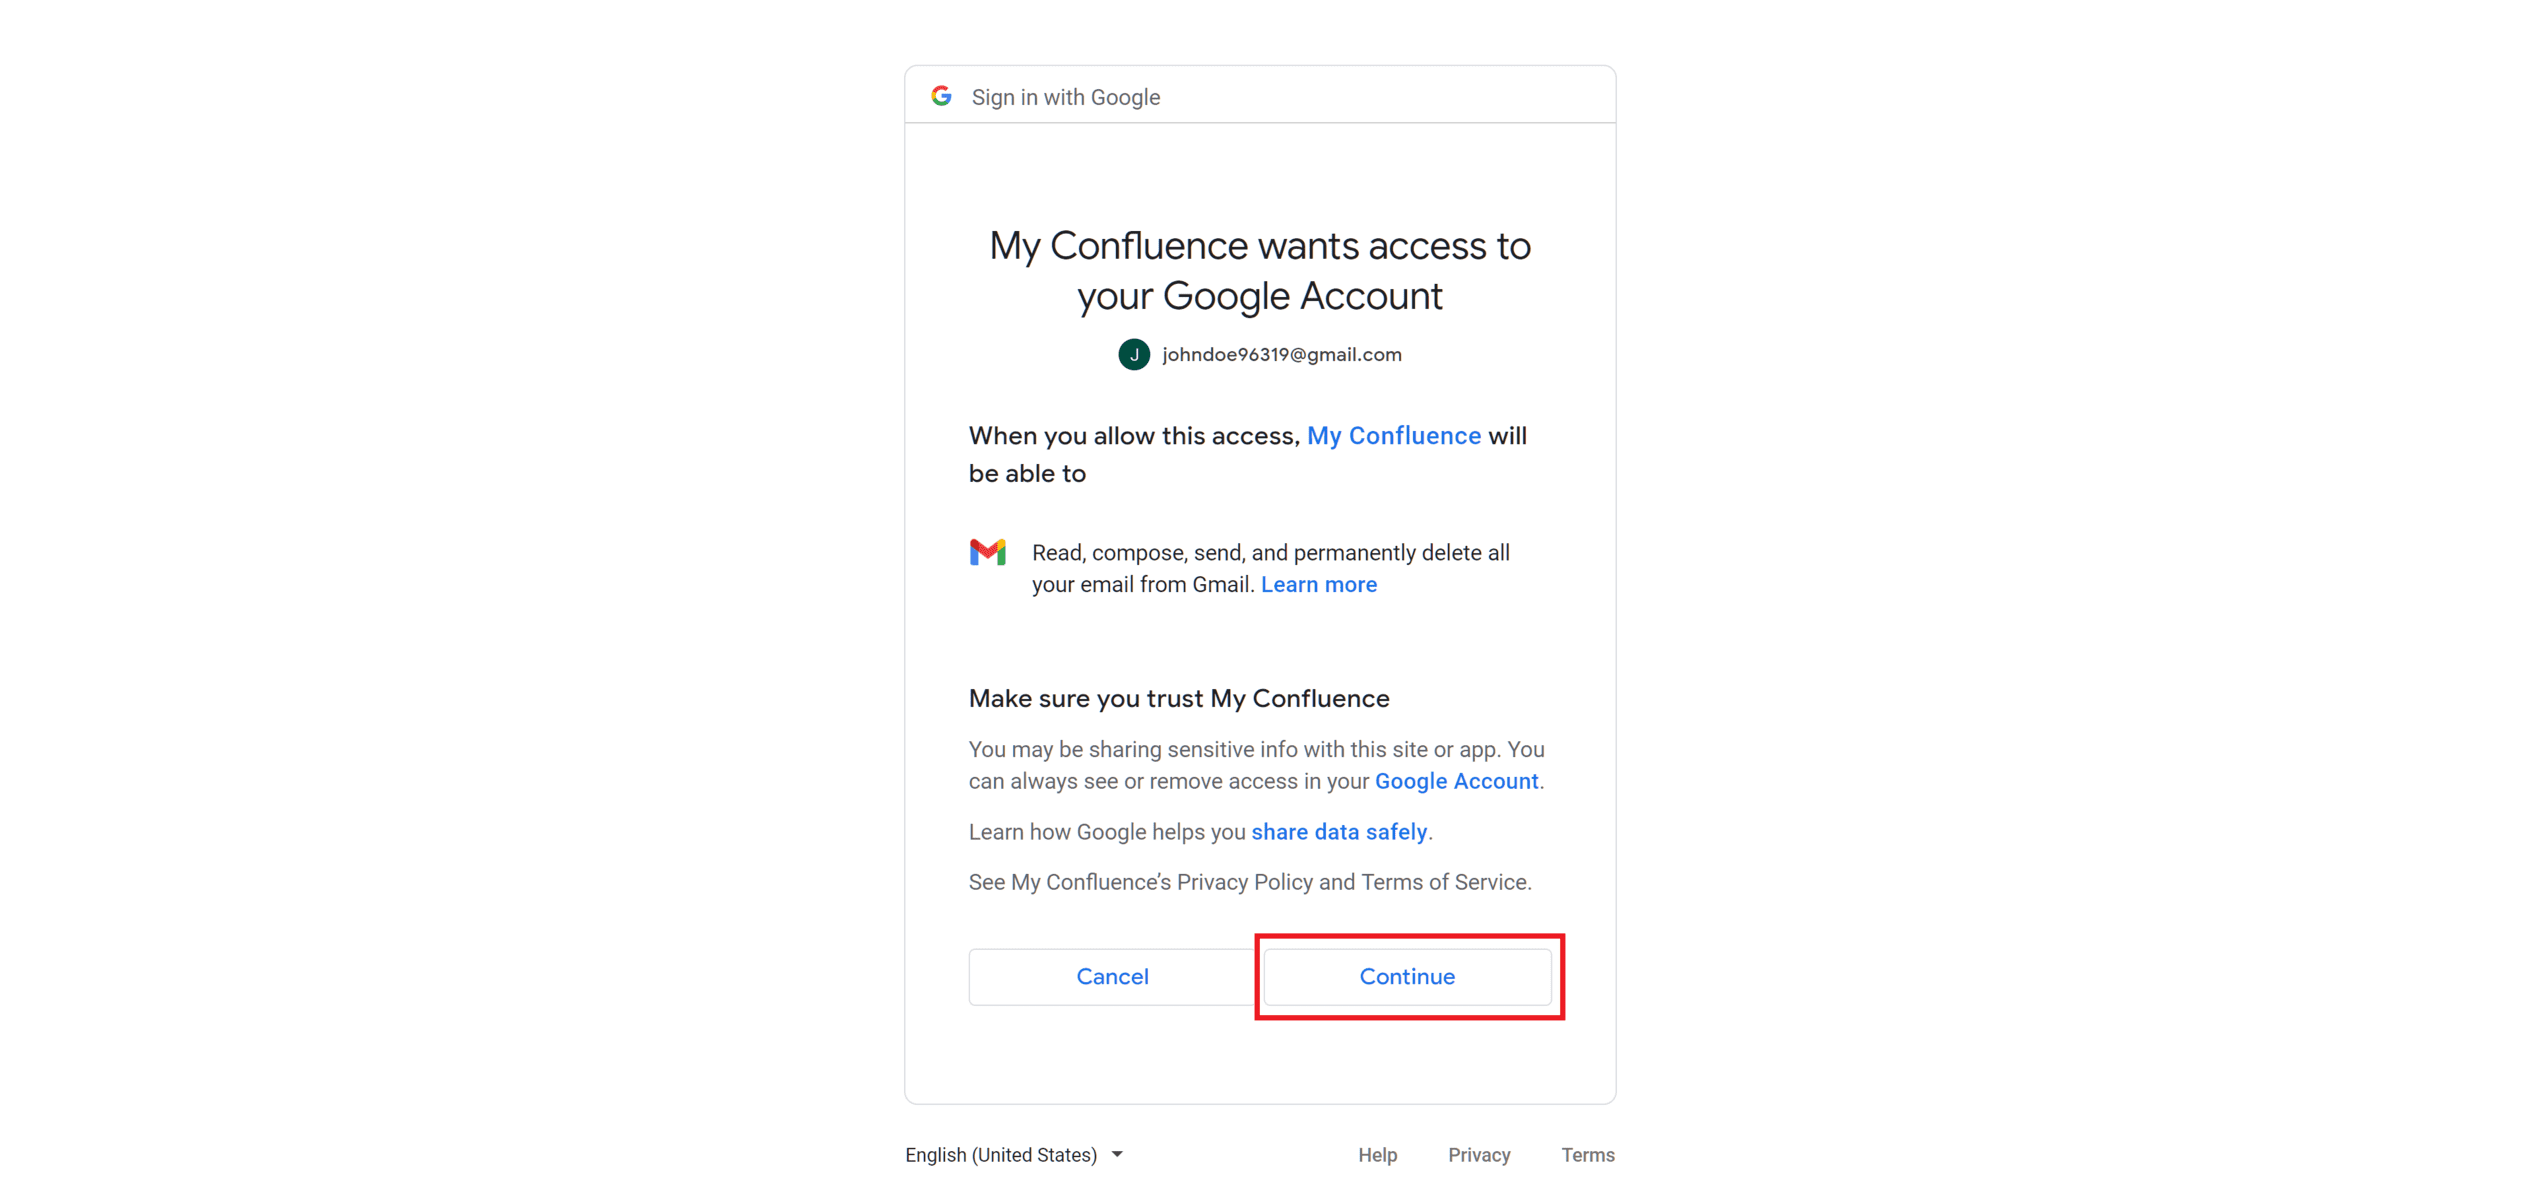
Next, Google will prompt you to grant Confluence permission to access Gmail. Confirm this by clicking on “Continue.”
If everything went smoothly, you should now see a success message indicating that the connection with Gmail has been established. If you do not see this message or encounter any issues, please take a screenshot and contact support@mailto.wiki for further assistance.
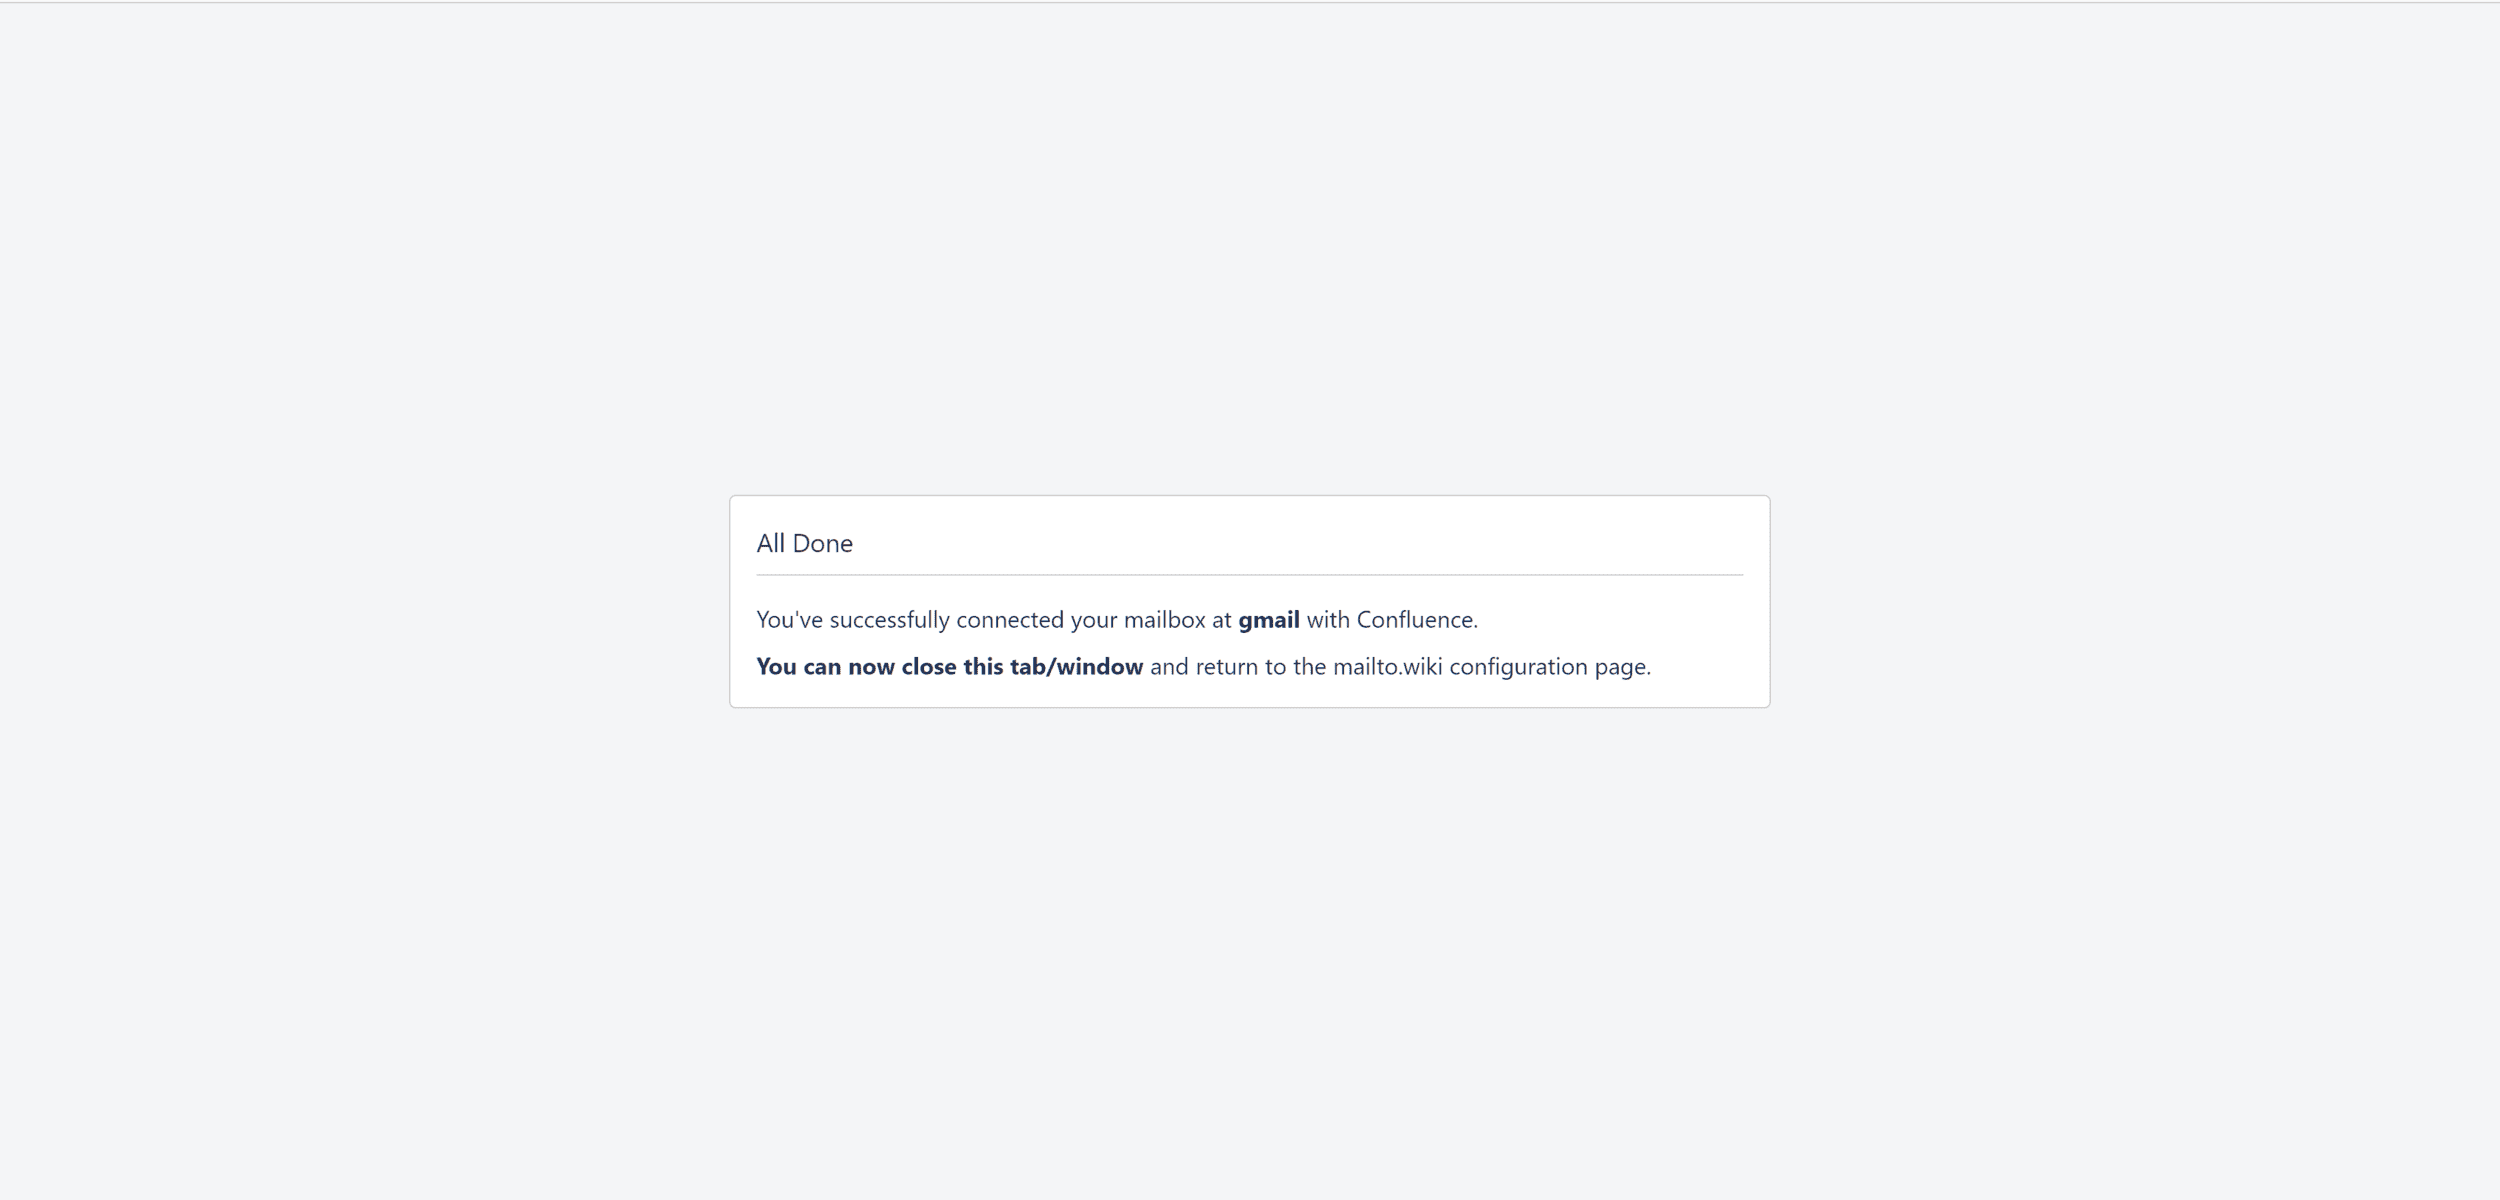
Finally, close the tab or window displaying the success message and return to the configuration screen. After waiting for about 10 seconds, the configuration screen should reflect that you are logged in. Don’t forget to save your settings by clicking on the “Save Settings” button.
Conclusion
Congratulations! You have successfully learned how to connect Gmail with mailto.wiki. Remember that you can use the same client ID and secret for both the Inbound Server Settings and the Outbound Server Settings. In case you change your password for the Gmail account or encounter any issues with receiving emails in Confluence, simply revisit the configuration page and ensure that you are still logged in to Gmail.
If you encounter any difficulties or have further questions, please do not hesitate to reach out to support@mailto.wiki for assistance.