

Getting Started
After successfully installing the add-on, there are a few basic configuration settings that need to be made before you can send your first email to Confluence.
To follow this guide, you will need administrative rights. If you are not a Confluence Administrator, please ask a Confluence admin in your organization to perform the steps on your behalf.
Step 1 – Access the Configuration Page
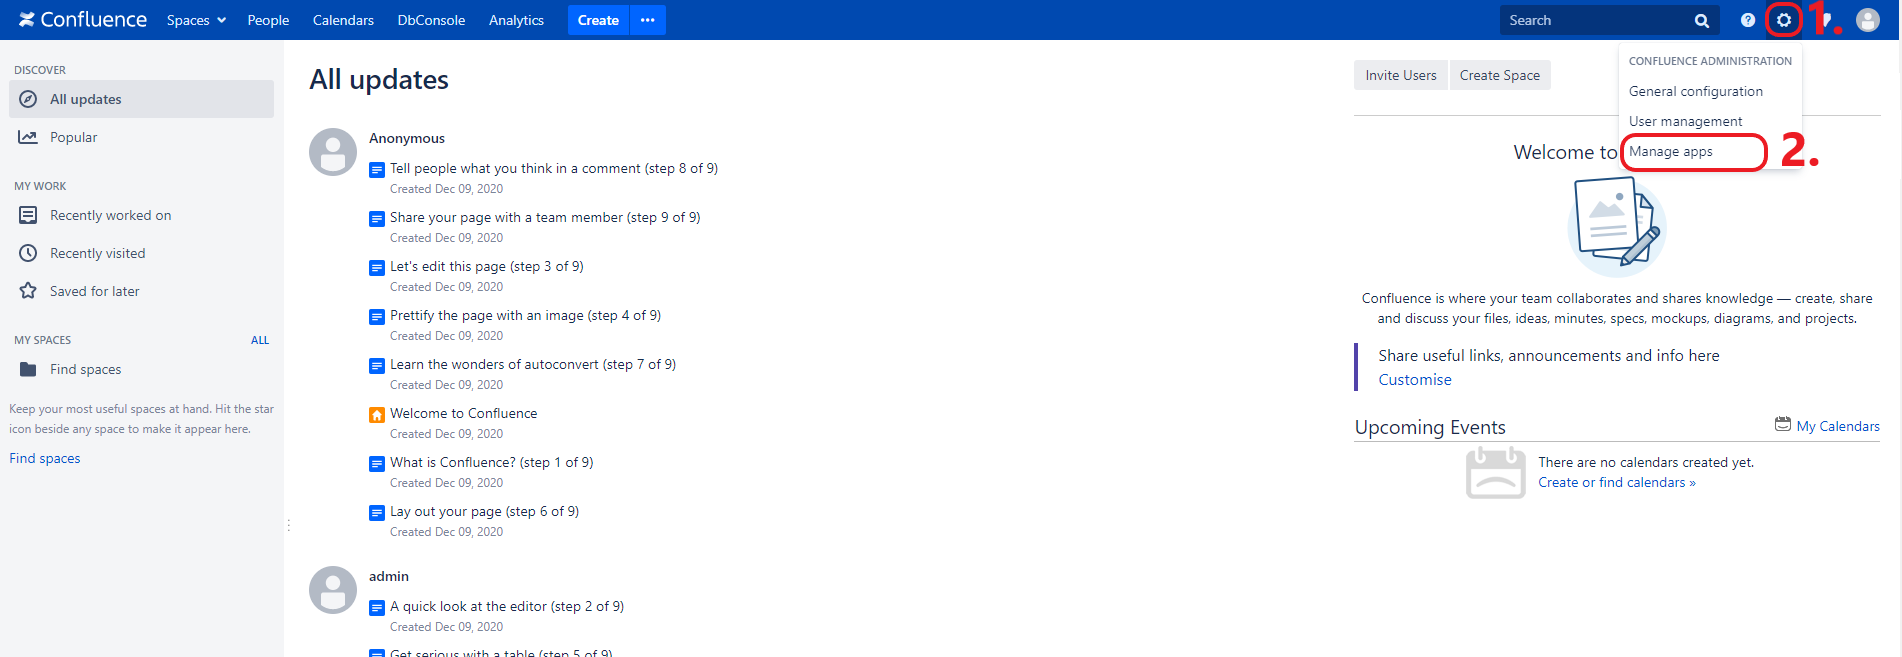
Navigate to the Confluence Welcome Page or any other page in Confluence. In the menu bar at the top right of your screen, click on the Settings icon. From the drop-down menu, select Manage apps.
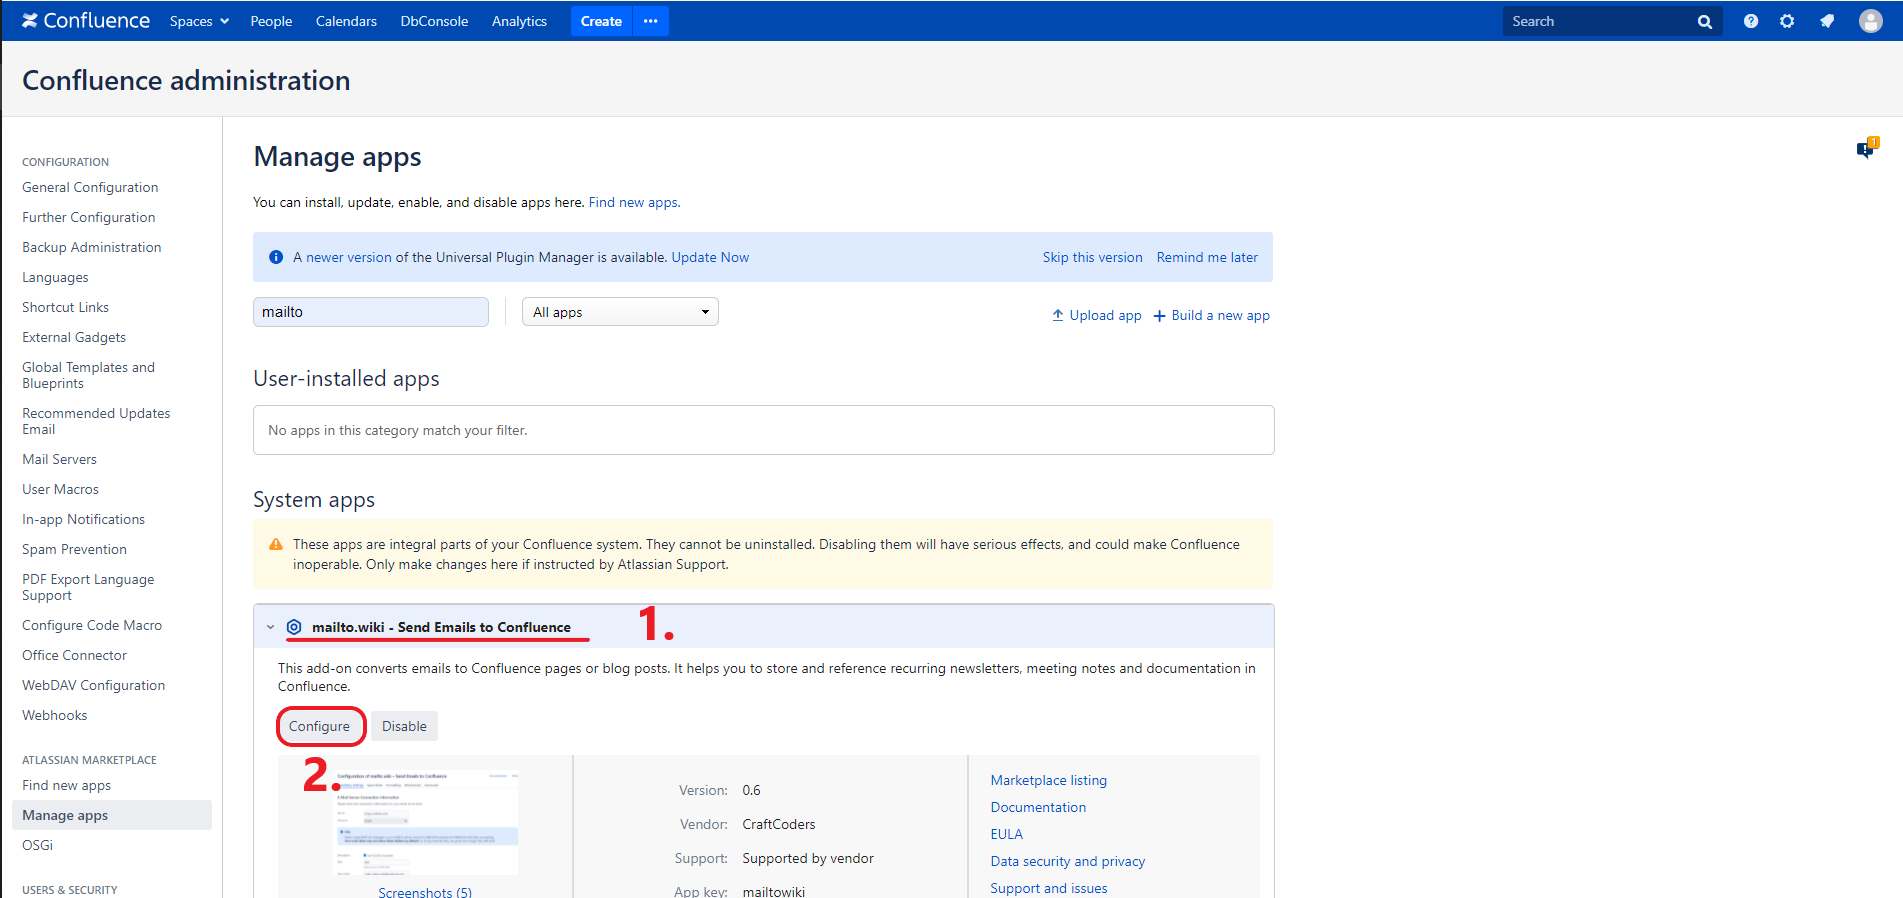
This will take you to an overview page that displays all of your currently installed add-ons. Locate the mailto.wiki – Email for Confluence add-on and expand the section by clicking on its title. Then, click on the Configure button to access the configuration page for the add-on.
Step 2 – Mandatory Settings
You should now be on the configuration page for the add-on.
Before you can send your first email, there are three things you need to do: set up your email server connection information, set the default space, and define the default content type.
Every email you send to your registered email account will be automatically inserted into your default space as a page or blog post, depending on your configured default content type. Think of the default space as your INBOX.
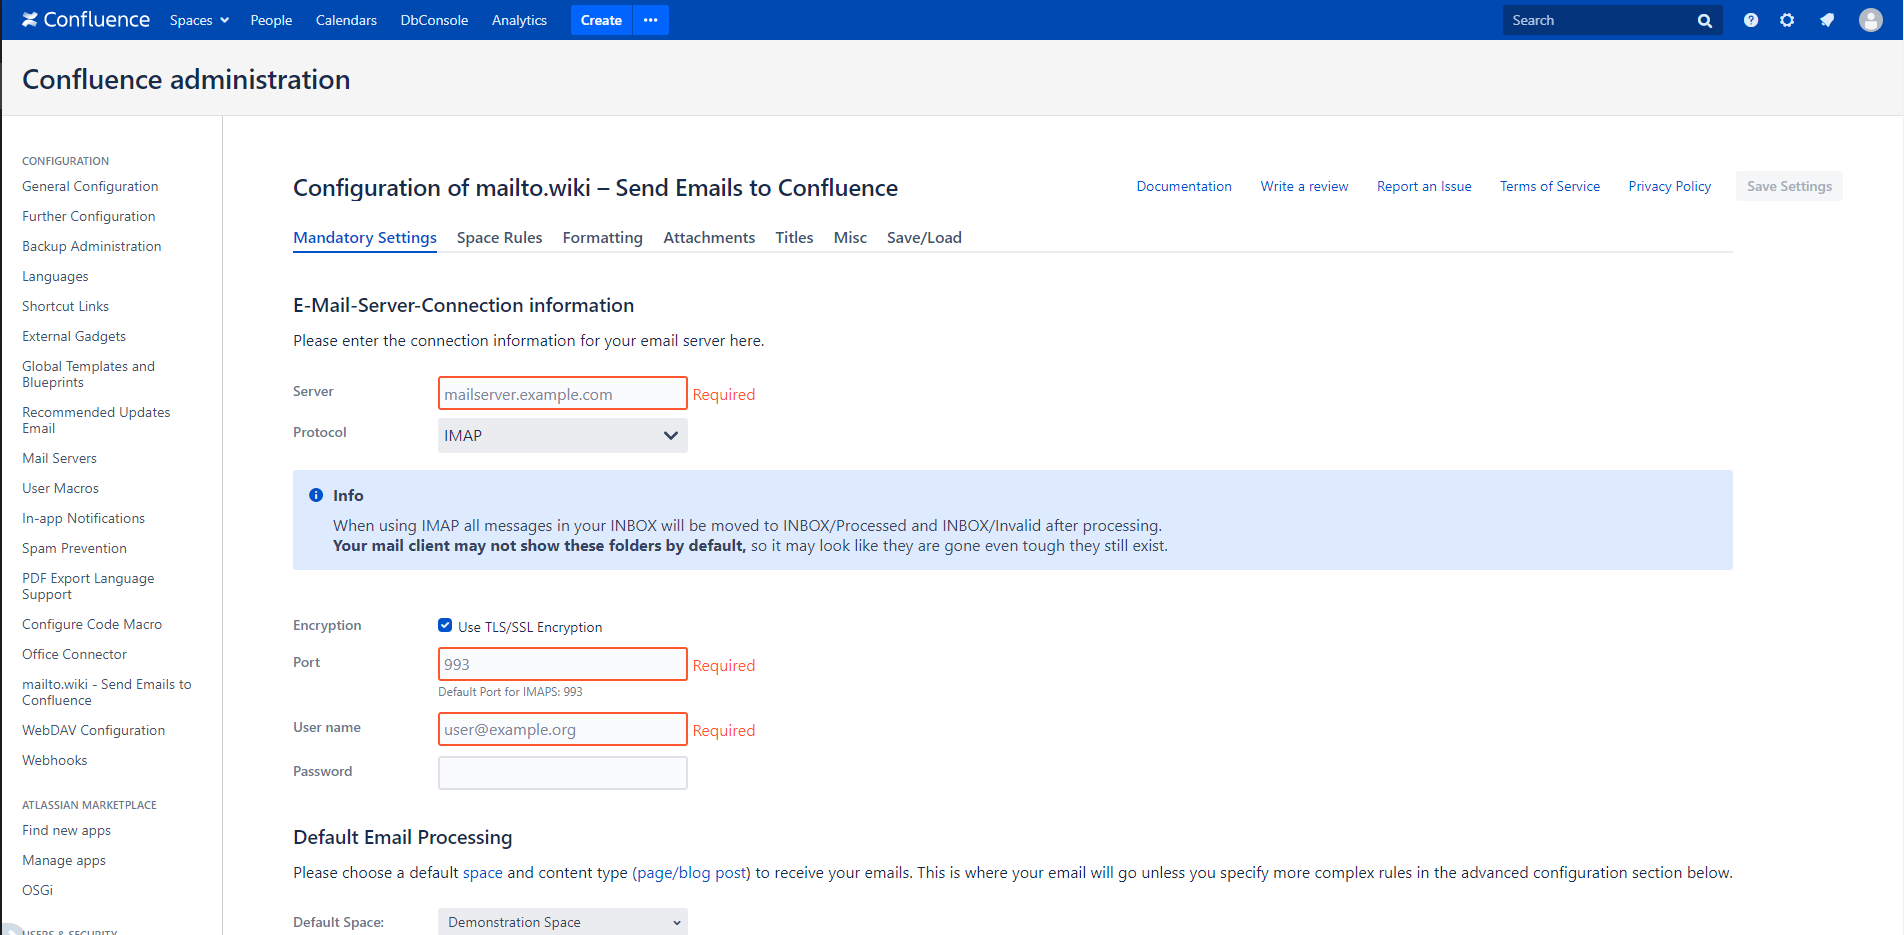
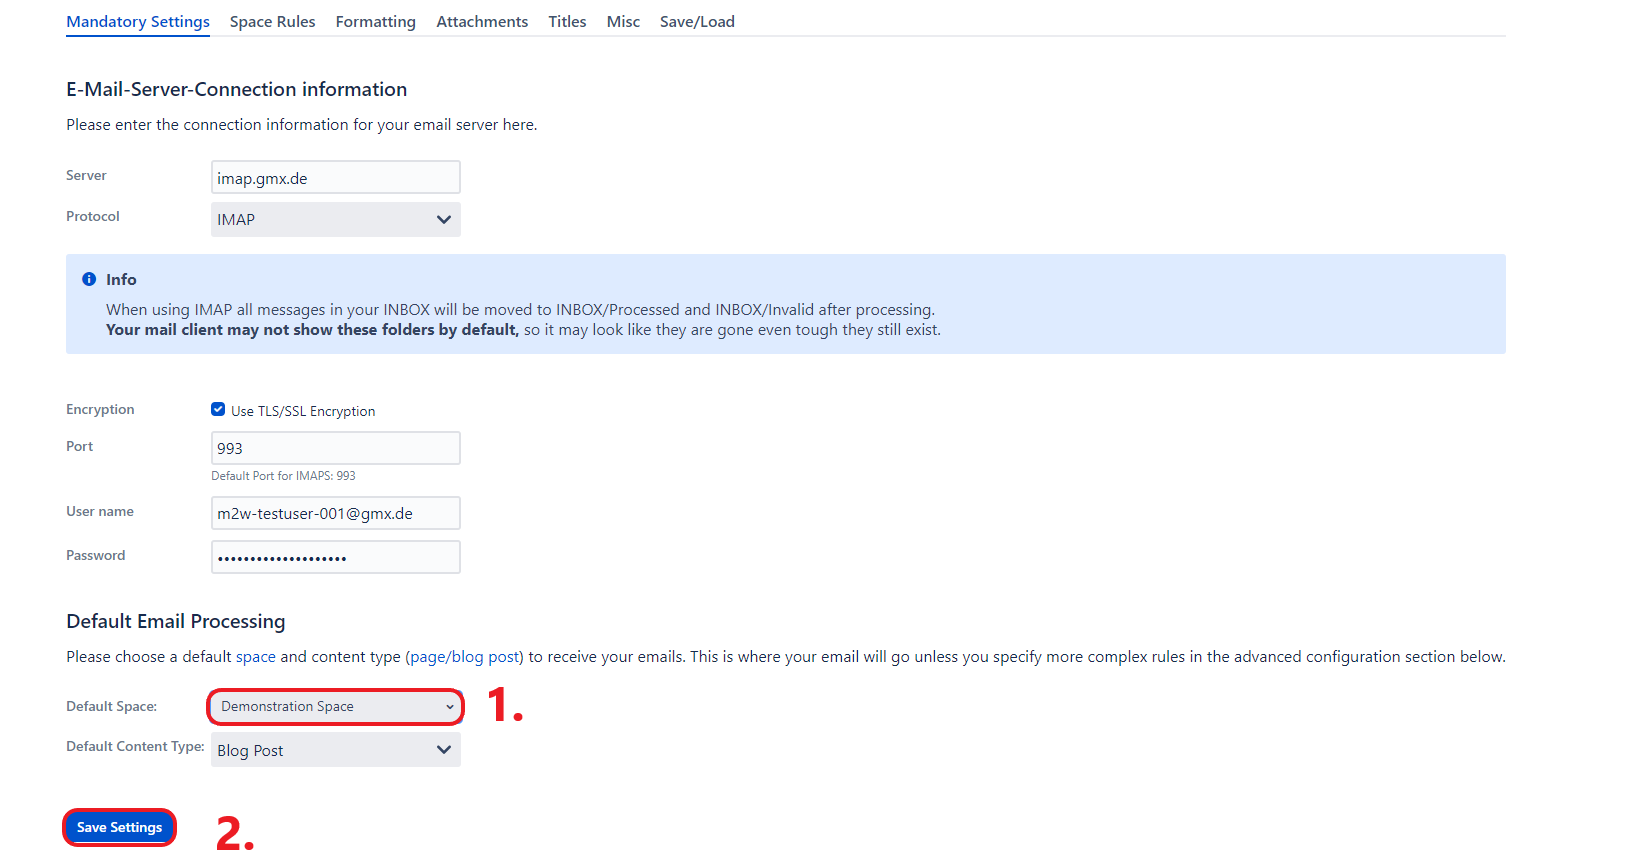
To begin, you need to configure the email server connection information. For this purpose, you must create an email account to which the emails can be sent. We strongly recommend using this account exclusively with mailto.wiki, as unexpected behavior may occur if you try to use the account for other purposes simultaneously.
Once you have created an email account, you can enter the server and account information. An example is provided in the image below.
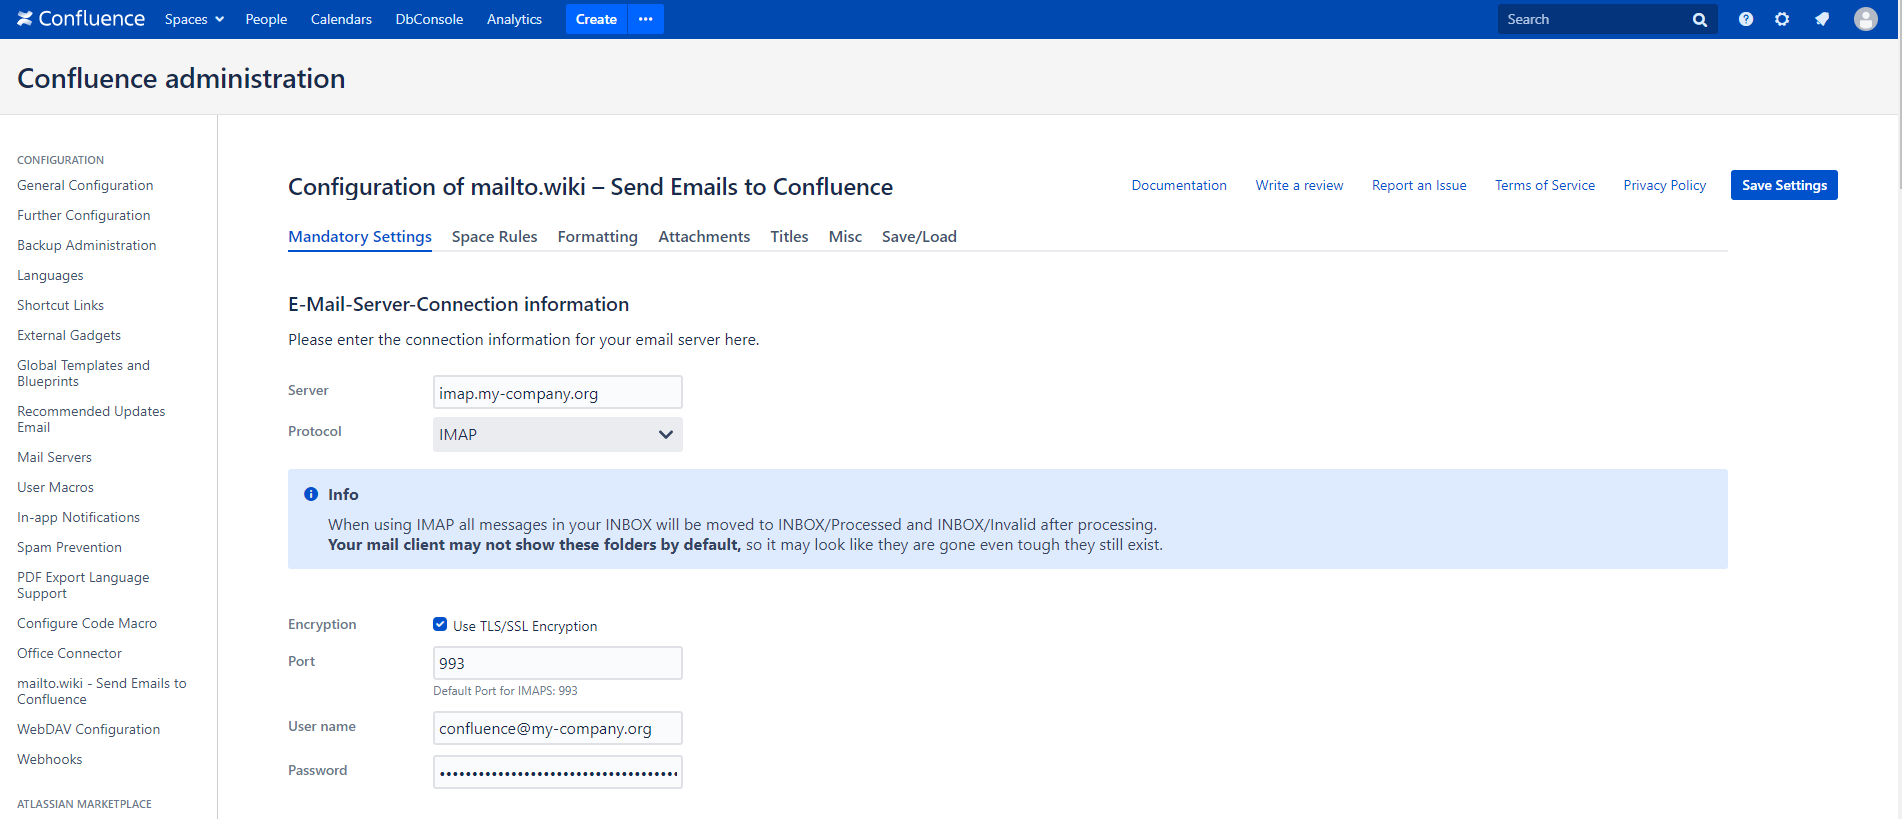
Once you have entered the server information, click on one of the two Save Settings buttons. After a few seconds, a window will appear in the upper part of the settings, indicating whether mailto.wiki was able to establish a successful connection to the email account or not. If there is a failure, a detailed error message will be displayed in this window. If you are unable to resolve the issue on your own, please contact us at support@mailto.wiki. If the connection is successful, you can proceed with the settings.
Once you have successfully registered at least one email address, you can start using Email for Confluence. As mentioned earlier, these emails will be inserted into the default space. Since the default space is automatically set during installation, make sure to change it to a space of your choice.
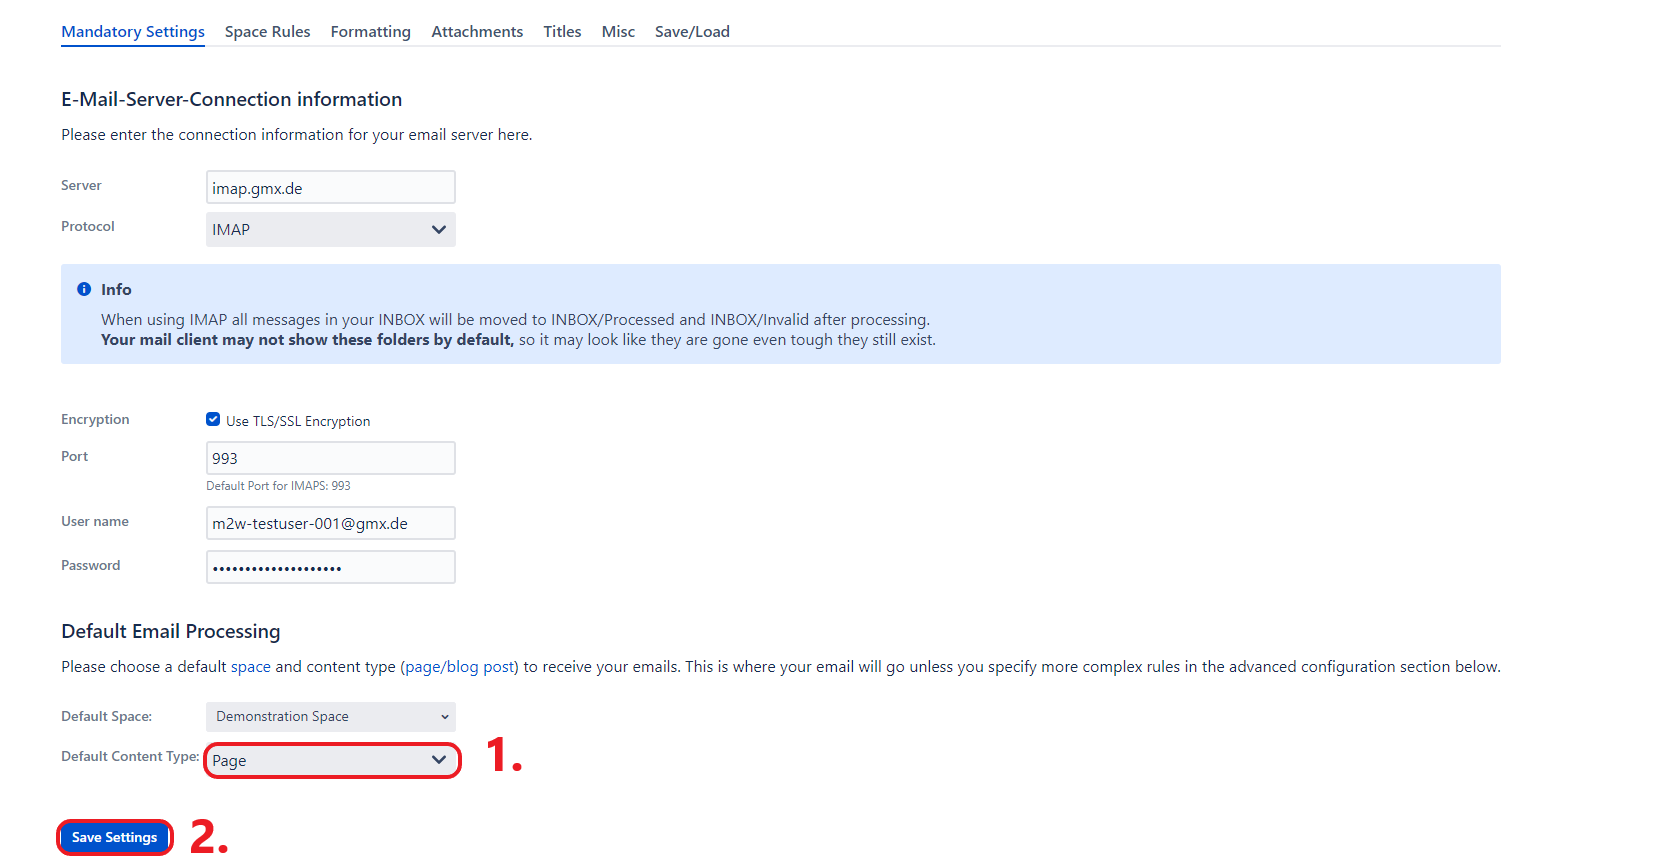
Finally, you need to select a default content type. Confluence offers two types of content: Pages and blog posts. Atlassian suggests that pages are suitable when you want the information to be persistent and evolve over time. On the other hand, if you have a point-in-time update or a one-time communication, a blog post is more appropriate.
Step 3 – Send your first email
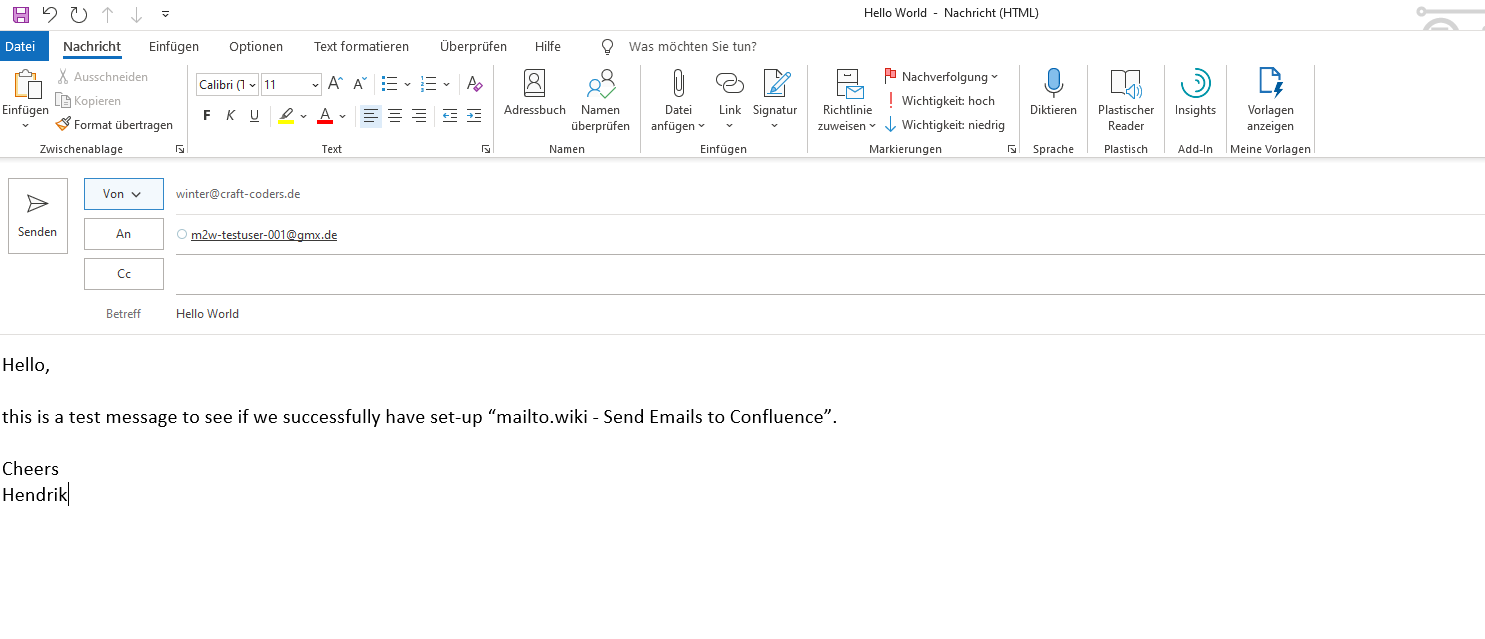
Now you are ready to send your first email to Confluence. Open your email program or log into your webmail provider. Compose a new email and send it to the email account you registered earlier.
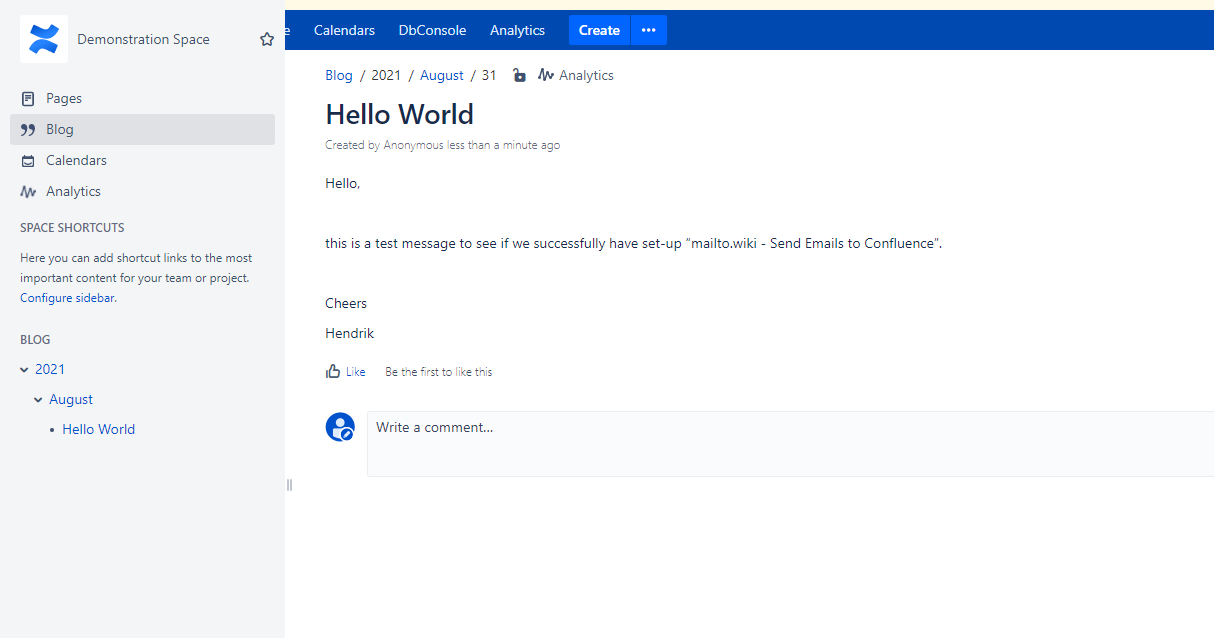
After sending your email, please wait for 5 minutes to allow the system enough time to process your message. Then navigate to the default space you configured earlier. If everything was set up correctly, your email should appear in the default space as either a page or a blog post, depending on your default content type settings.
Conclusion
Congratulations! You are now ready to start using Email for Confluence. Give it a try and if you encounter any errors or if something doesn’t work as expected, feel free to reach out to us through our Help Desk or by emailing us at support@mailto.wiki. If you want more control over where your emails are posted, you can explore the options available with Space Rules.