Power Automate is a service from Microsoft that allows you to fully automate regular work steps by creating automated workflows between applications and services. Microsoft already offers a variety of connectors, but unfortunately Confluence is not yet included. Nevertheless, there are ways you can include Confluence in your workflows with Power Automate. One of them is with our add-on mailto.wiki – Email for Confluence.
Disclaimer: We are the developers of mailto.wiki – Email for Confluence which is part of the solution below.
Mailto.wiki offers you the possibility to send emails to your Confluence instance. Microsoft Power Automate is able to include mail operations in their workflows. The combination of the two allows you to create a well-functioning workaround.
Microsoft already provides you with several workflow templates, but you can also create your own workflows. In this blog post, we will show you how to create a customized workflow that creates pages in Confluence. As an example, we will create a flow that performs a mass import of all pages in a selected notebook from OneNote to Confluence.
Unfortunately, with this import method, some details of the OneNote document may not be displayed correctly in Confluence. For example, freehand drawings are lost when converting the OneNote file to HTML in Power Automate and images are not displayed permanently. Anything written by keyboard is displayed without any problems. If you have a file that contains important or/and only freehand drawings, you should send it directly from OneNote to Confluence.
Set up mailto.wiki
For this example, we assume that you have already installed the mailto.wiki plugin, set up the mandatory configuration, and have at least one valid mailto.wiki email address registered. If you haven’t, take a look at our getting started article.
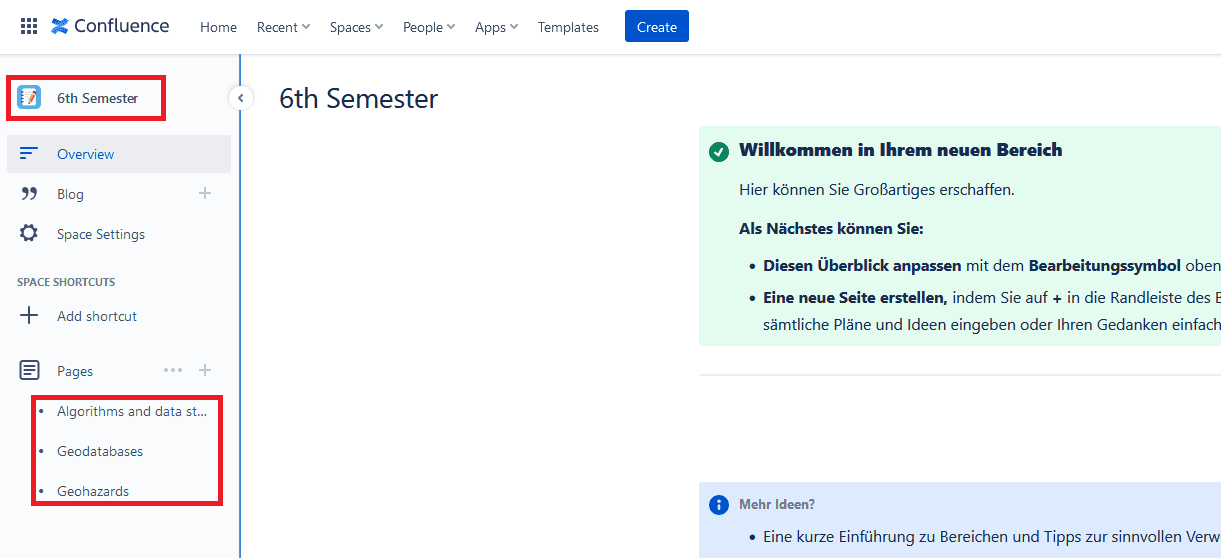
After setting up the mandatory configurations, you need to decide where to save the pages from your OneNote notebook. We will import a notebook named 6th Semester that contains three different sections. Therefore, we create a new space in Confluence named 6th Semester and three pages named Geodatabases, Algorithms and data structures, and Geohazards.
To ensure that incoming emails are automatically sorted into the correct spaces, we create space rules. To create a new space rule, you need to go to the configuration page of the plugin and then to the Space Rules section. How to get to the configuration page is described in the getting started article. You can also read more about space rules in the corresponding documentation.
You can add a new space rule by clicking on Add Rule at the lower right corner. A new window will open to guide you through the creation process.
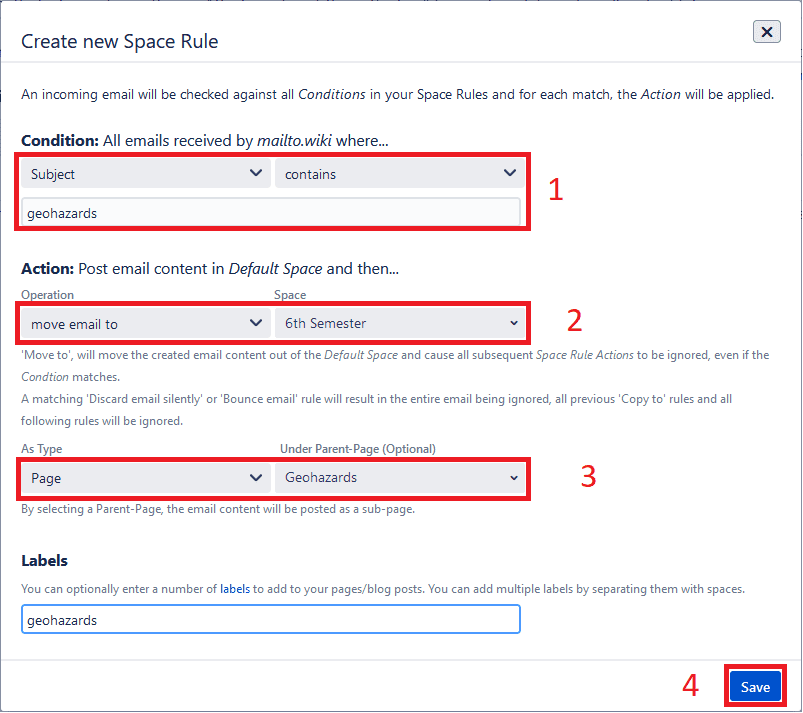
In our example, we create three rules to sort the emails into the three sections. We use Subject contains as a condition and the name of the notebook section as a value. Move the email to the 6th Semester space and select the Type Page and the Parent-Page (Geodatabases, Algorithms and data structures or Geohazards). Below you can see an example for the space rule for the geohazards section:
Repeat this also for the Geodatabases and Algorithms and data structures sections:
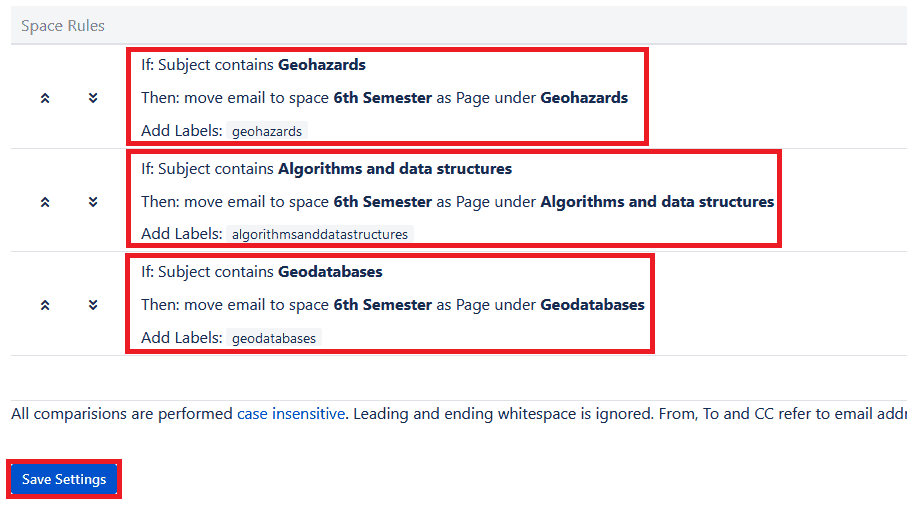
With these three rules, we now have everything set up on the Confluence side. Don’t forget to save your settings!
Set up your workflow
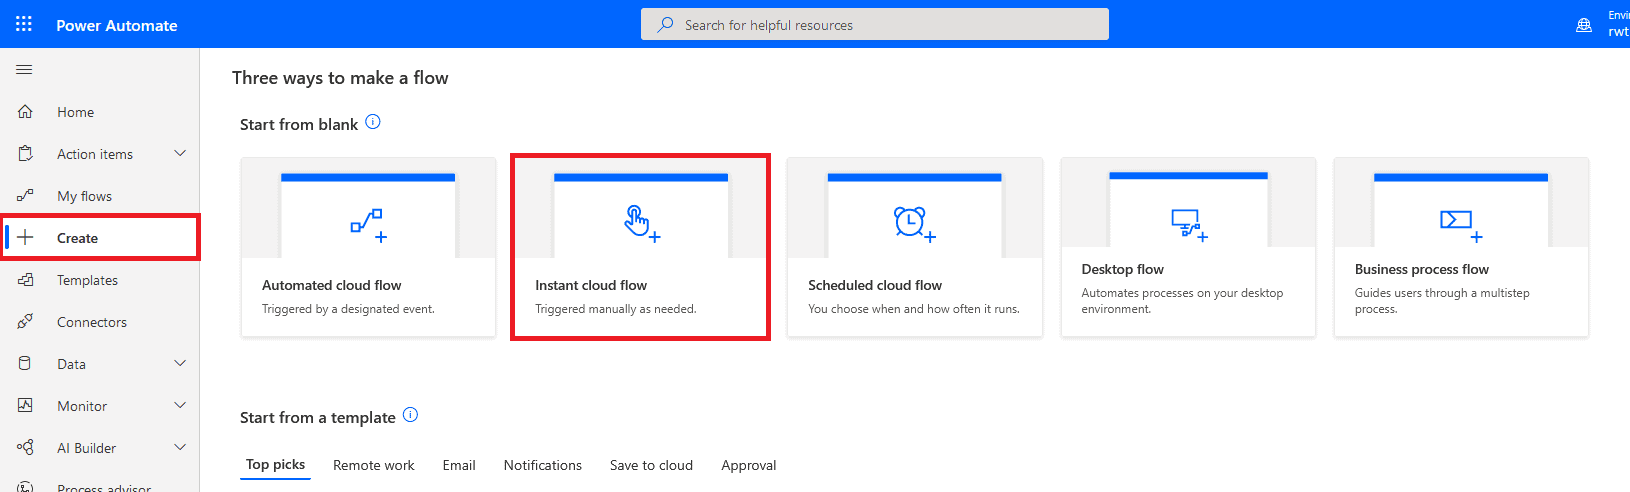
In order to create a new customized flow in Power Automate, you need to click on the rider +Create in the left column (display the column by clicking on the hamburger menu in the upper left corner). We will start from blank and choose an Instant cloud flow, since we want to import our OneNote notebook only once.
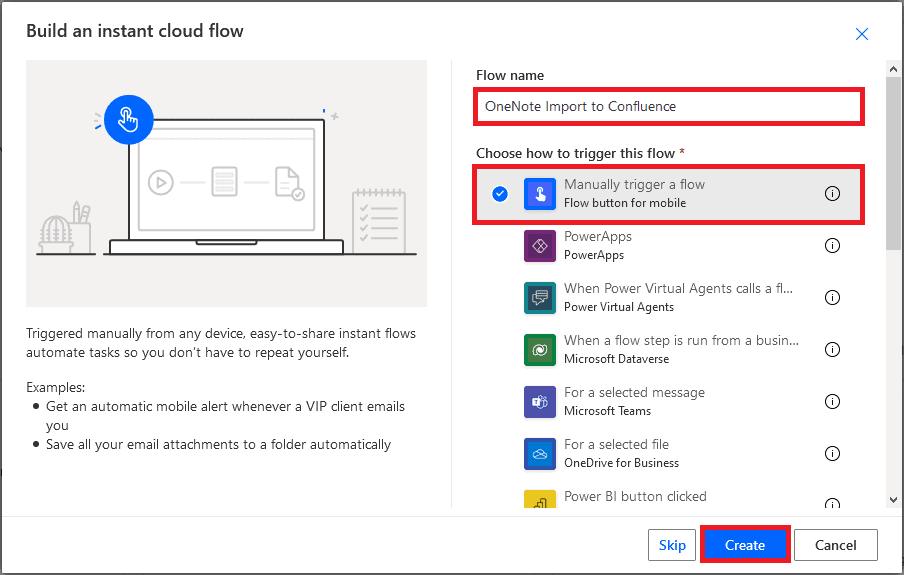
In the next step, we name our flow OneNote Import to Confluence and then choose Manually trigger a flow as the triggering option.
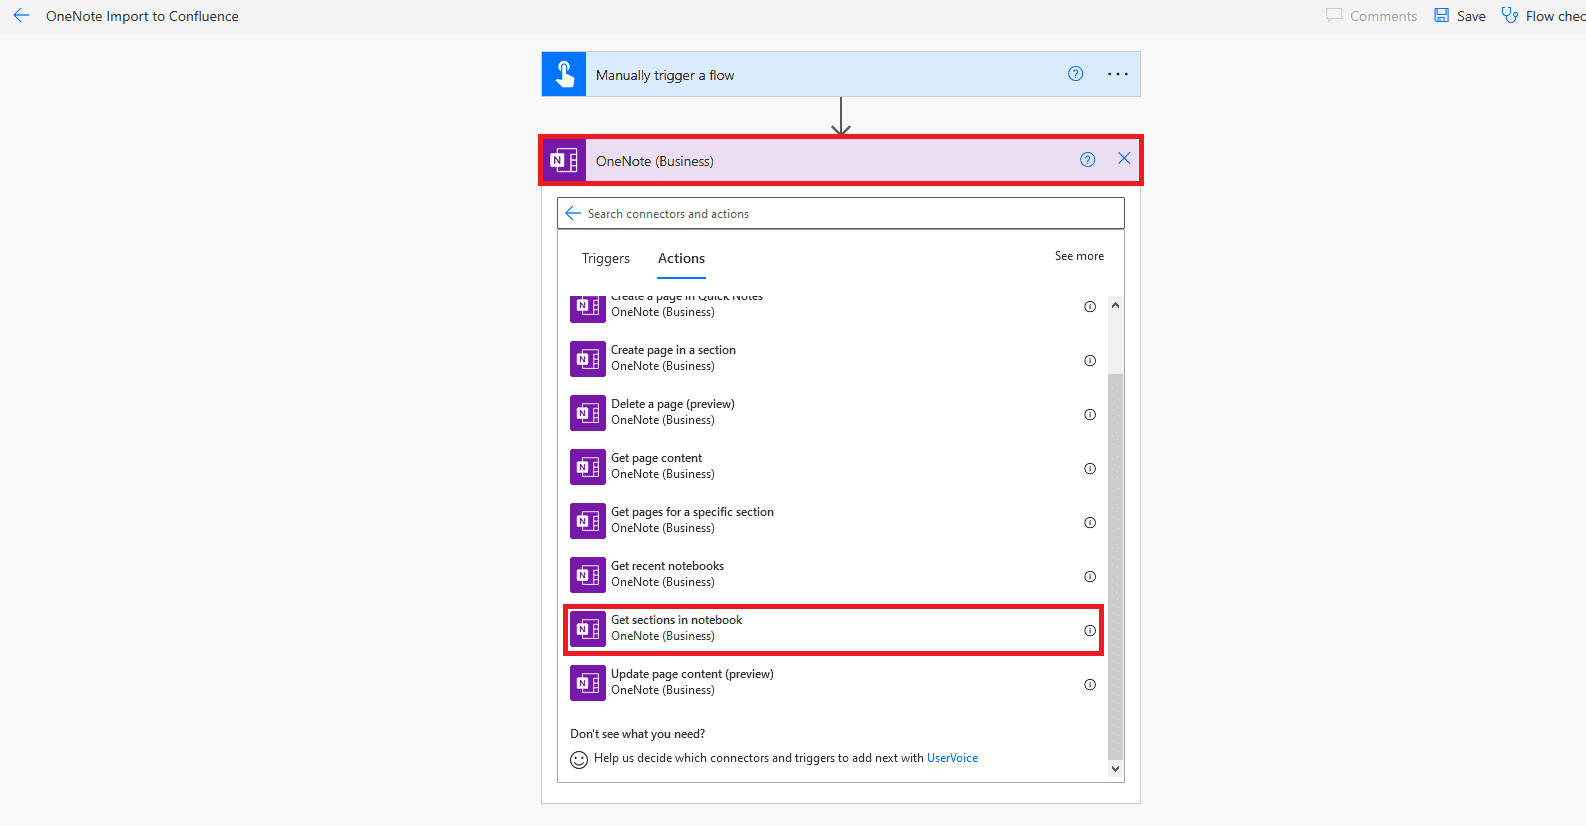
Next step is to set up the operations for our flow. Click on + New step and search for OneNote in the Search connectors and actions search bar; choose the Action Get sections in notebook:
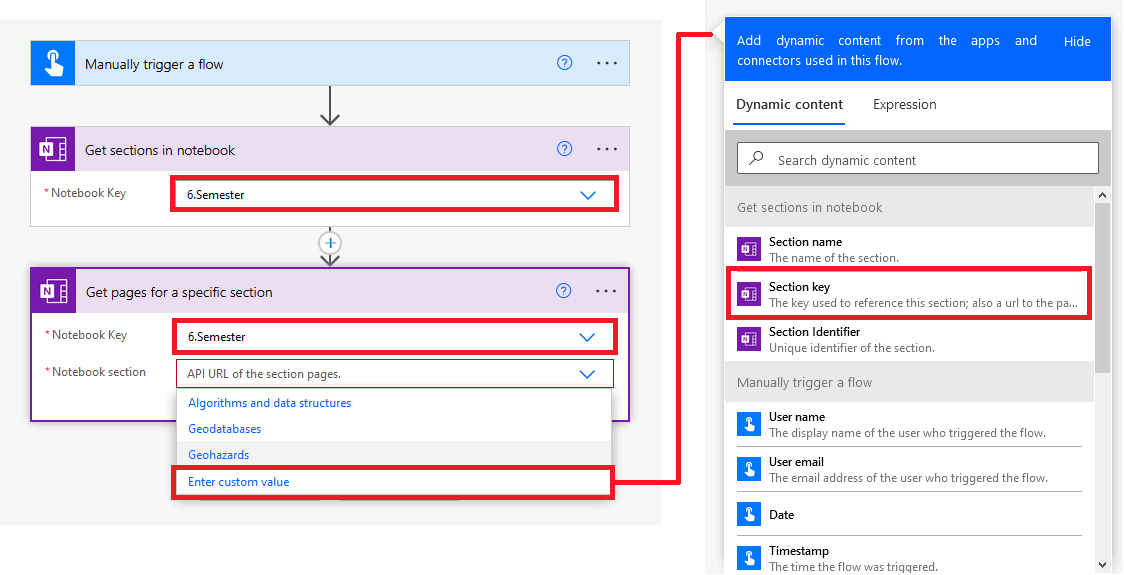
Pick the notebook you want to import and then click + New step. Select the OneNote connector again and select Get pages for a specific section as the action. Pick the notebook that you want to import as Notebook Key and select Enter custom value in the Notebook section. Select Section key.
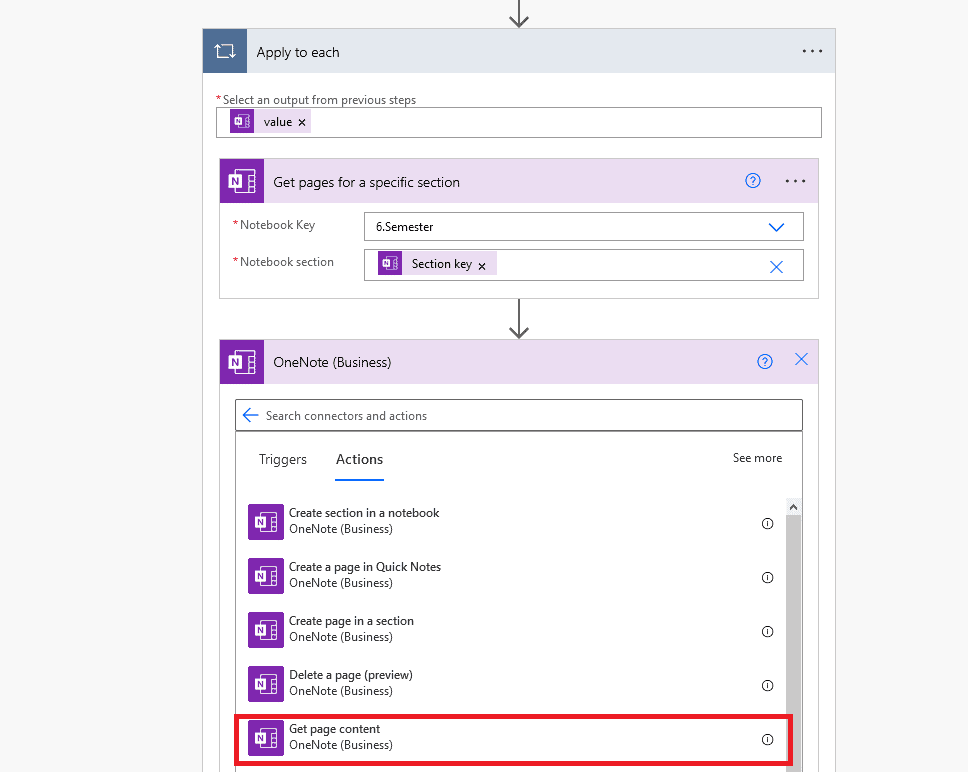
Next click on Add an action inside your Apply to each window. Search for the OneNote connector again and select Get page content.
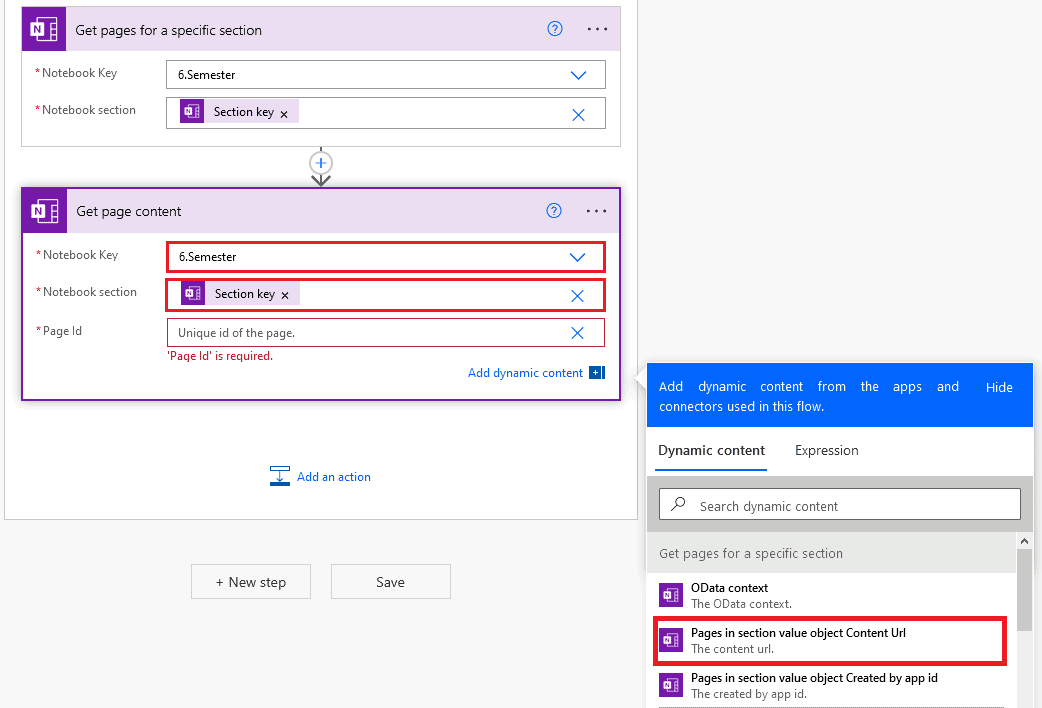
For the Notebook Key, again select the notebook you want to import. For Notebook section, select Section key from our Get sections in notebook action. For the Page id, select Enter custom value and then Pages in section value object Content Url.
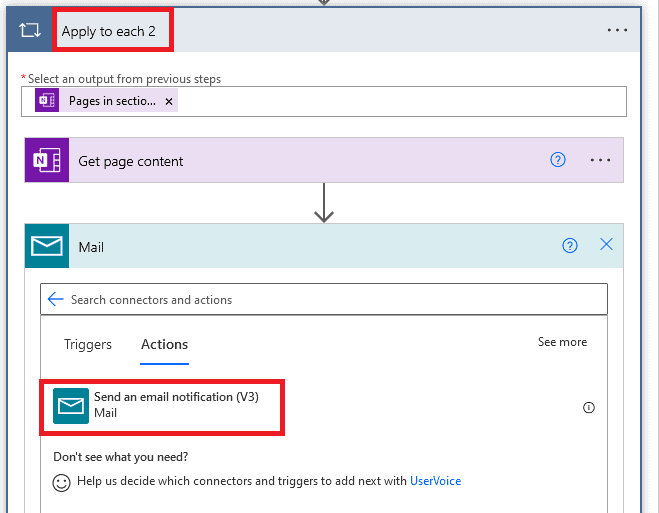
With these operations we get the content of each page in the selected OneNote notebook. The next step is to send these pages to our @mailto.wiki address and thus to Confluence. To do this, click in the Add an action button INSIDE the Apply to each 2 section. Search for Mail in the Search connectors and actions bar and select the action Send an email notification (V3).
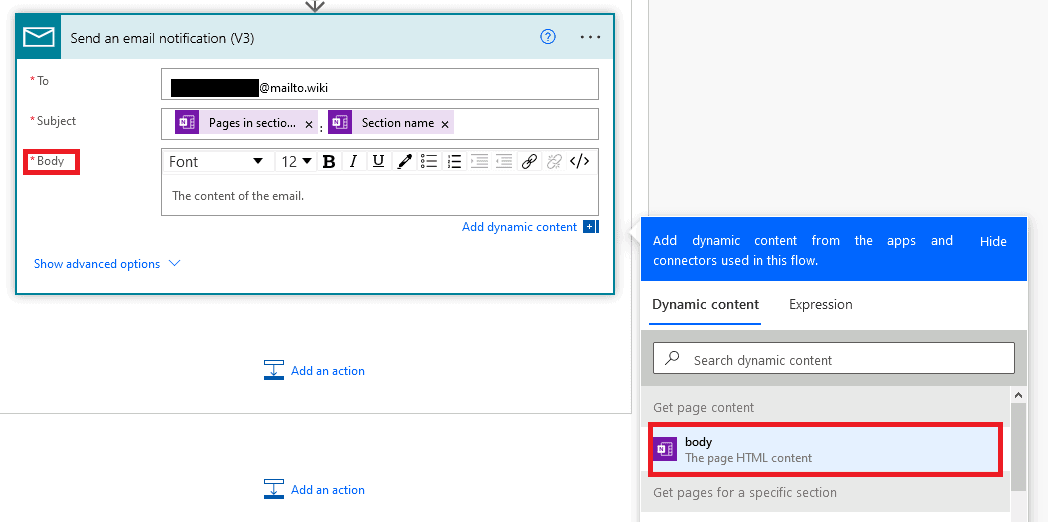
Enter your @mailto.wiki address in the To field. We want to include the title of the page and also the name of the section the page is in as the subject. The section name is important, because it is our sorting criteria inside Confluence. Therefore, we pick Pages in section value object Page title from the Get pages for specific section action and then Section name from the Get sections in notebook action.

Select body (The page HTML content) for the Body field.
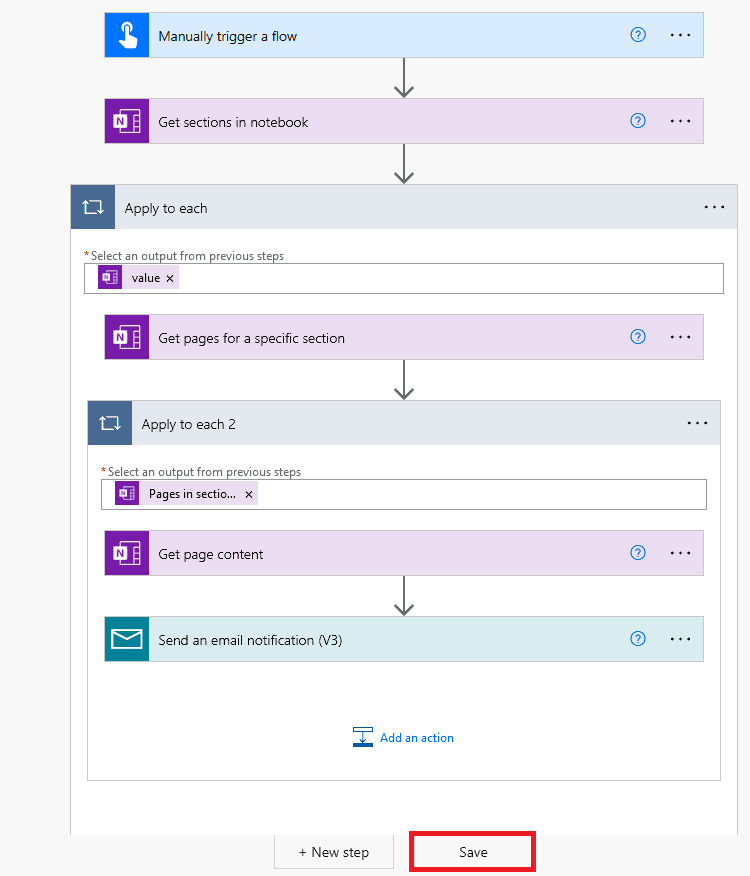
Our workflow is now completed. Don’t forget to save it! The entire flow looks like this:
You can now run the generated flow by going to My flows in the left column and selecting the OneNote Import to Confluence flow.
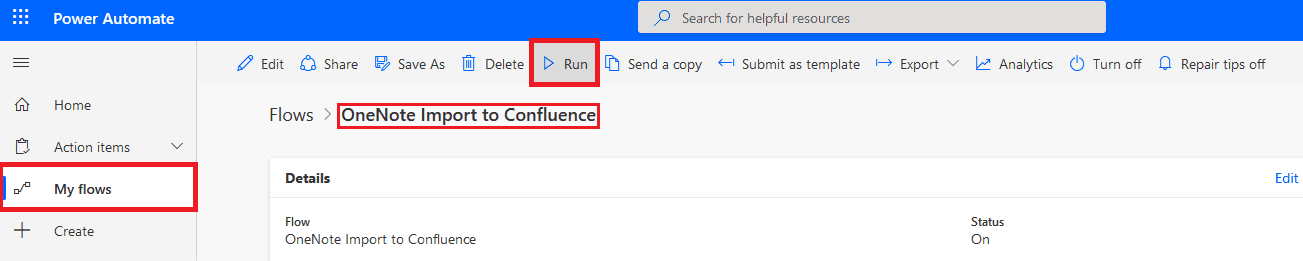
Depending on the size of the notebook, it may take a while before the flow is executed.
Outcome
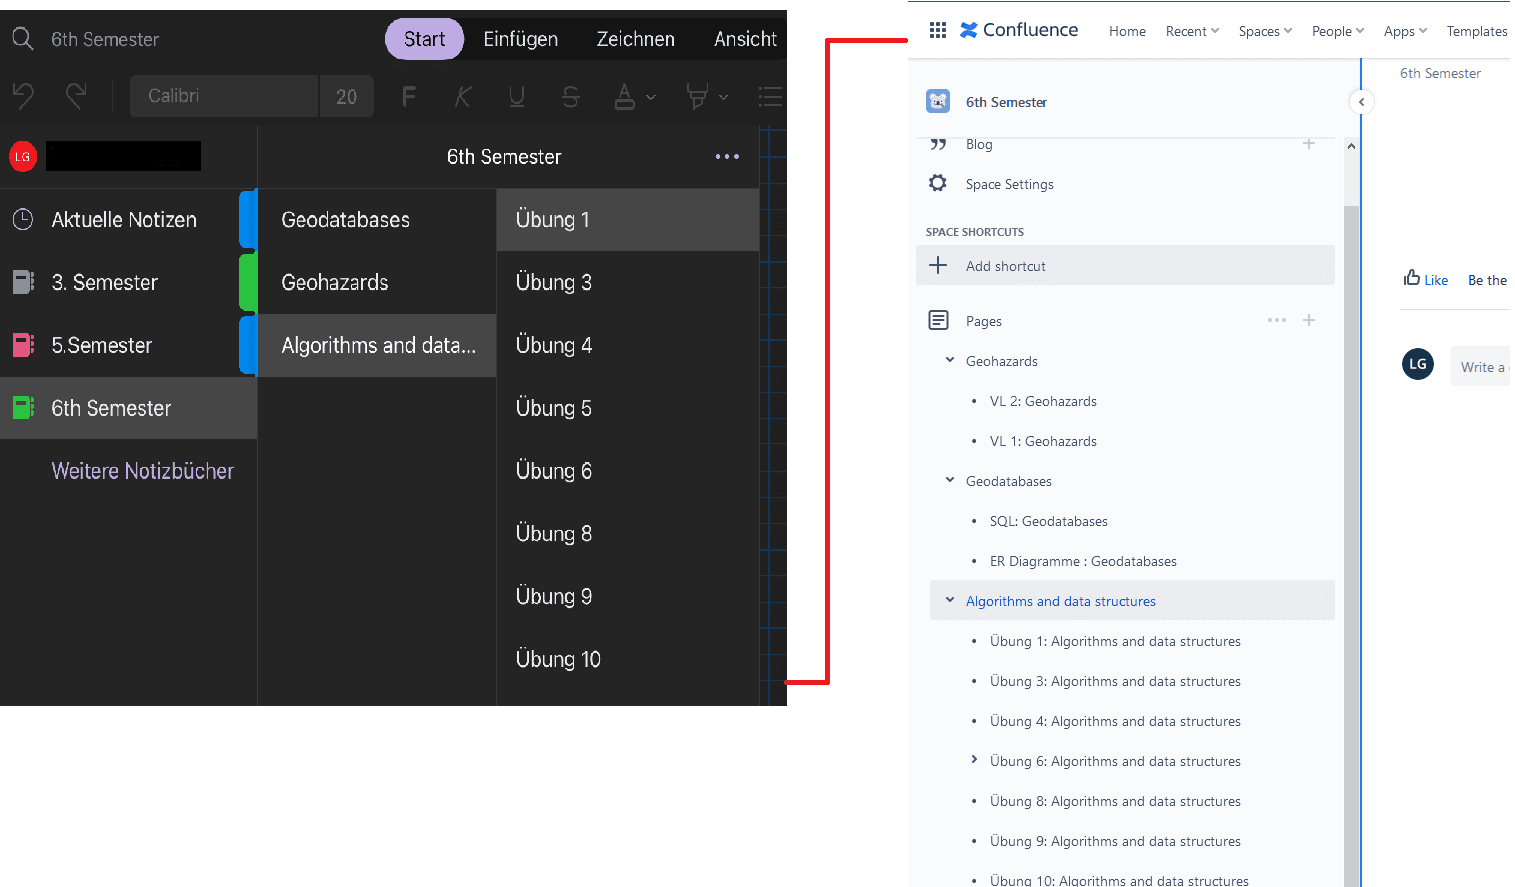
In the following picture you can see how the notebook is sorted in OneNote and how it is sorted in Confluence after the import. You may need to arrange the pages within a section in Confluence itself, since it is not sent to Confluence chronologically.
Conclusion
This is an example of how the combination of Microsoft Power Automate and mailto.wiki helps you to simplify workflows around Confluence. You now have the ability to create your own workflows or search for existing workflows that meet your needs. For example, to further automate the transfer of documents between OneNote and Confluence in the future, you can also create a flow that automatically sends new documents in specific notebooks or sections to Confluence. We recommend that you take an in-depth look at the documentation for Microsoft Power Automate and the documentation for mailto.wiki so that you can create workflows that are tailored to your needs.
If you have any questions regarding our add-on or this blog don’t hesitate to contact us by email at support@mailto.wiki or via the Service Desk. We always like to hear about suggestions for improvements.